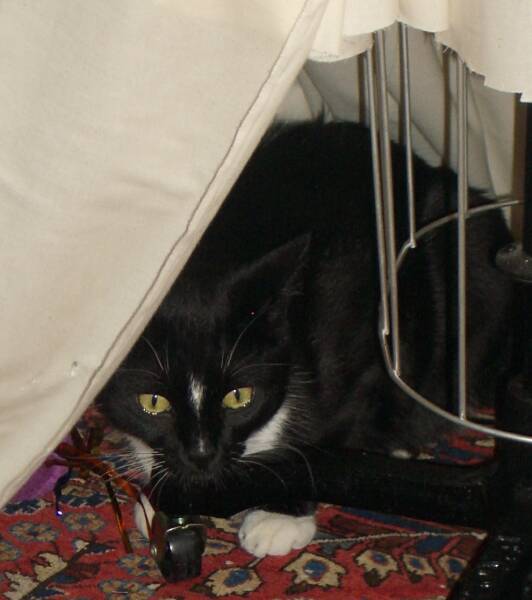
Recently having finished the Harry Potter series, as far as is possible at the current time, (book six), I've been thinking of making a Severus Snape costume, because he happens to be my favorite character in the Harry Potter books, and because I think I have an amusing physical resemblance to Alan Rickman, who plays the Professor in the movies... ;) I discovered this rather funny similarity as I was loading my Green Gown portraits; I seem to have had a sour expression a few times during the shoot... I've pulled out two of these examples and have them here on the page, to the right...
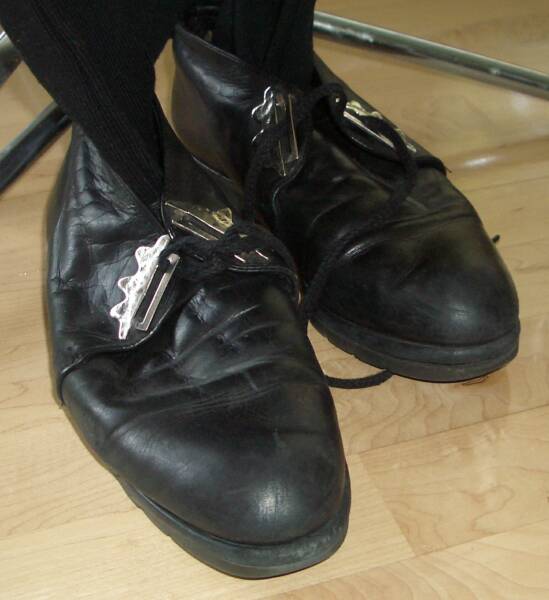
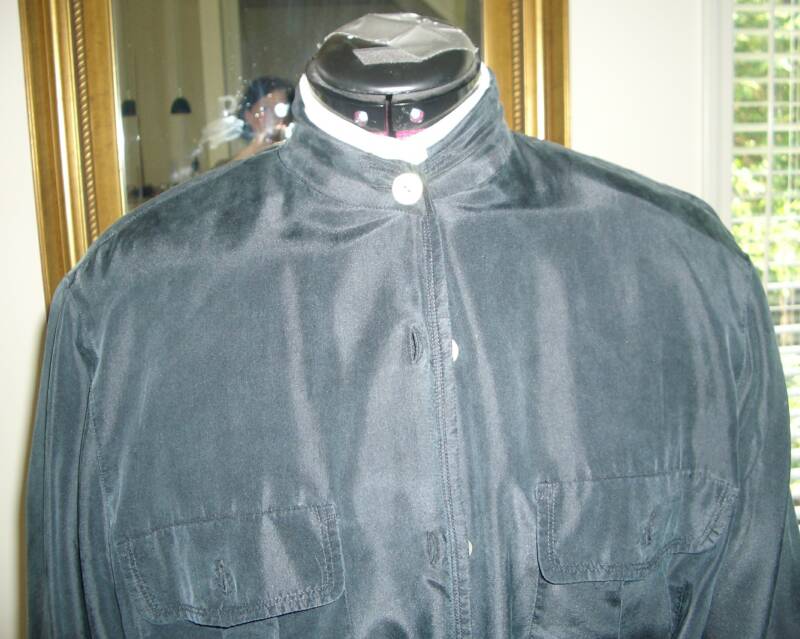
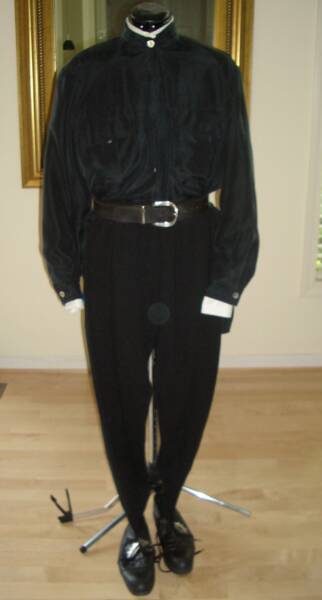
I already own a few things I'll be able to use in this costume. I put up the shirts, the slacks, the boots and the belt on the dress form, and here I can show you where I'll start.
I want to change the buttons on the black shirt to black.
Here are the photos of what I already have...
This page was last updated: March 10, 2013
This simplifies the task at hand, and leaves just the jacket and the cape for me to sew... ;D
I may also make shafts for the boots...
Edit: I won't need the belt, or boot shafts... I saw this after more costume study. :D
June 21, 2006:
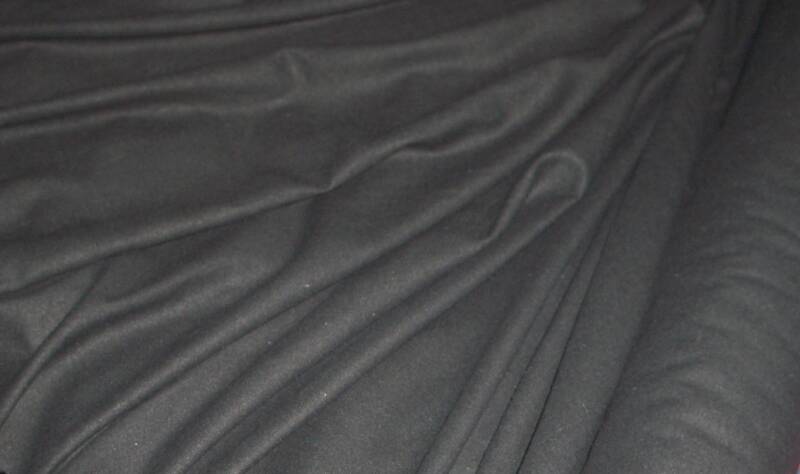
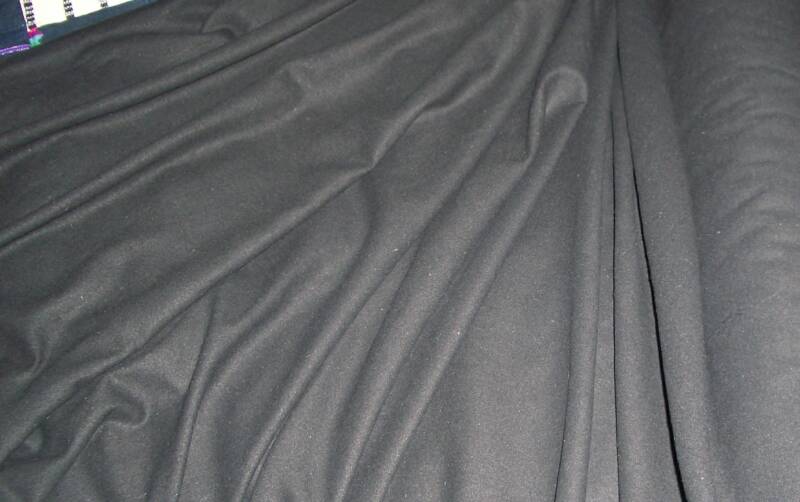
I researched today. I'm trying to figure out if the pleats in Severus Snape's cape are Cartridge pleats or Knife pleats...
I've settled on box pleats. :D
I think they are box pleats...
There are very few photos of Severus Snape's back...
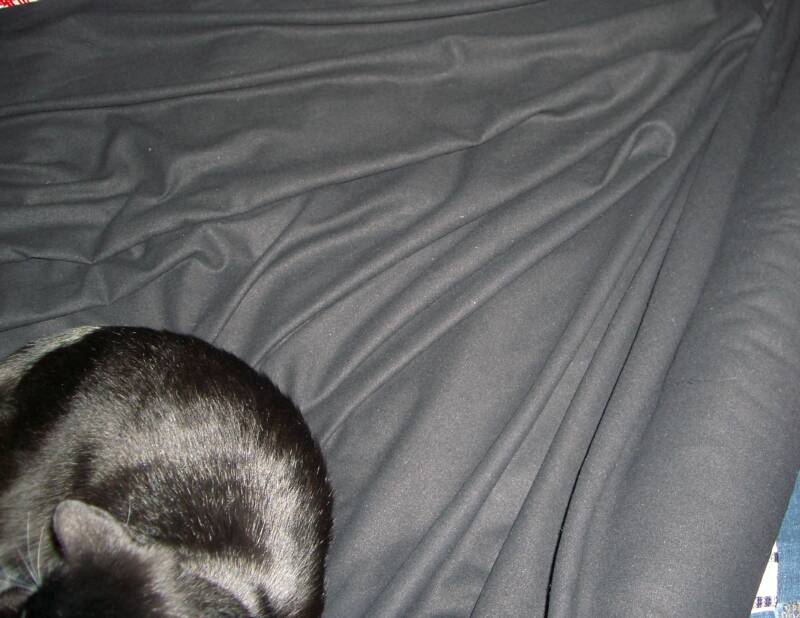
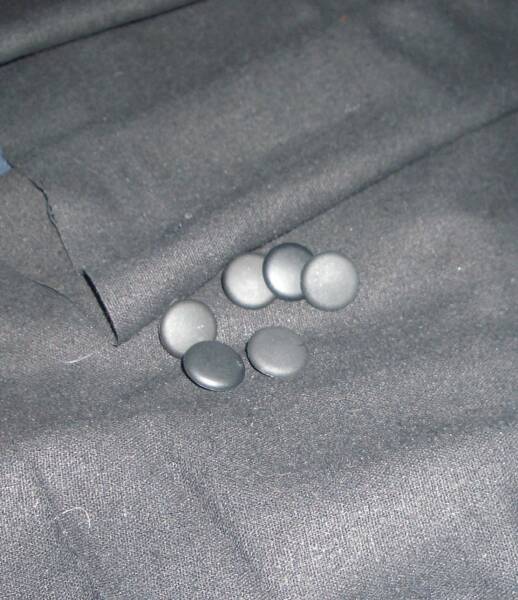
I have the fabric I'll be using to make the jacket and the robes... It is black silk noil from silk connection. I can't believe how excited I am about this project.
I also found some buttons at JoAnns, however, not enough yet, so I will continue to gather.
I have a priest's cassock pattern on the way, and will begin drafting the robes Very Soon, simply because I just can't wait.
Here are a few photos of the fabrc, and the buttons. Seuss watched me pull the fabric out, and could not resist laying on it. ;D
I am dreaming of the drape of these robes...
July 5, 2006:
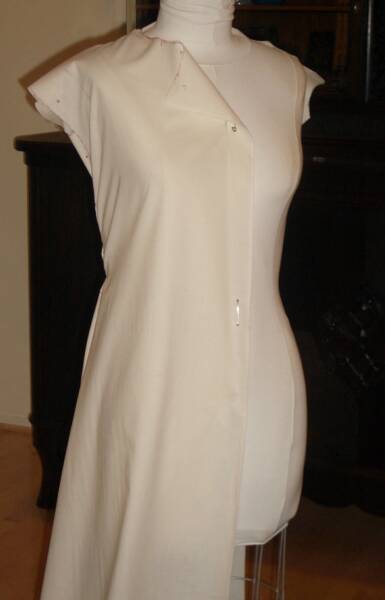
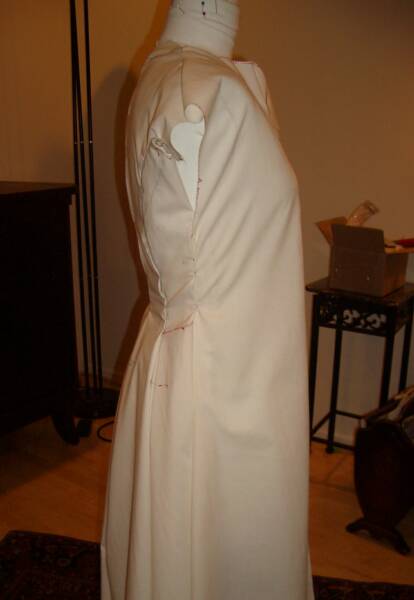
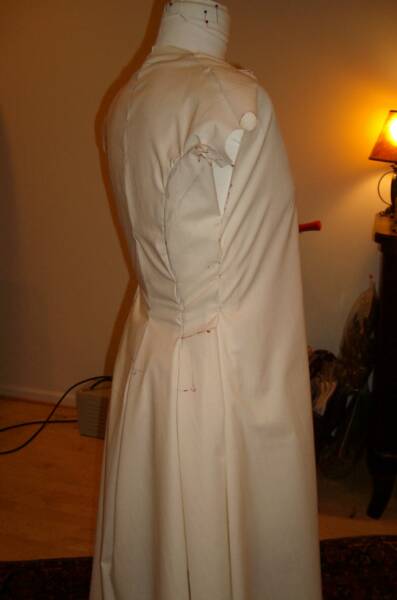
I started on the muslin of the jacket today, starting with a cassock pattern, and altering it like crazy. It is looking rough at this point. This is the first time I've used something like a princess seam in the back of a piece. The muslin pieces are now pinned together, and they have more wrinkles than they will when I finish, but still, it is progress. I hope to get farther on that in the morning. Here are a few photos.
July 6, 2006:
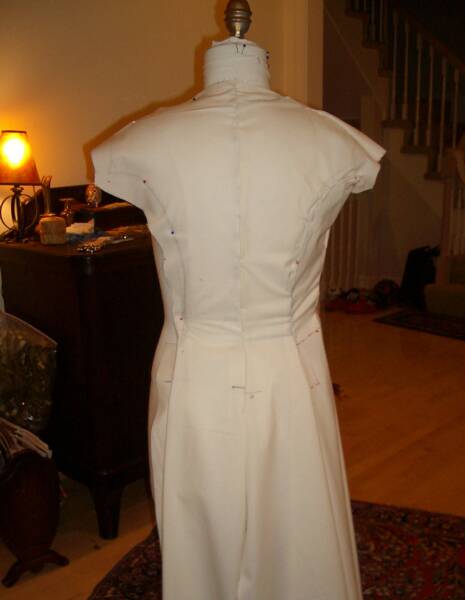
Today I've gotten a little farther on the jacket muslin. Still to do: Sleeves and collar. Here are photos as it's looking now. Still, only pinned together, and rather lumpy.
July 7, 2006:
Today I have all the panels of the jacket basted together, and I've managed to smooth quite a bit of the lumps out of the back side seams. There are still some folds around the area where I put the sleeves in that I want to attempt to smooth out, but otherwise, I'm very happy with the muslin so far.
Perhaps I just need to play with the placement of the sleeves to solve that little issue.
Next, I'll start draping the muslin for the academic robe. I think I will enjoy that part.
Here are some photos of the muslin of the jacket.
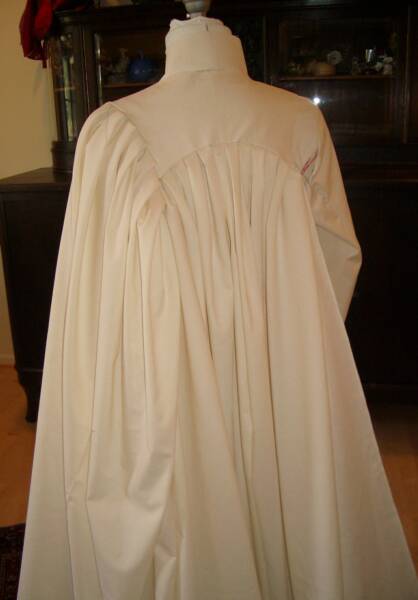
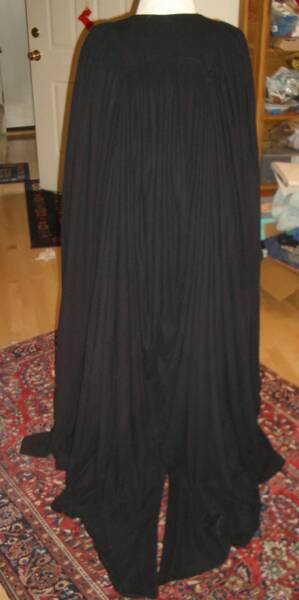
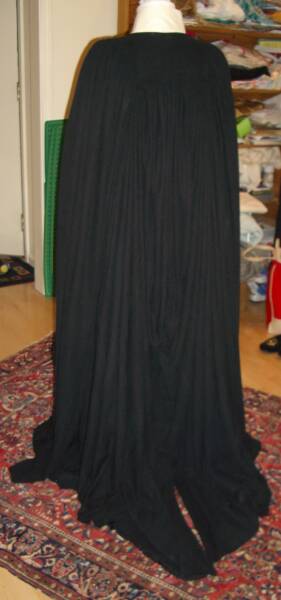
I continued today, and started the muslin for the robe. It is just as much fun as I thought it would be. I am using box pleats. :D
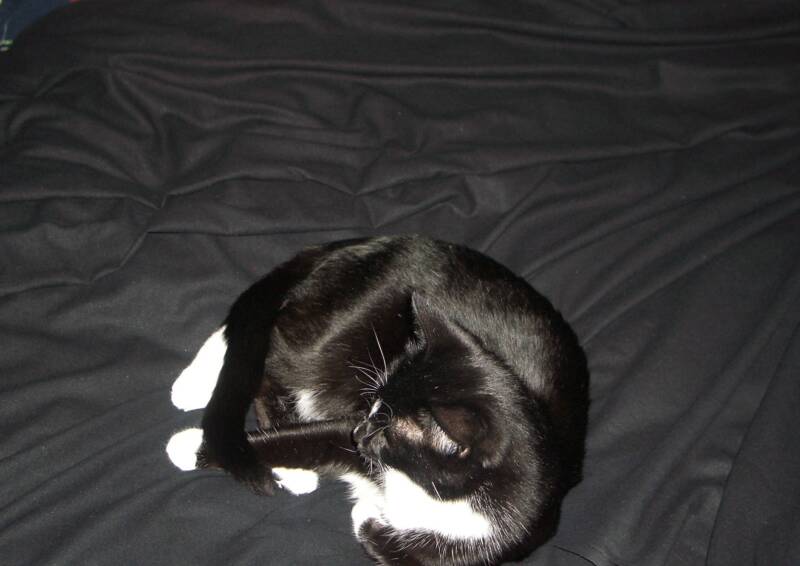
Here follow the first photos. On the long shots in the back, you can see Jojo sleeping in a ball up on top of my hutch, to the right. :D He is such a funny cat, loving the high places.
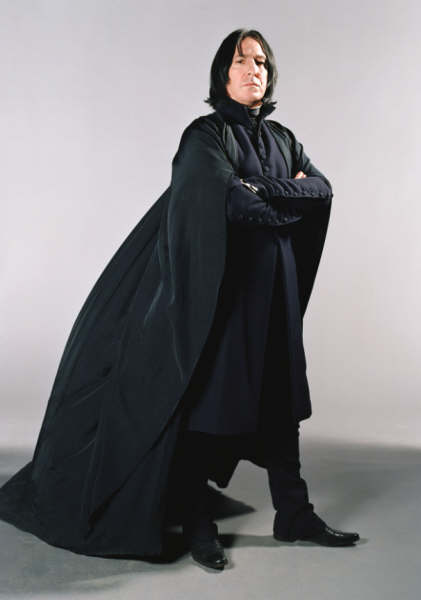
This is a self-drafted pattern. I looked for patterns of academic robes, but was unable to find anything I thought was similar to the ones Severus Snape is wearing in the movies.
So, I started with the shape in back, and created the yoke. Then, I took a panel, about 70 inches long, and 45 inches wide, and curved the section at top to fit into the curve of the back of the yoke. I put in 12 box pleats. On the side panel, there are nine box pleats, stopping just about where I think they stop in the costume move.
No photos yet of the front panel, it is in progress. But it is a half panel. I tried it on last night, and it operates like a dream. I will continue working on this today, and add photos later.
July 8, 2006:
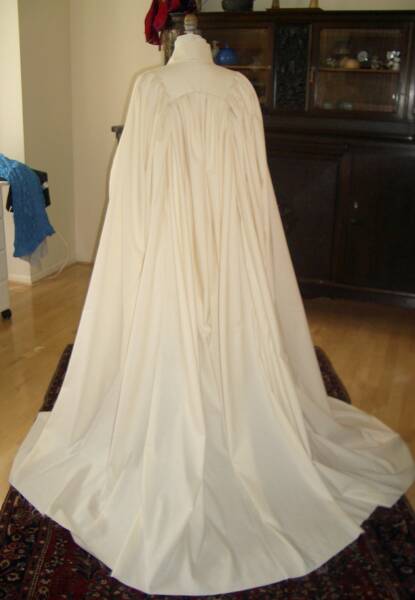
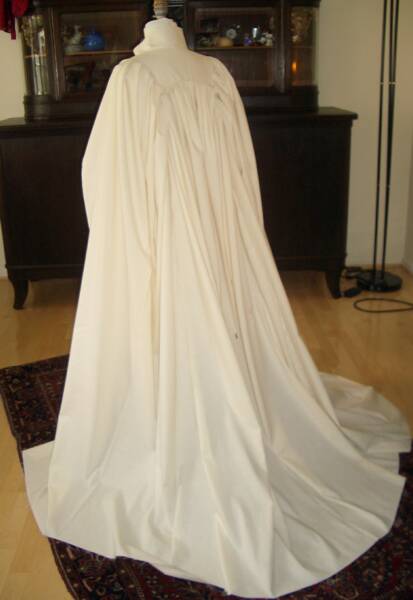
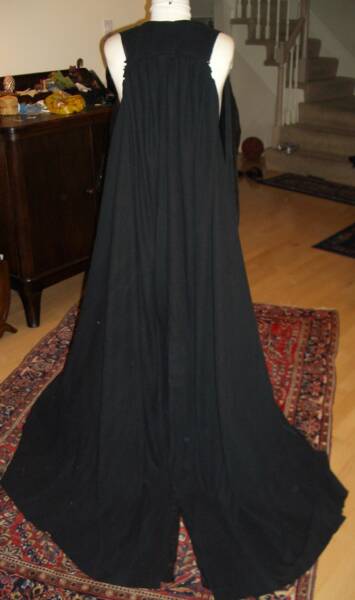
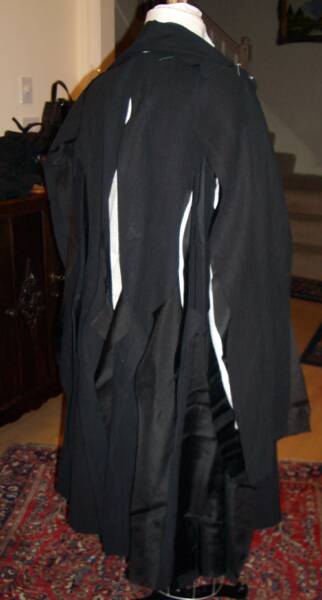
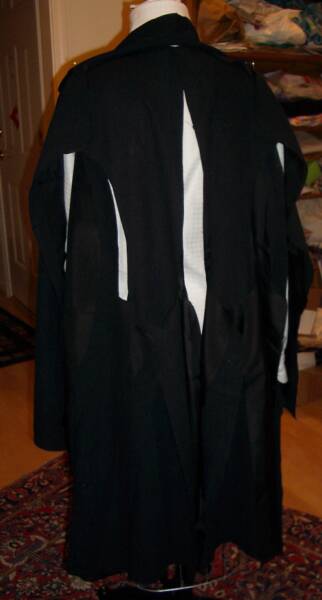
I have the first muslin complete for Severus Snape's academic robes. Pictures follow.
I cannot wait to make this in the black fabric. Right now, though, I'm waiting for my lining material to come.
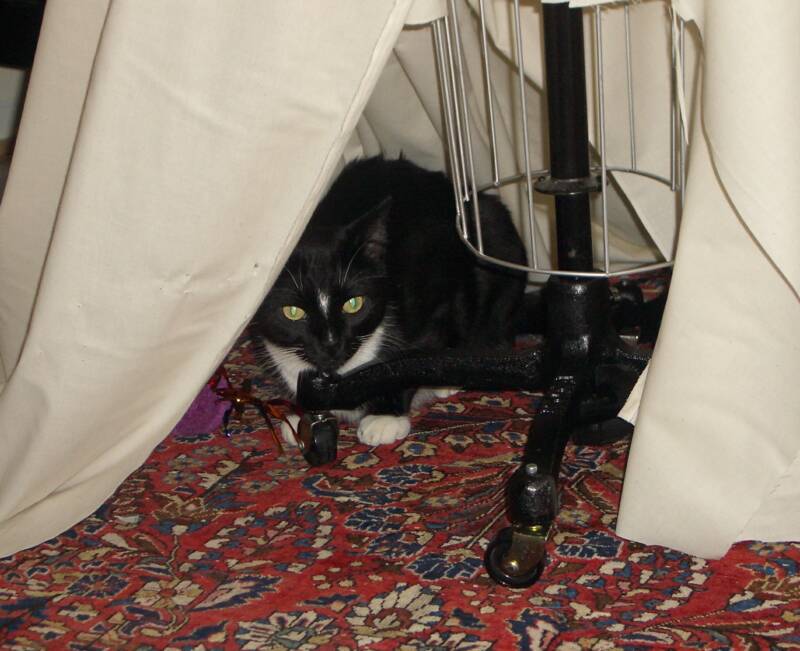
Seuss is loving hiding under the robes...
July 10, 2006:
Research:
Sometimes waiting for things can be a very good thing. I am waiting for my fabric, and at the same time, continuing to research. I've been going through the archives at the Madame Malkin's HP Yahoo Costume Group, and have picked up two very useful bits of information.
The first thing is on the jacket. It seems, at least in the front of the jacket, that there is a waist seam. I then went and hunted for a photo that would show this, because most of the ones I'd seen before did not. I'll have to dig to find the screen cap, but I did see it on one of them. (Didn't save it... yet) As I like the way my jacket fits, I may not change this. (But I probably will...) It is still good to know. :D
The second thing is the billowing of the drape of the academic robes, due to the fact that I have used rectangular panels to construct it. I'm going to see if gores in between these two panels will spread that out a bit, for better flow. I know this is likely not how it was done on the movie costume, but I may just go my own way if it works out. There is a split in the back bottom of the robe that mine will not have. Right now I'm testing the gores.
And the third thing is the issue of what kind of pleats to make in the academic robes...
In the photos below, I have added a gore between the center back panel and the panel on the back left. There is no gore between the center back panel and the panel on the right. To the left, you can see how much more even it falls. To the right, you see that bunching up effect midway down the robes, beneath the right shoulder blade. So, I will be adding these gores to my academic robes pattern. :D
After I put in the one gore, I put the robes on and walked in it with Lisa watching me, and observing how it moves. She said the left side moved much more like the one in the movie than the right side, and that it flew out. whereas the right side stayed kind of bunched up, and didn't look as "swoopy".
Right now, I'm very glad I don't have all my fabric yet... :D
July 22, 2006:
All of the fabric has arrived, and I put it through a pre-wash today.
July 25, 2006:
I have ironed the fabric.
July 26, 2006:
After watching the section in the Sourcerer's Stone, and seeing the robes from the back in motion, with the slit at the center bottom, and the way the sleeves billow out,
I've determined to make changes in my pattern for the robe; in order to create the slit in the back, and add fullness, and get those wing sleeves, I will use two back panels, joined up in the back center of the yoke, tapering off at angles out a the sides, and sewn together to about knee height. I am going to use those two side panels, as sleeves. I am working out the sleeve pattern currently.
With these changes, I am set to get started.
Oh, and I have decided to use fabric covered buttons, using half ball button kits, and the black silk noil to cover the buttons. They are ordered and on the way.
July 27, 2006:
I started cutting and constructing the body of the academic robes today. So far, I have the two front panels and the two back panels sewn into the yoke, and hanging to relax the bias,
I am continuing work on the sleeve draft. They will be set in raglan style, and they will be wing-like. That is what they most remind me of.
Here are two photos of the beginning construction of the body of the robes, as the panels hang to relax the bias.
I have to undo the back panel one more time, and adjust where some of the pleats were sewn in a little wacky. But, anyways... ;D My camera doesn't want to focus on the black...
Academic Robes Sleeve Muslin...
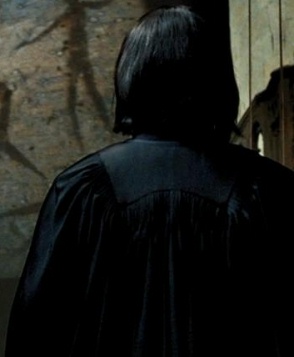
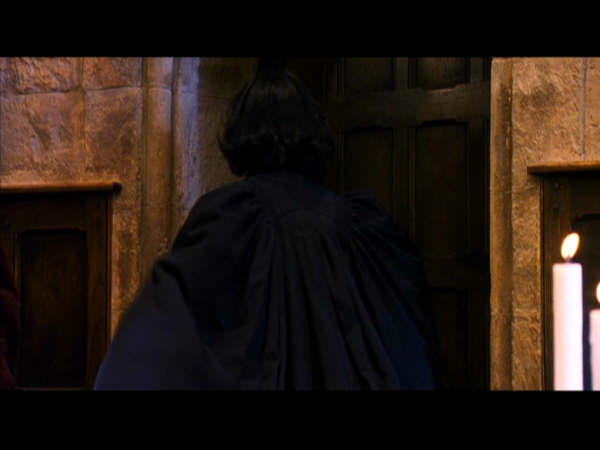
Based upon this promotion photo of the actual costume...
I draped my muslin of the sleeve in greater detail. These photos show the results of my draping, and this is how I will go. I am ready to cut out the sleeves. Here are the sleeve muslin photos:
So, I was happy with the muslin, and I cut out the sleeves today.
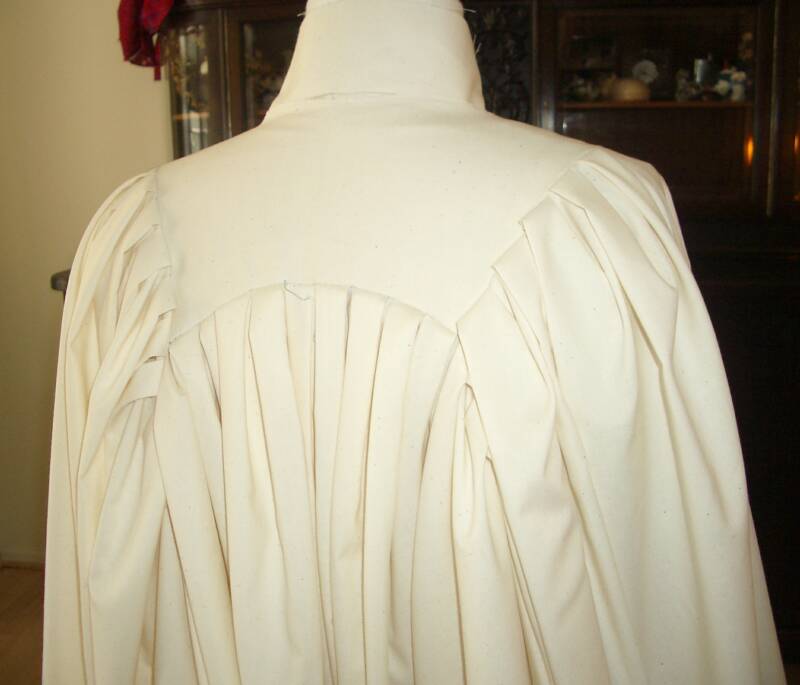
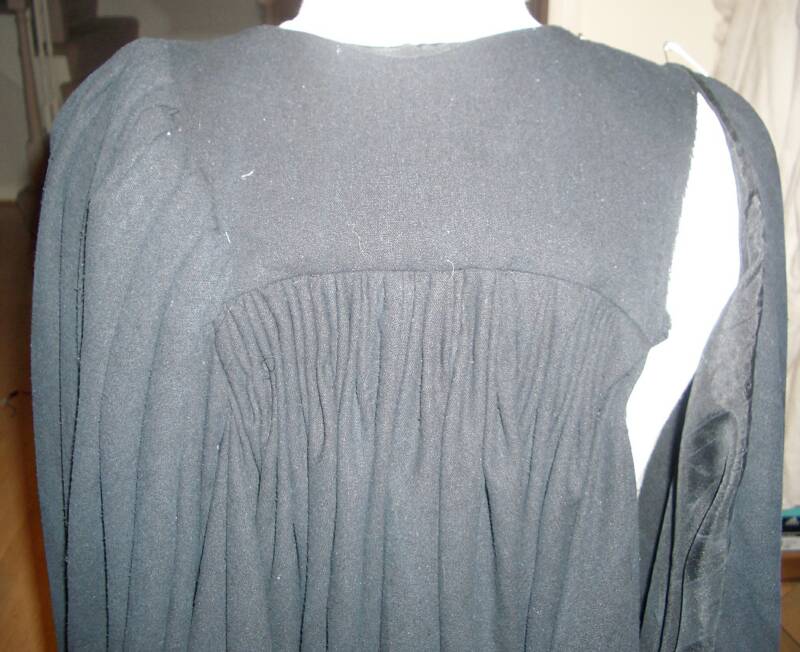
Pleat work:
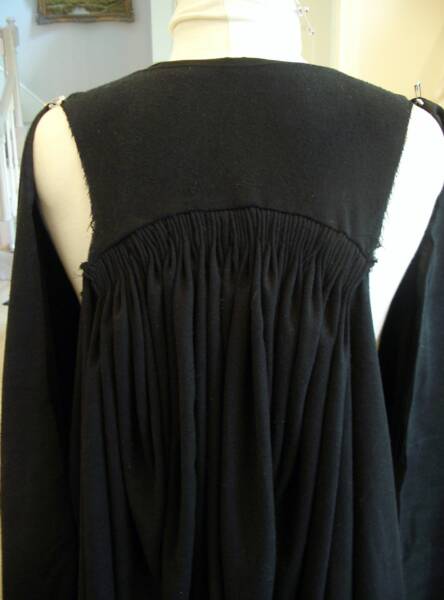
Then I took the back panels off the yoke again, in order to straighten out that wonky pleat. And then, when it was out, I tried something with the pleats... I gathered them in one more time, and sewed the panels back in the yoke. Then, I took several strands of thread, and sewed a line in below, to hold the gathers tight about one and a half inches or so. I think it simulates cartridge pleating very well. I know... I said I wasn't doing cartridge pleating. But again, I saw some other photo stills of movie shots, and at least in these shots it is obviously cartridge pleating.
Here is a photo I will refer to that shows them:
Mine are not really cartridge pleats... I don't know what kind of pleats they are. But, they look kind of like cartridge pleats... So I won't argue with them. So far, I have only completed the back panels. I've started on the left sleeve, and will continue the process tomorrow. The right sleeve is not pinned on yet, but just hanging off the dress form. Here are the photos of the pleating in the back:
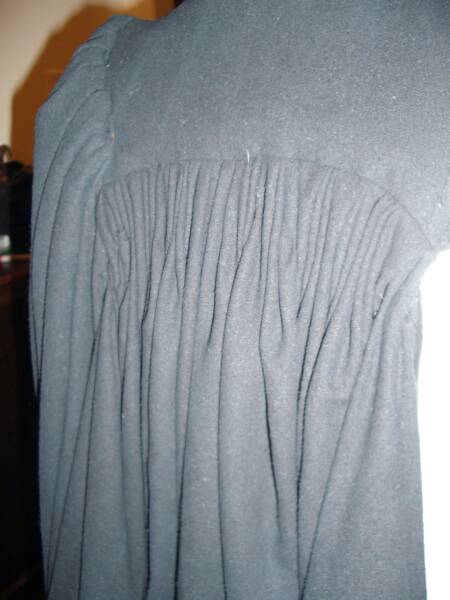
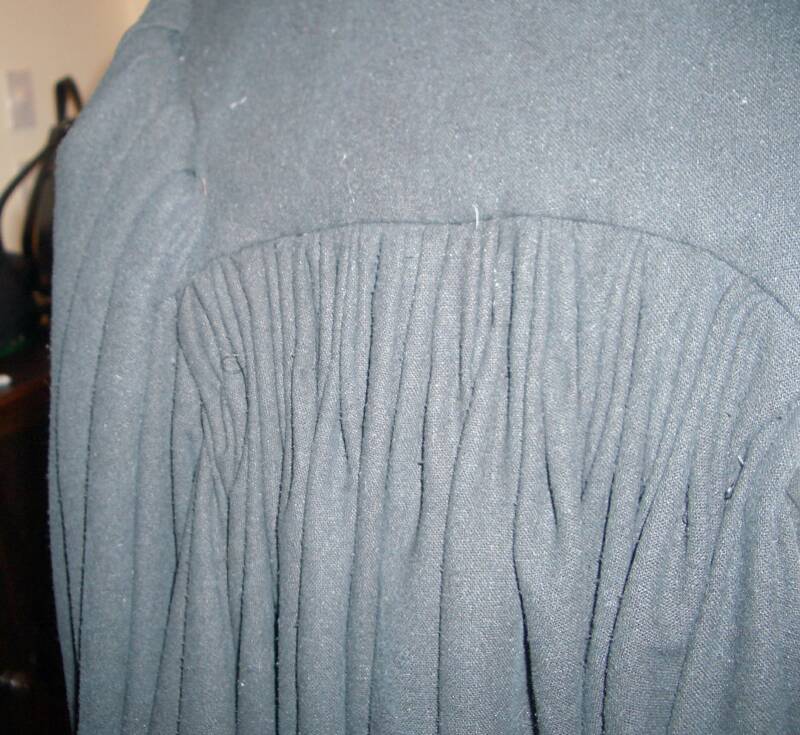
Ruminating over the result, I am thinking I may take it out one more time, and do them the "correct" way. I think I can get them to look "neater..." Three's the charm. I do like how the narrower pleating looks..., and I haven't done all the pleating yet...
July 29, 2006:
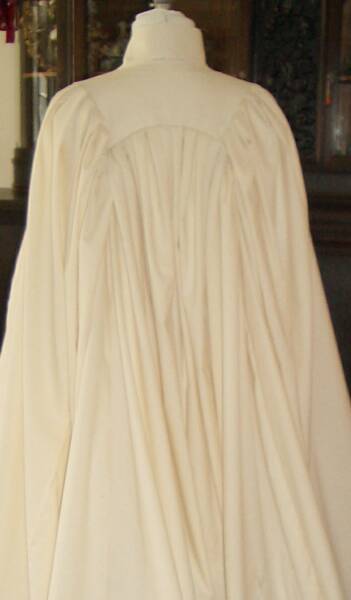
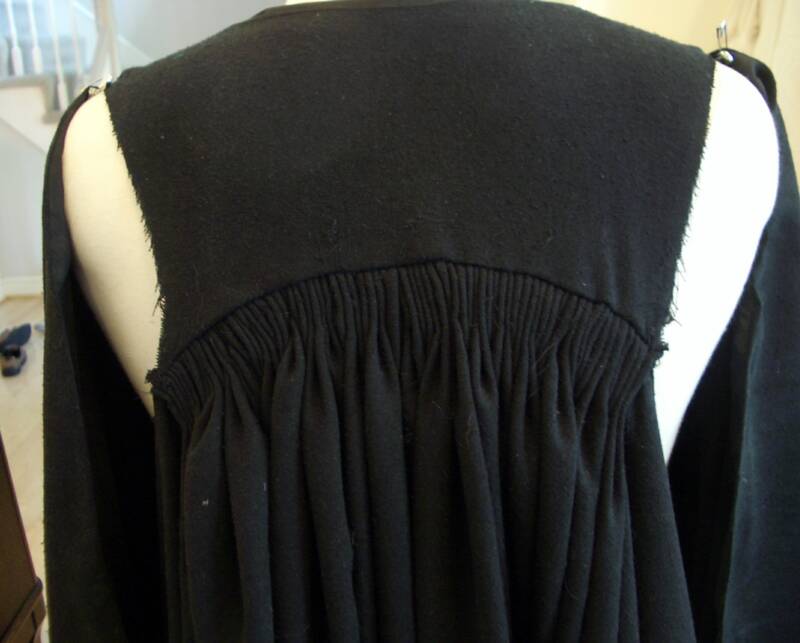
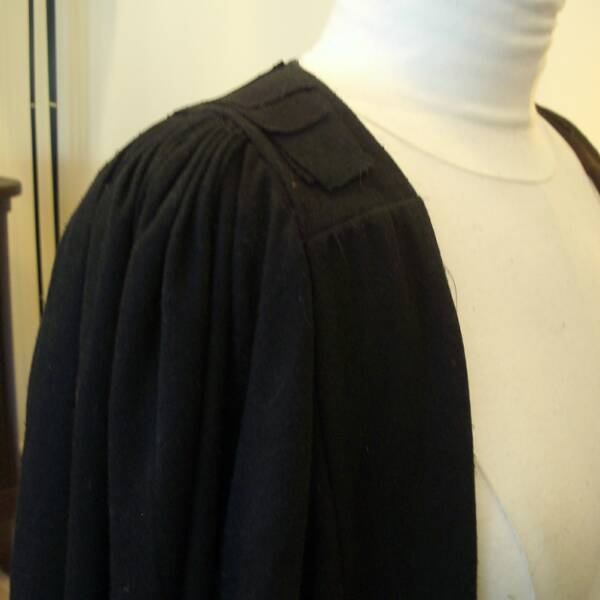
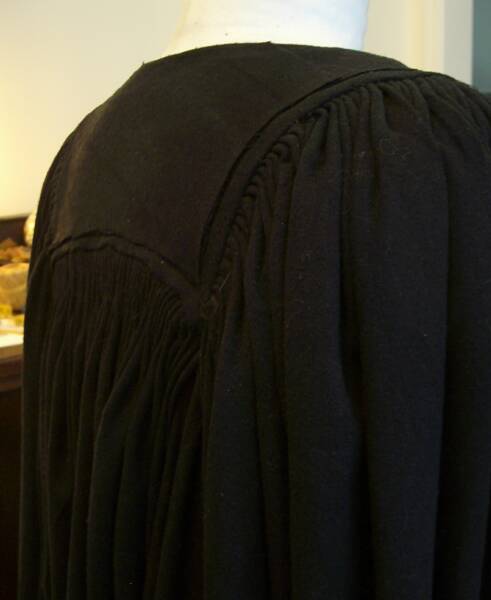
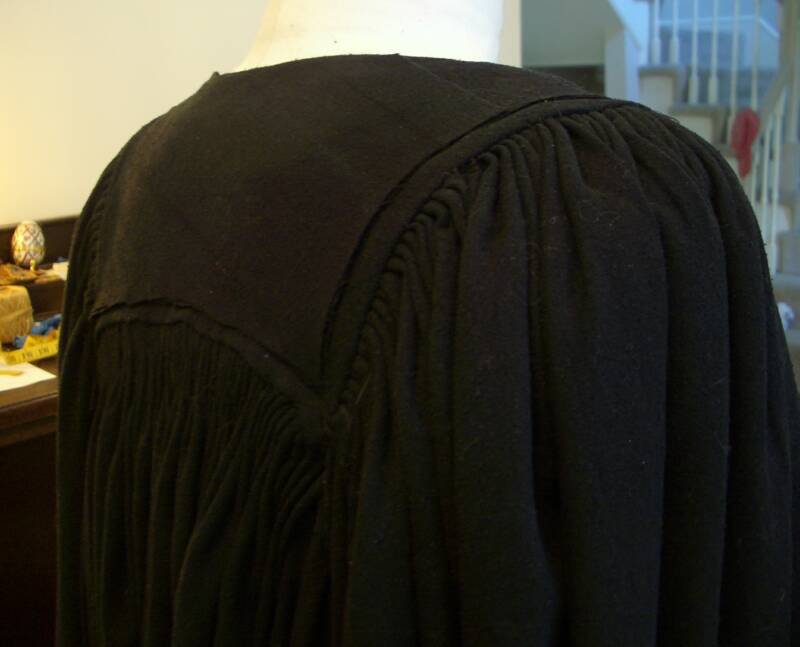
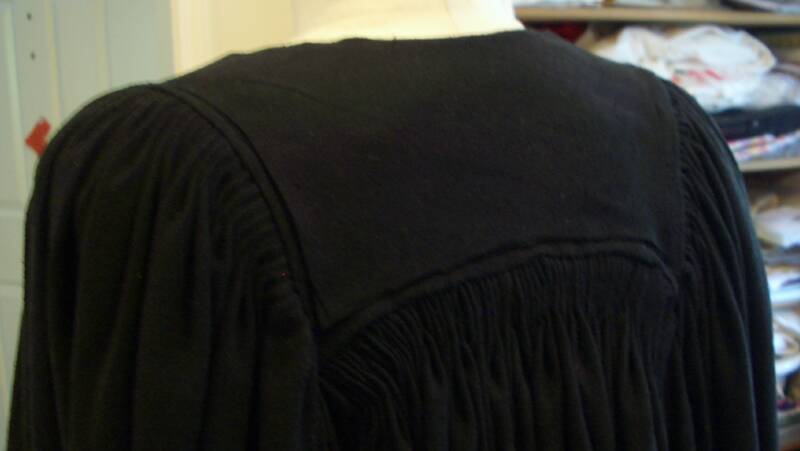
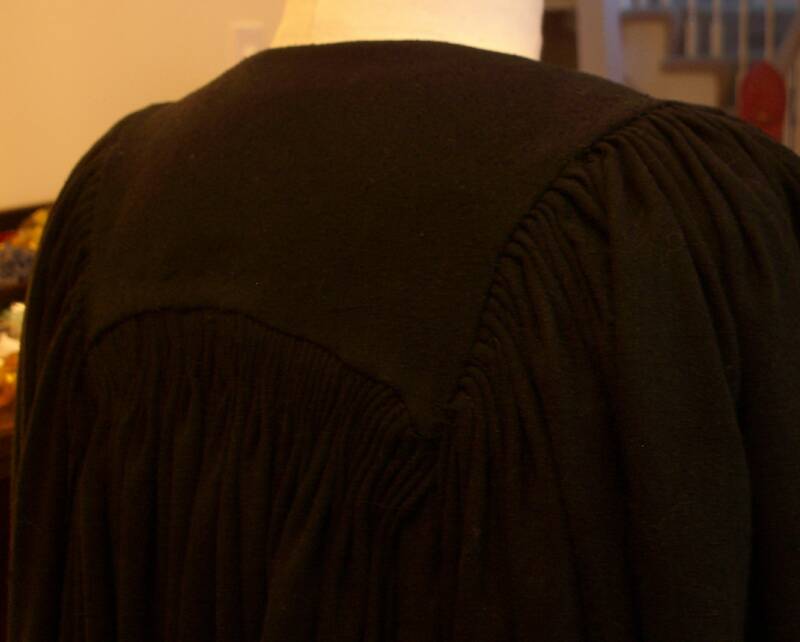
I picked out the back panels again, and did cartridge pleats. It was worth it. Here are a few photos...
That I can live with. They are neater, and actually easier than my second attempt. ;)
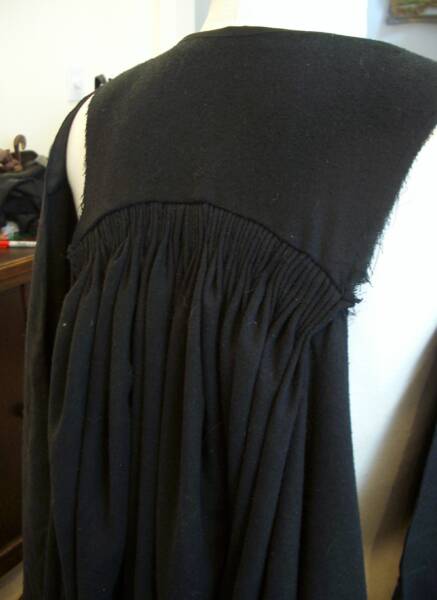
So, the biggest part of the pleating is complete, now I have the two sleeves, and the pleated area for these is not as long as the back panels... I'm more than half way done with the pleating.
July 29, 2006:
Yesterday, I completed the pleating of the sleeves, and sewed the sleeves in, and bag lined them. Here follow a few photos.
I think I want to open up the yoke area from the inside, and add some kind of layered fabrics, likely some of the same silk noil, layering such that the yoke is thicker where the pleats meet it, and level it off, tapering down towards the neck opening, and smoothing things out. Or maybe not. That's undecided.
Also left to do is the hem. And a few tacks in the sleeves, to keep the lining from peeking out. I'd say I'm getting close...
On another note:
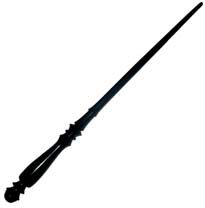
I went shopping today, and bought a wand. Yeah, I am too lazy to make one right now, and I really like this one. It is Gaboon Ebony, with Essence of Phoenix Talon, from Alivan's. On the site, they write: "Ebony is unquestionably accepted as the most powerful wood when it comes to magic. The user of this wand will have limitless power as well as unprecedented protectional qualities."
I think that is perfect for the Potions Master... *satisfied grin*
The wood: Gaboon Ebony
Length: 15 inches
Enchantment: Essence of Phoenix Talon
July 29, 2006:
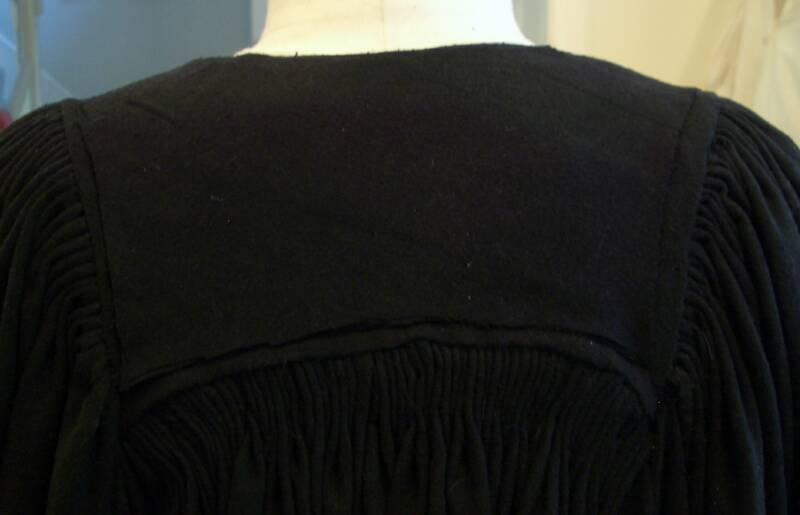
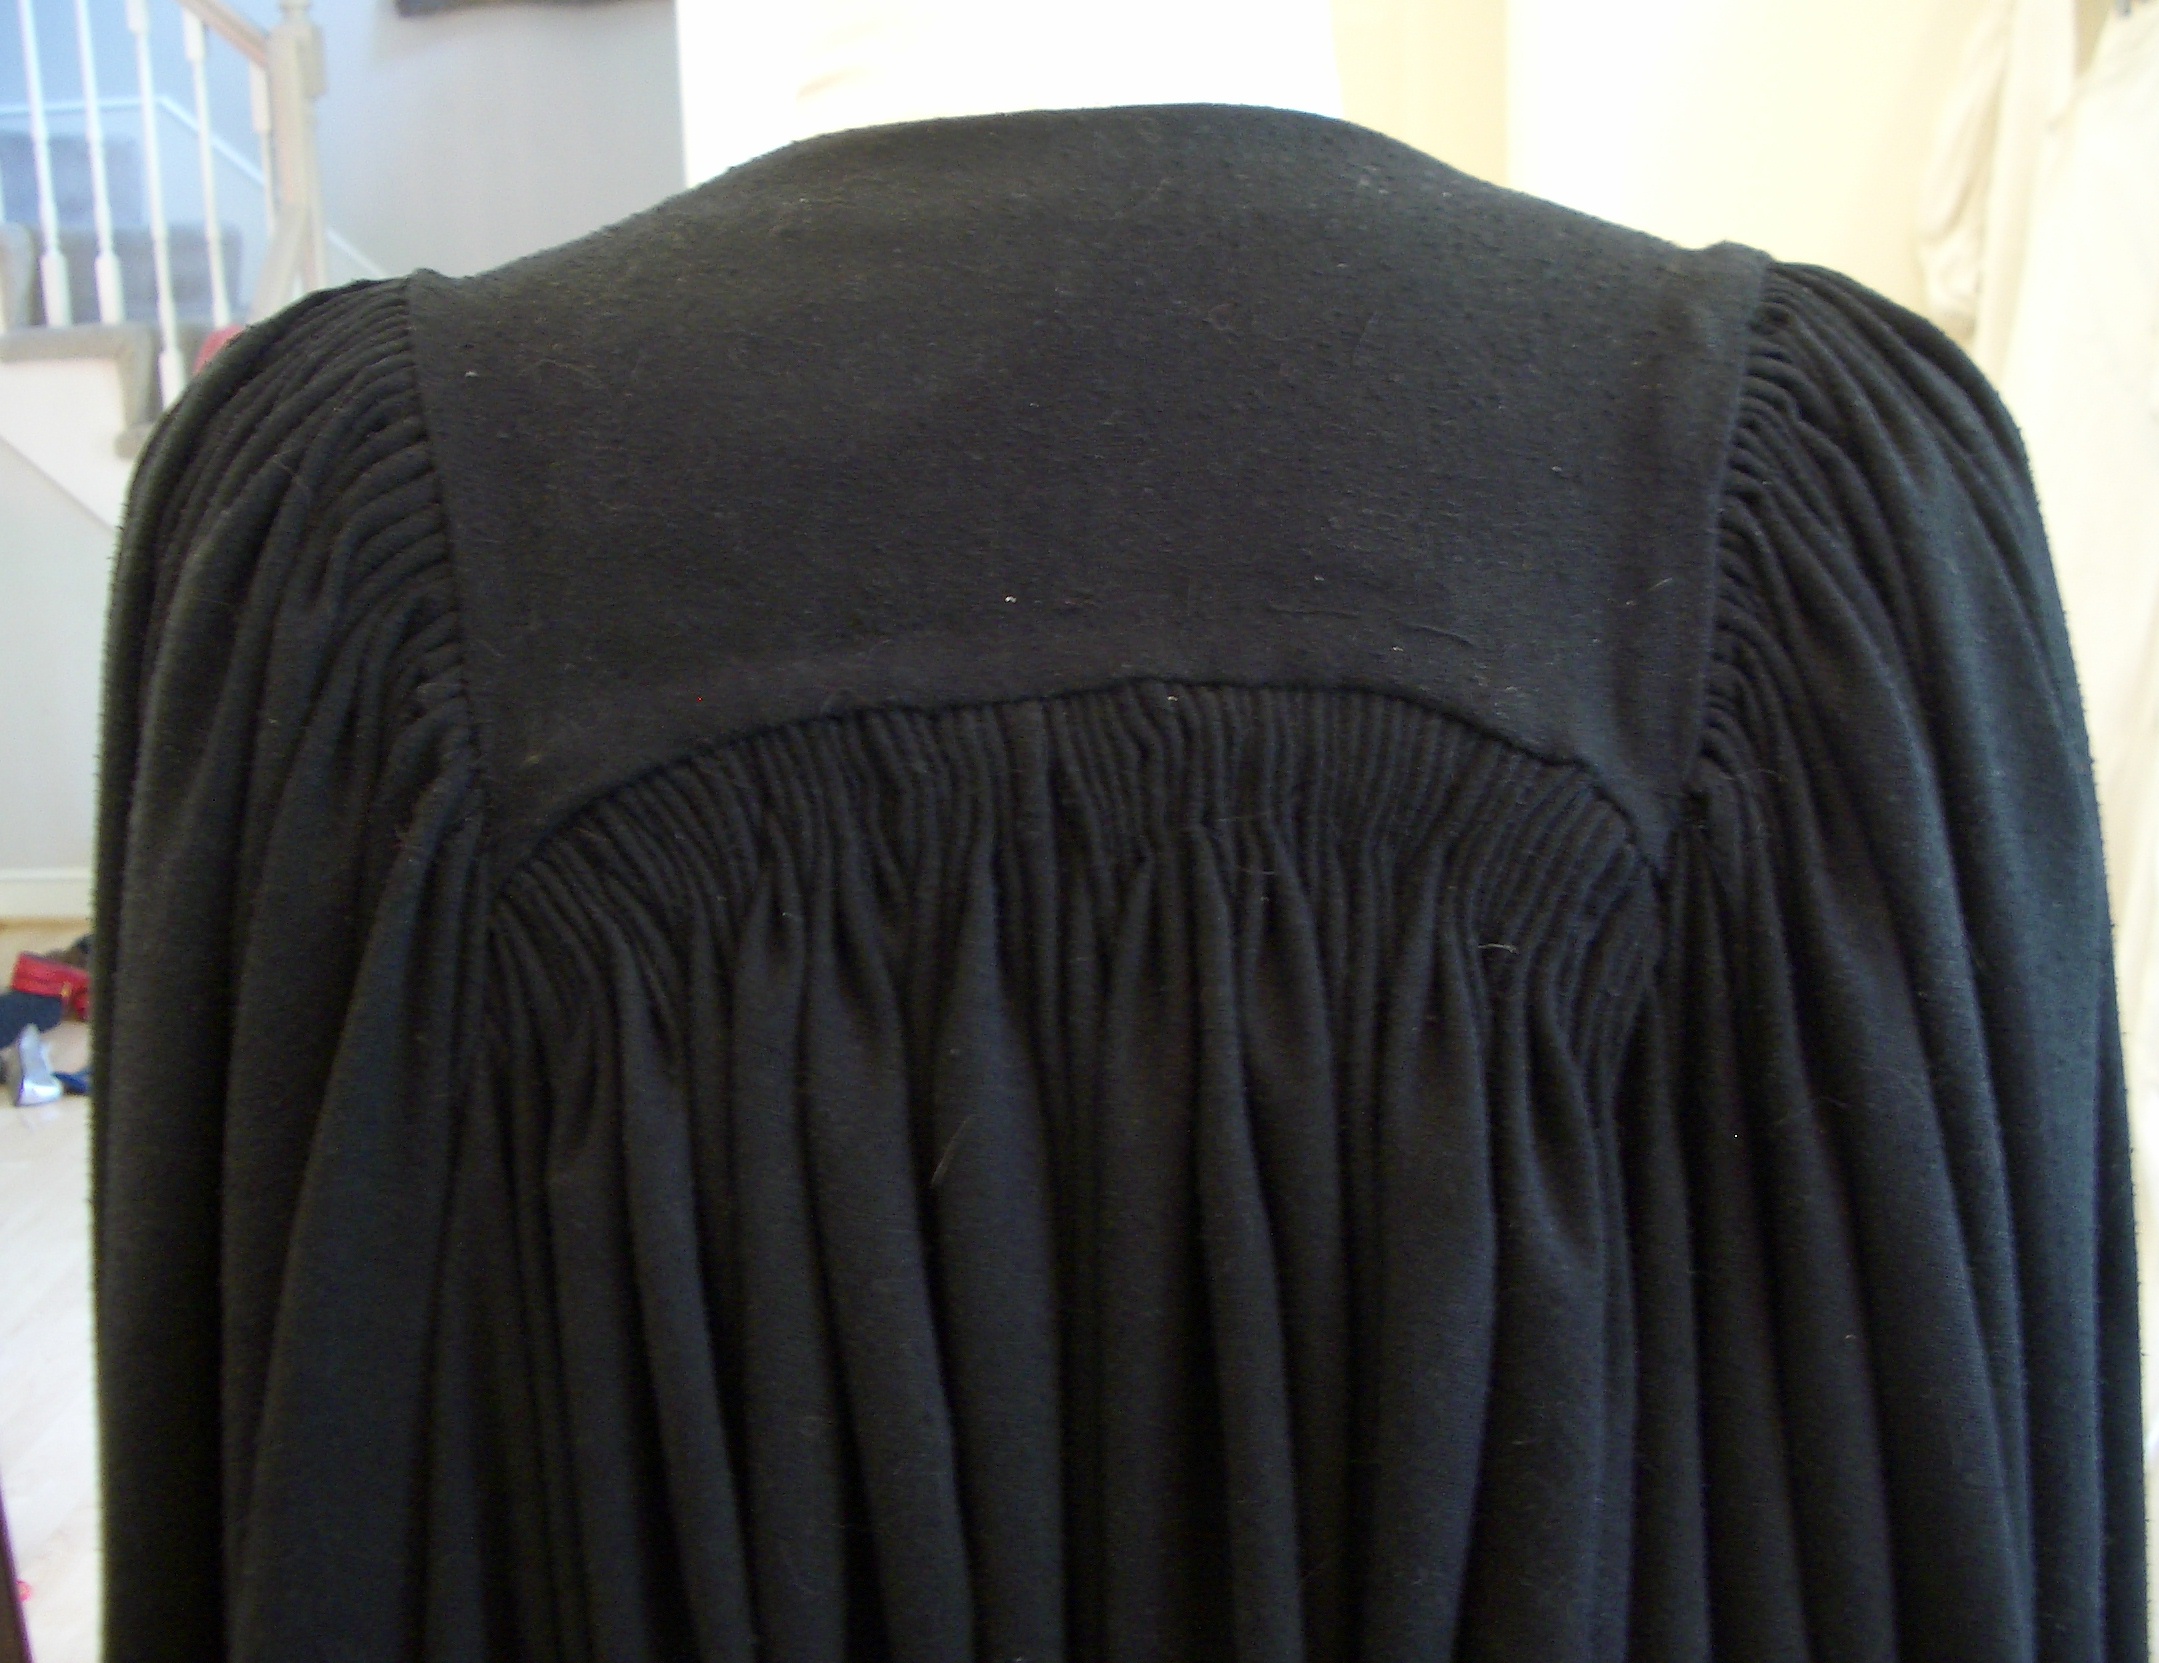
Interfacing in the yoke:
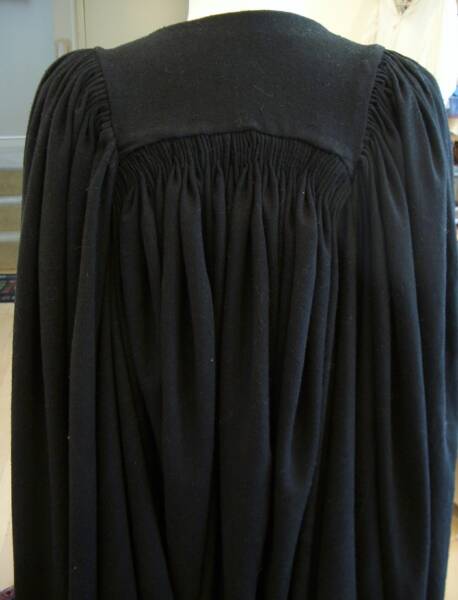
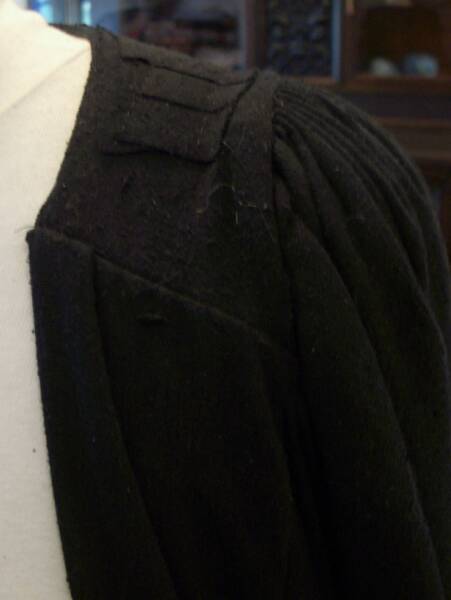
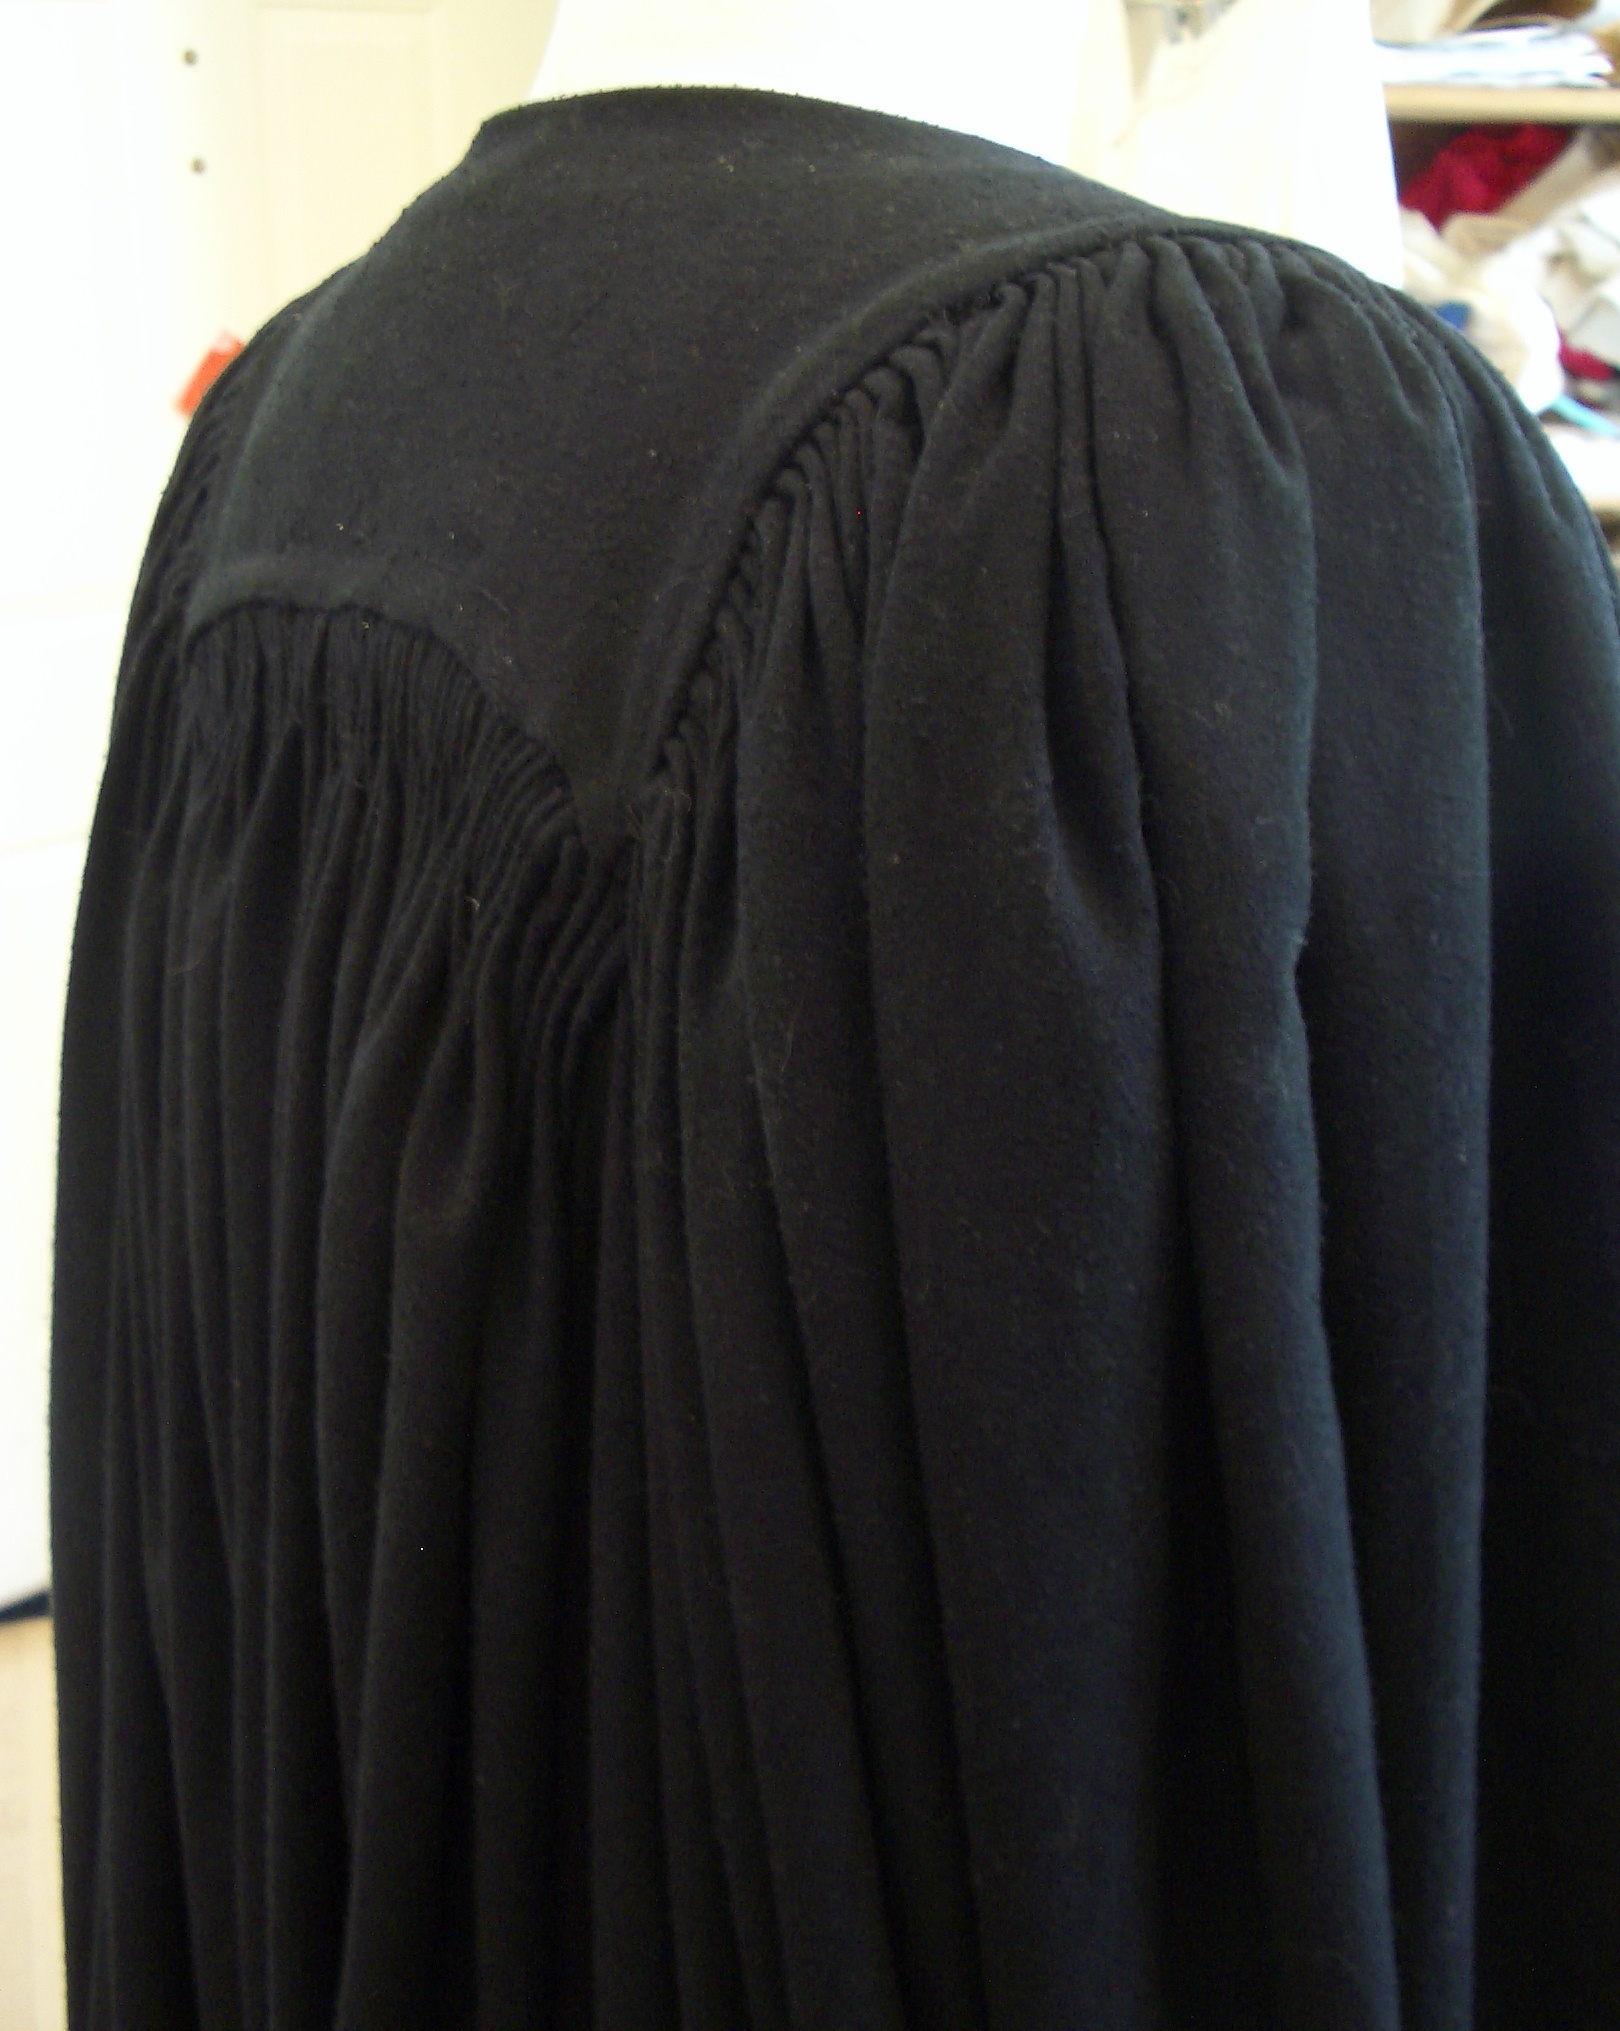
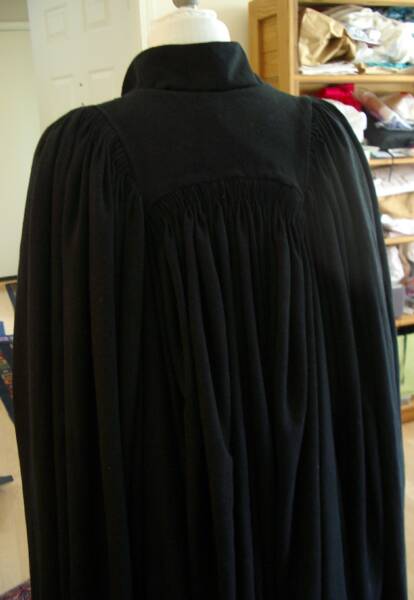
So, in order to solve the issue of hills and valleys in the yoke, I built an interfacing out of some of the scrap fabric. It consists of six layers, with all six layers butting up against where the pleats join, and tapering off towards the neckline of the yoke. Here are first some photos of the layers on top of the yoke. I trimmed each piece to fit in the valleys... :D
In the photos below, the interfacing has been tacked inside, so that it wont move or shift. Now, the lining layer of the yoke is just pinned in, and I have to re-sew that down by hand. I like the results.
Of these items, I will likely only use the shoes, the white shirt, and the slacks , until I make a pair of my own...
July 30, 2006:
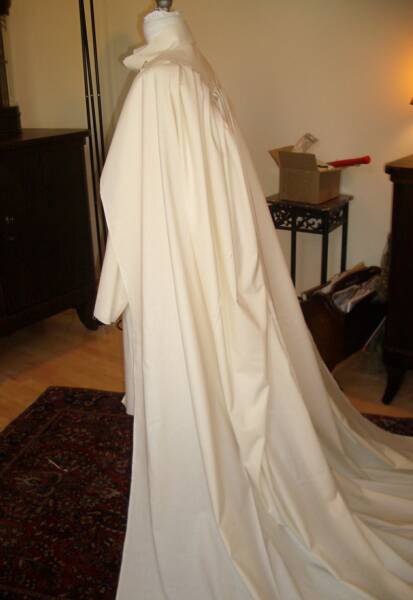
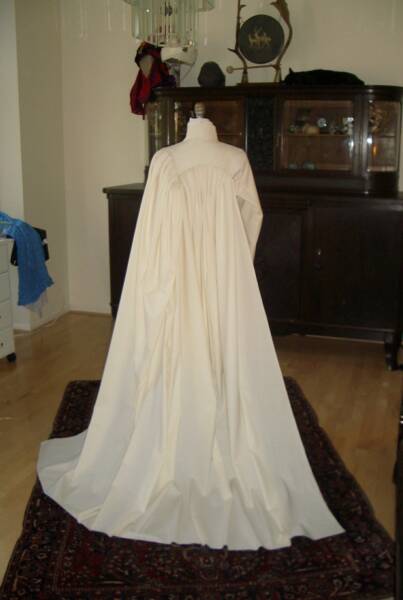
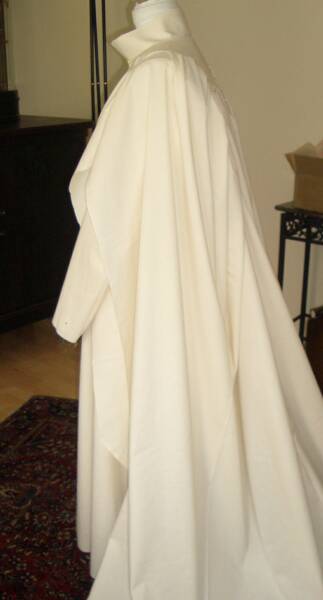
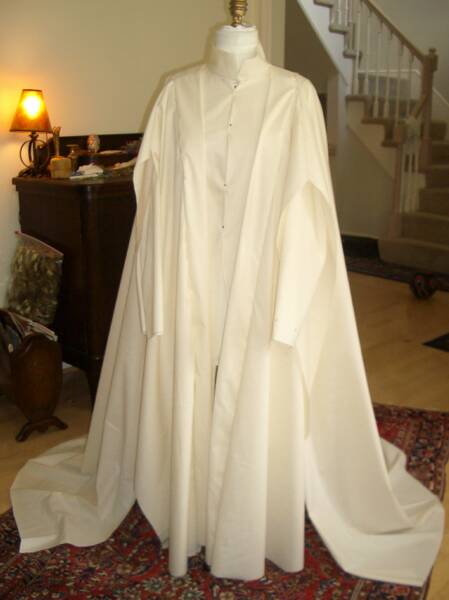
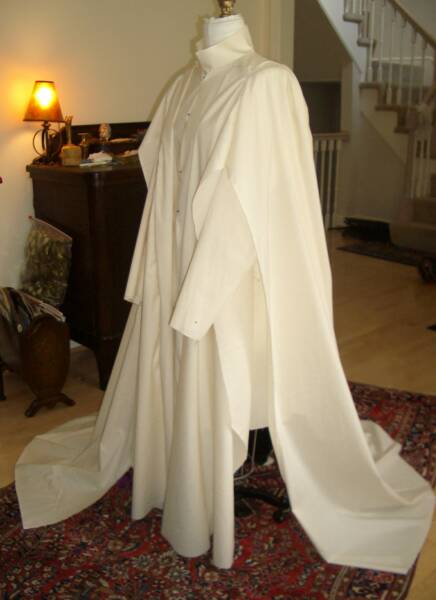
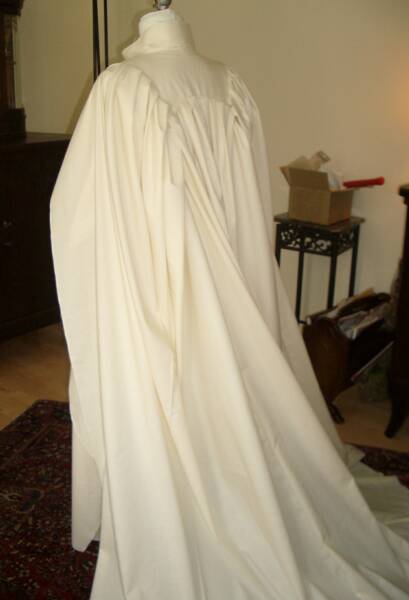
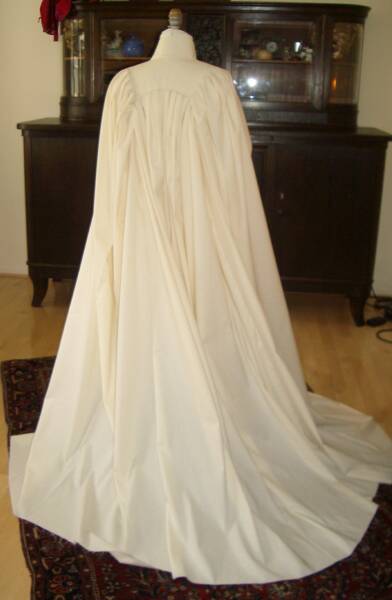
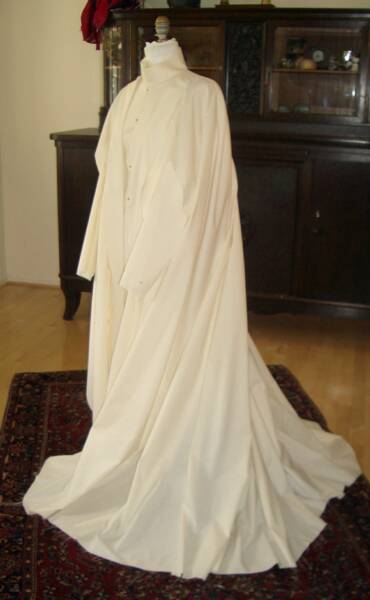
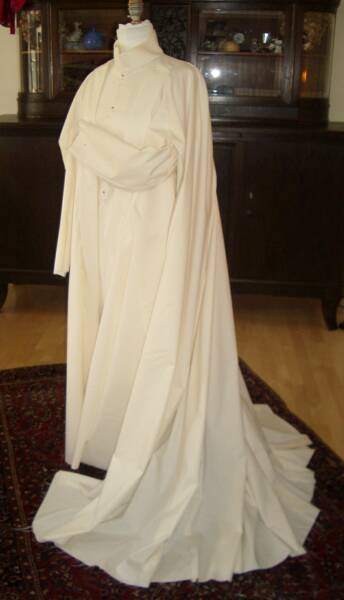
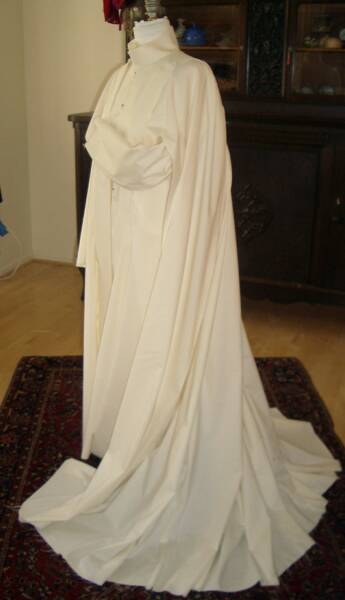
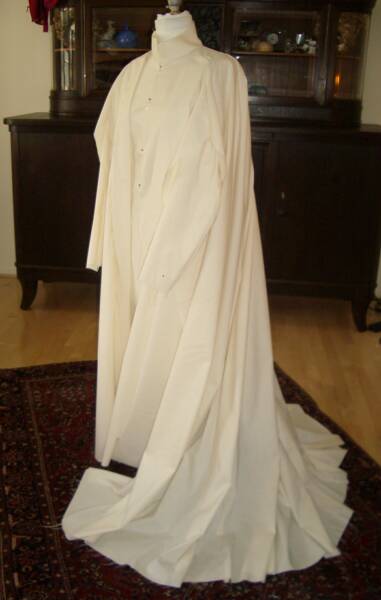
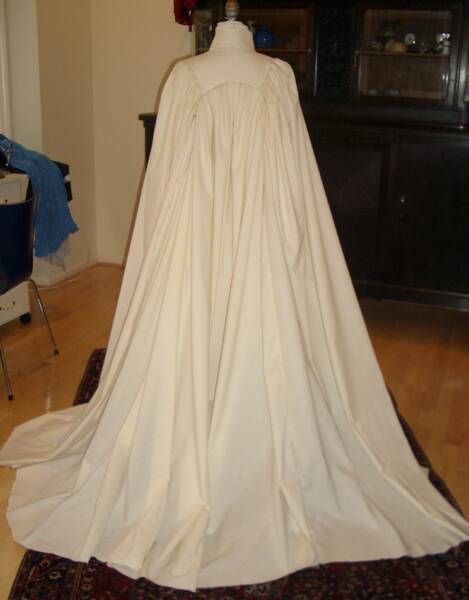
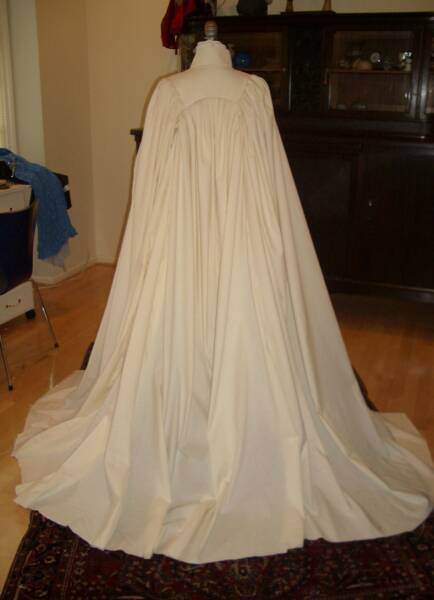
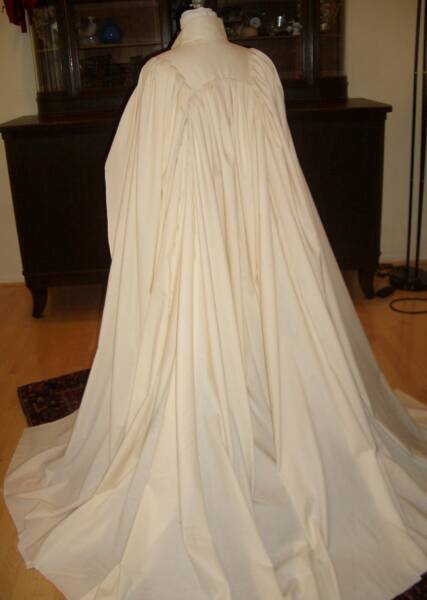
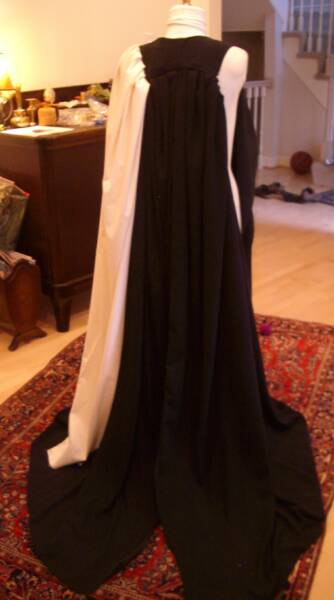
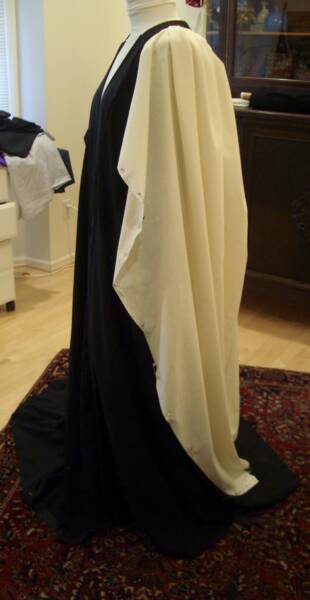
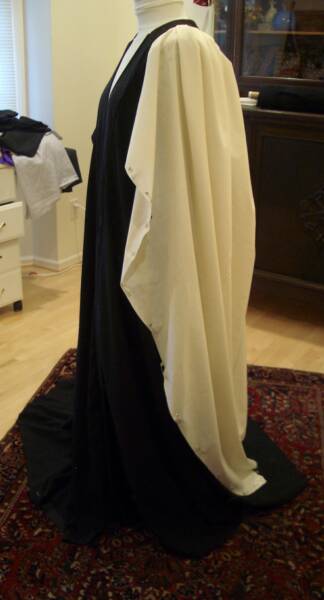
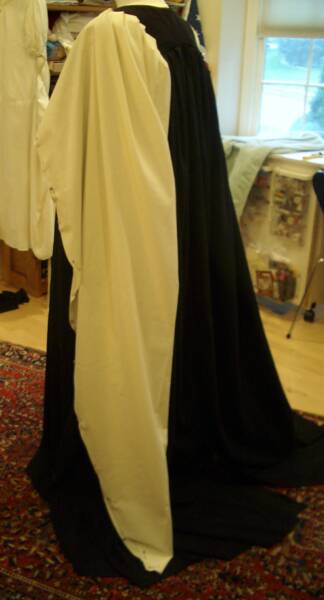
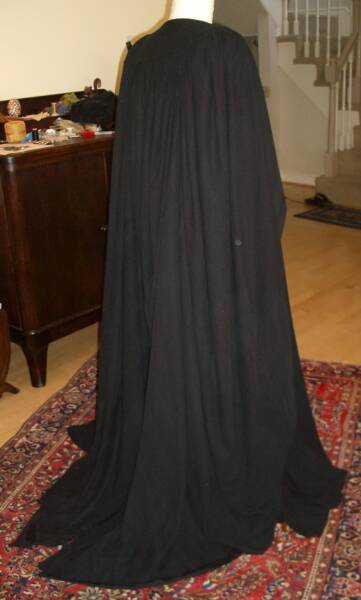
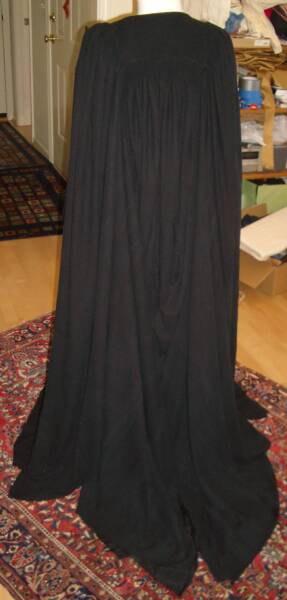
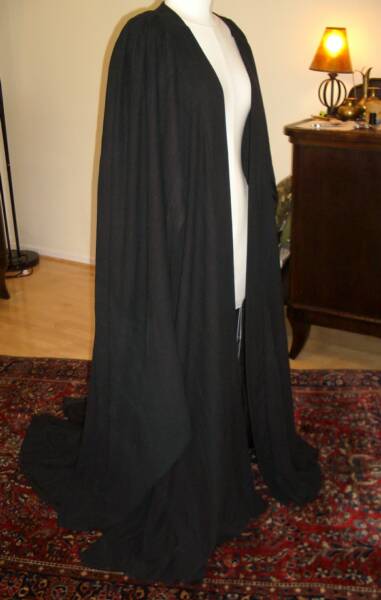
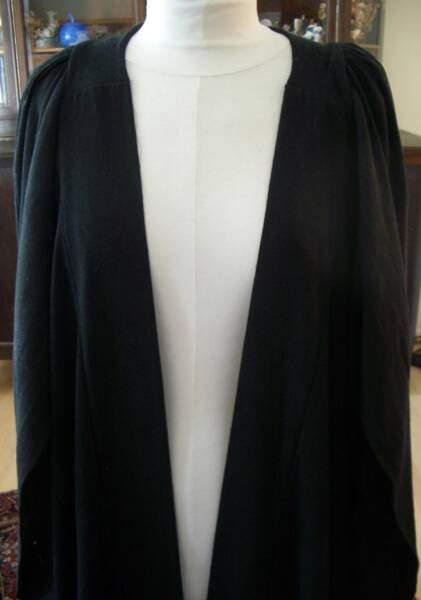
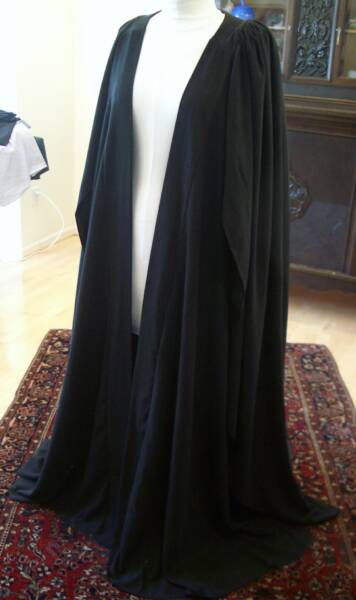
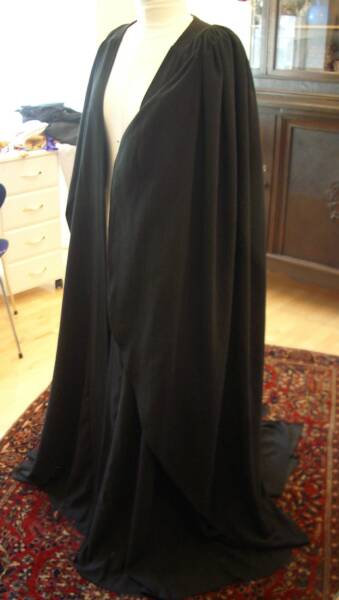
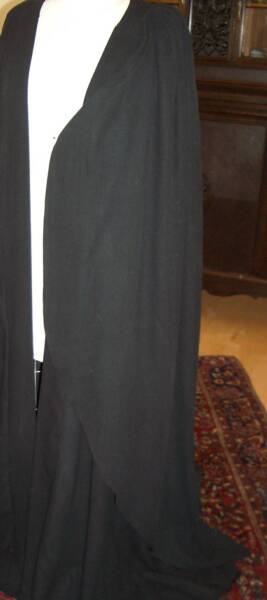
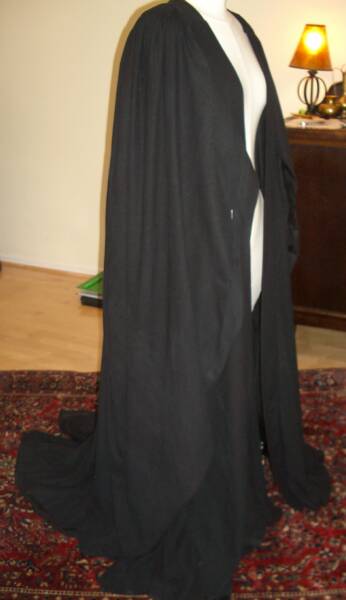
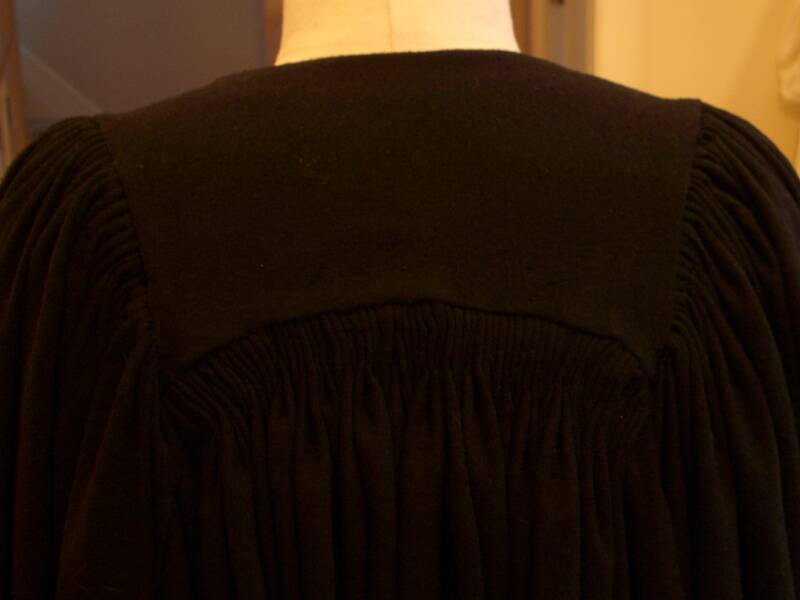
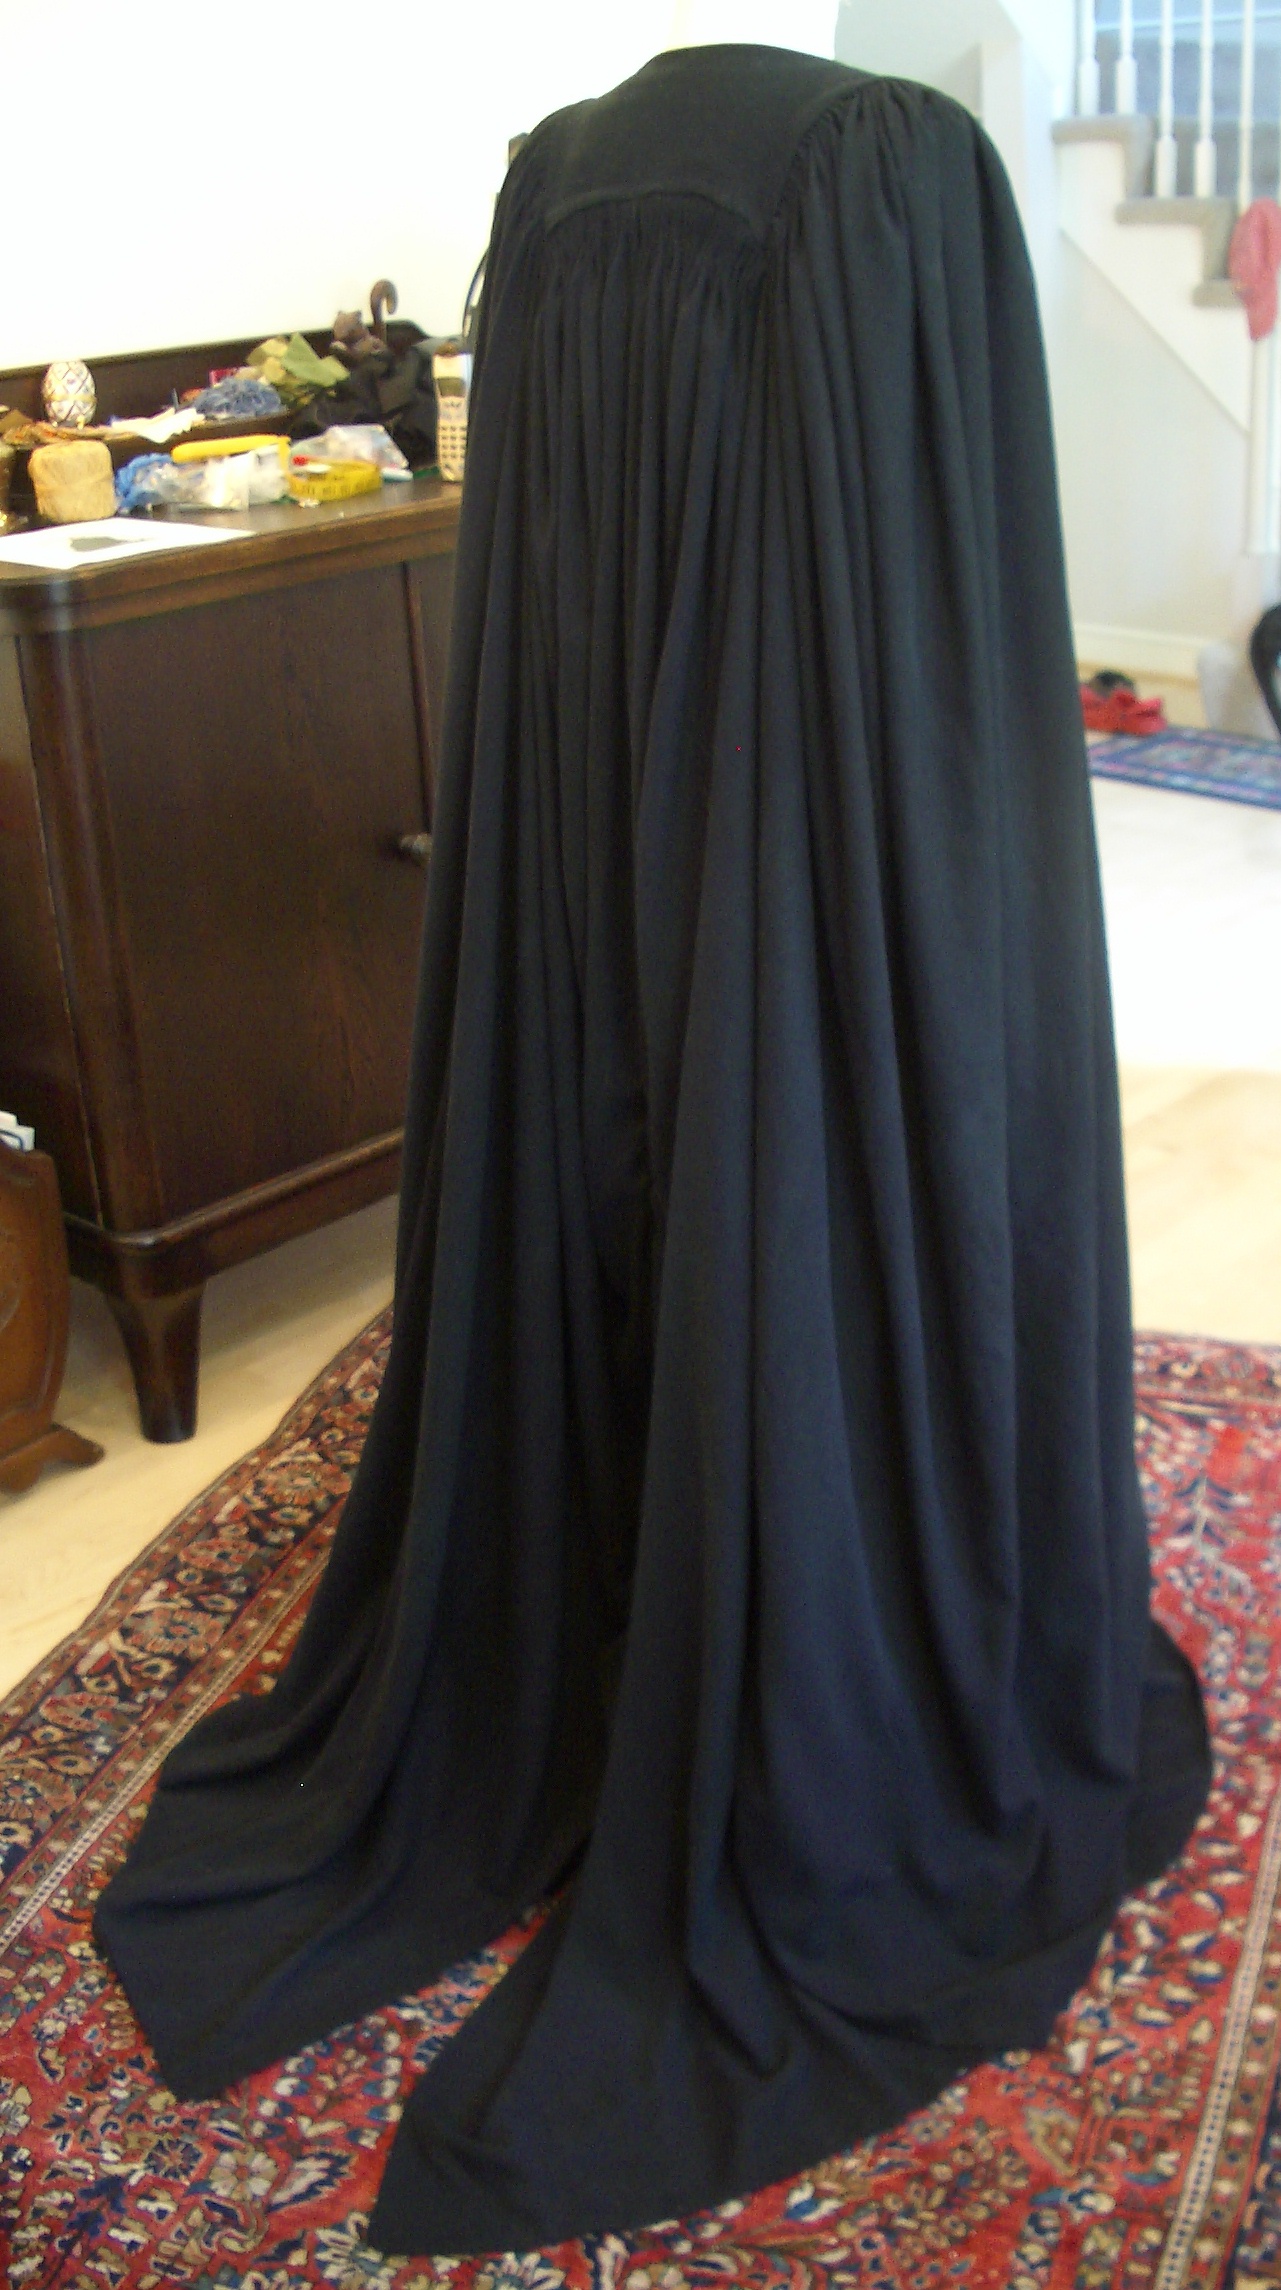
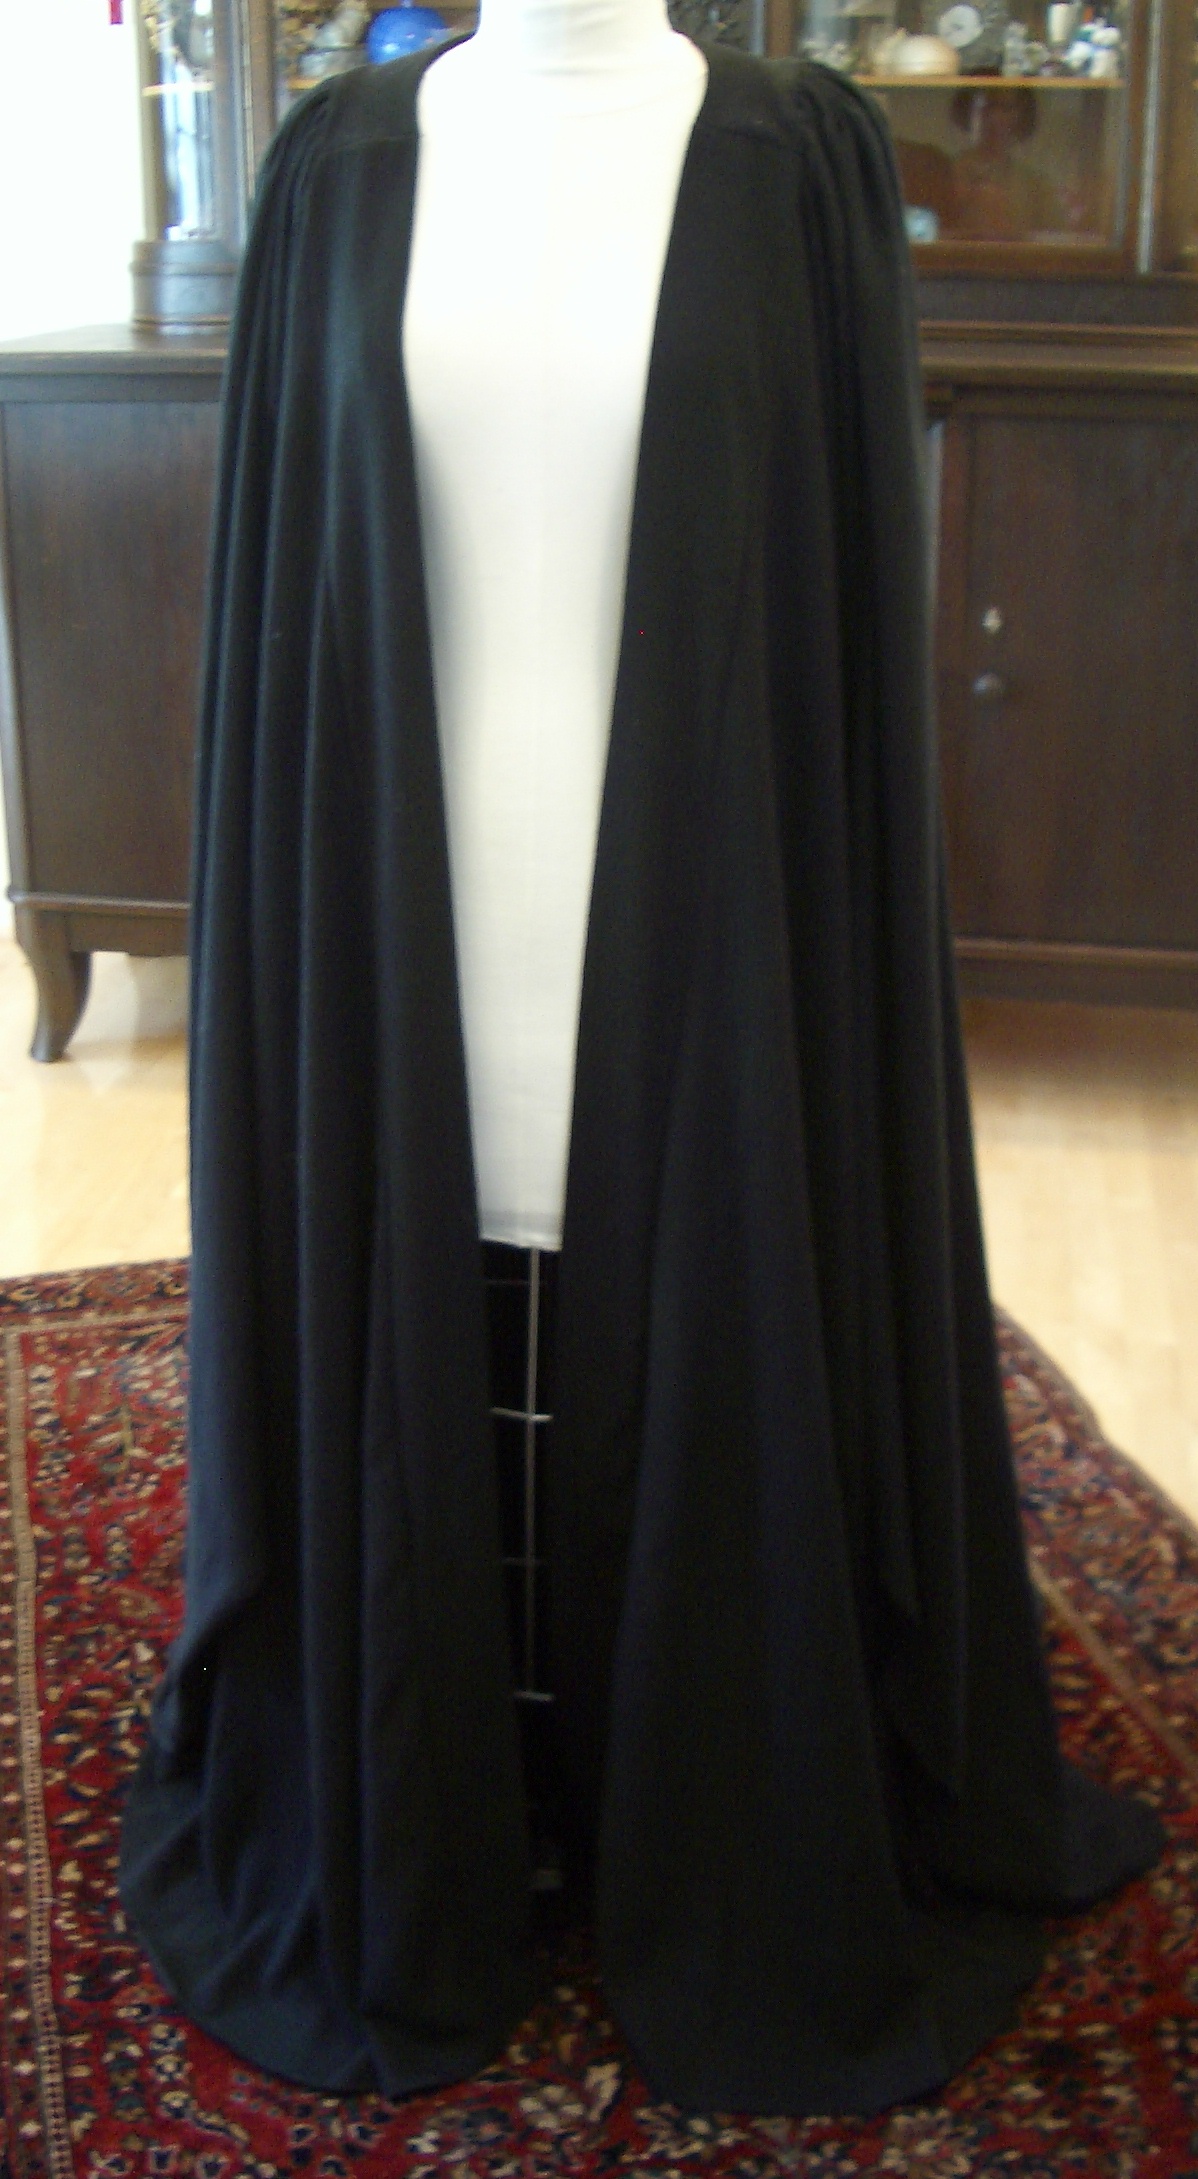
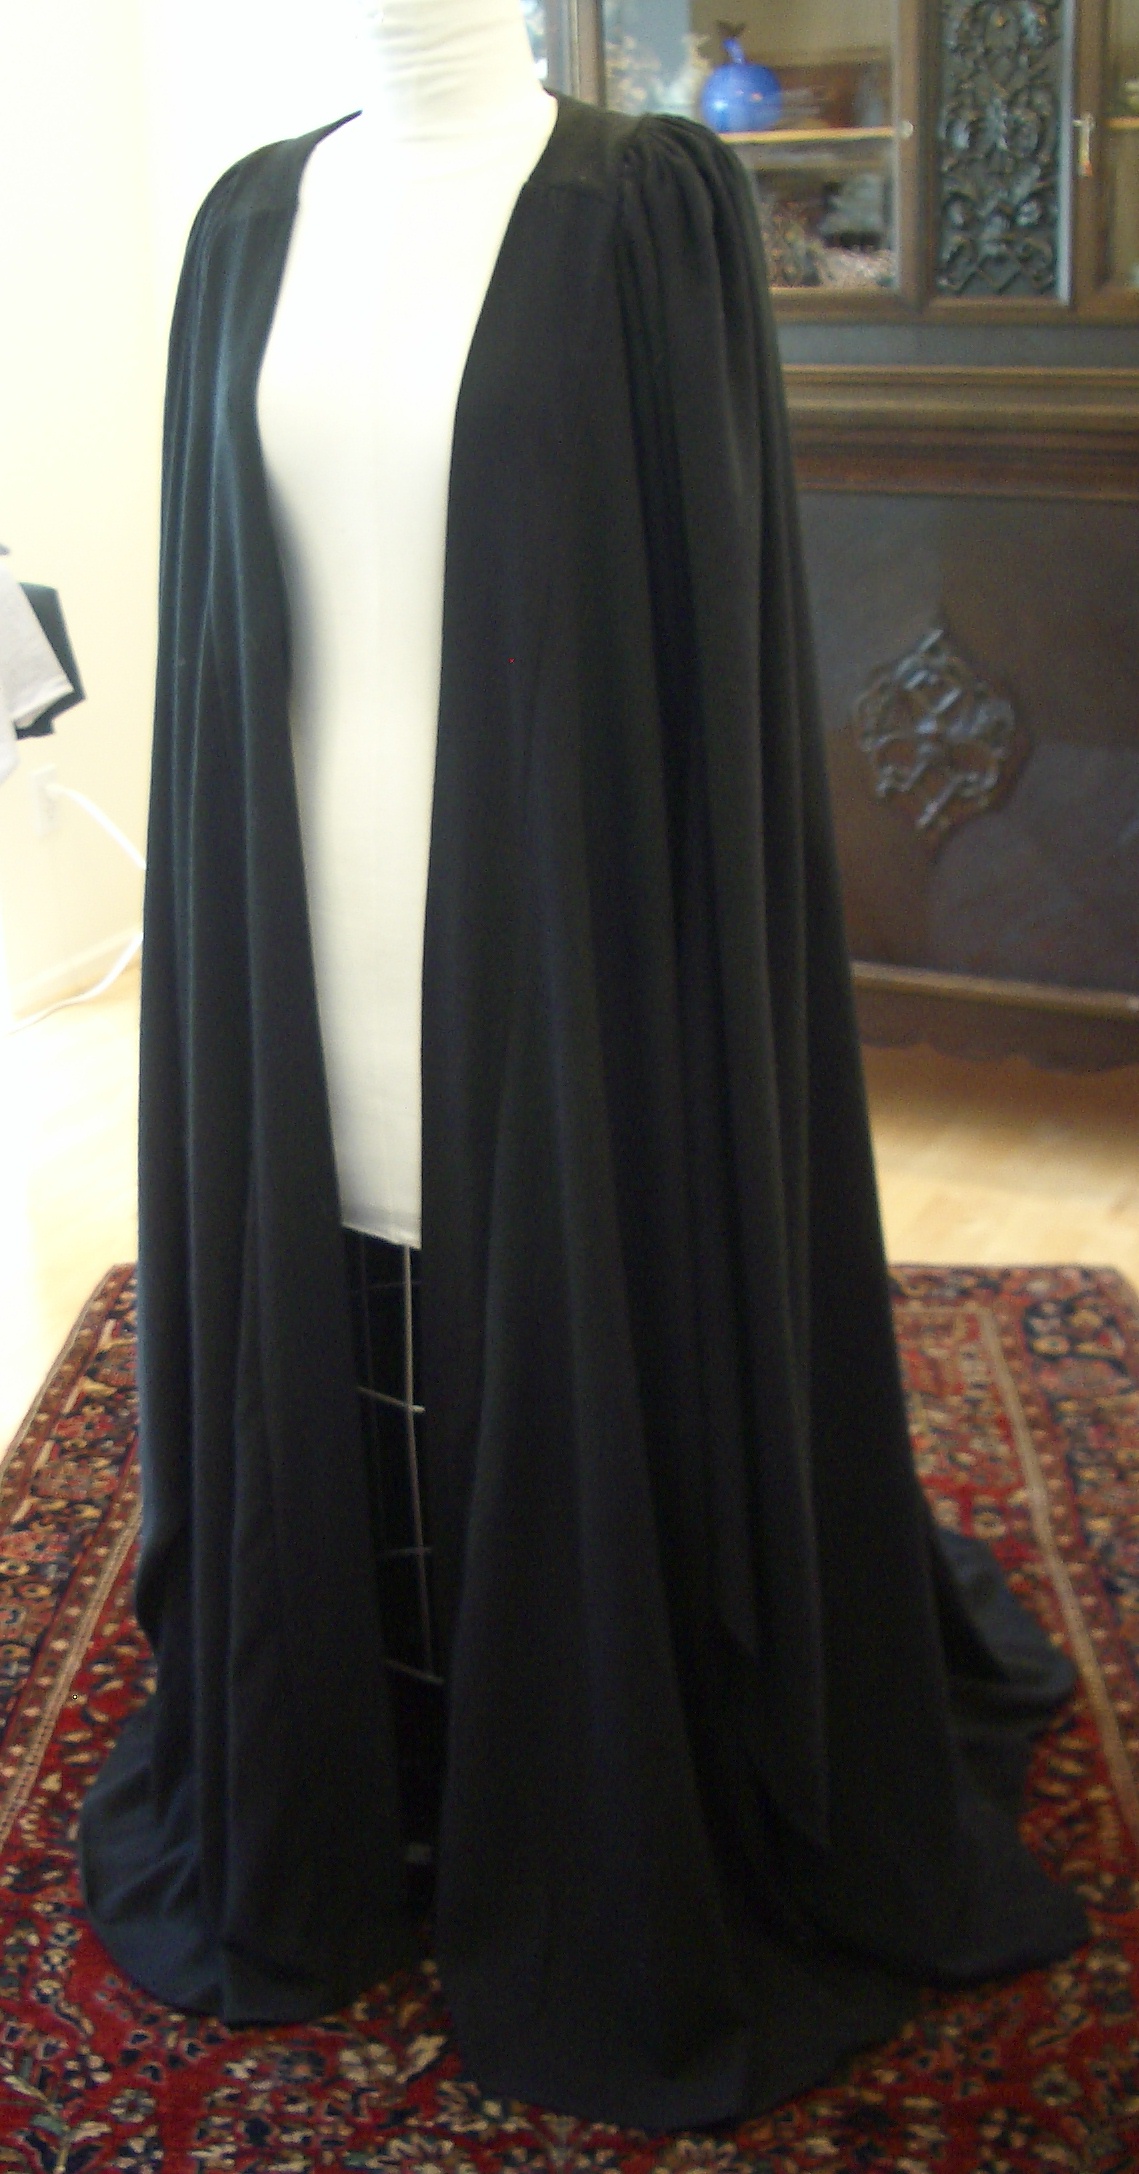
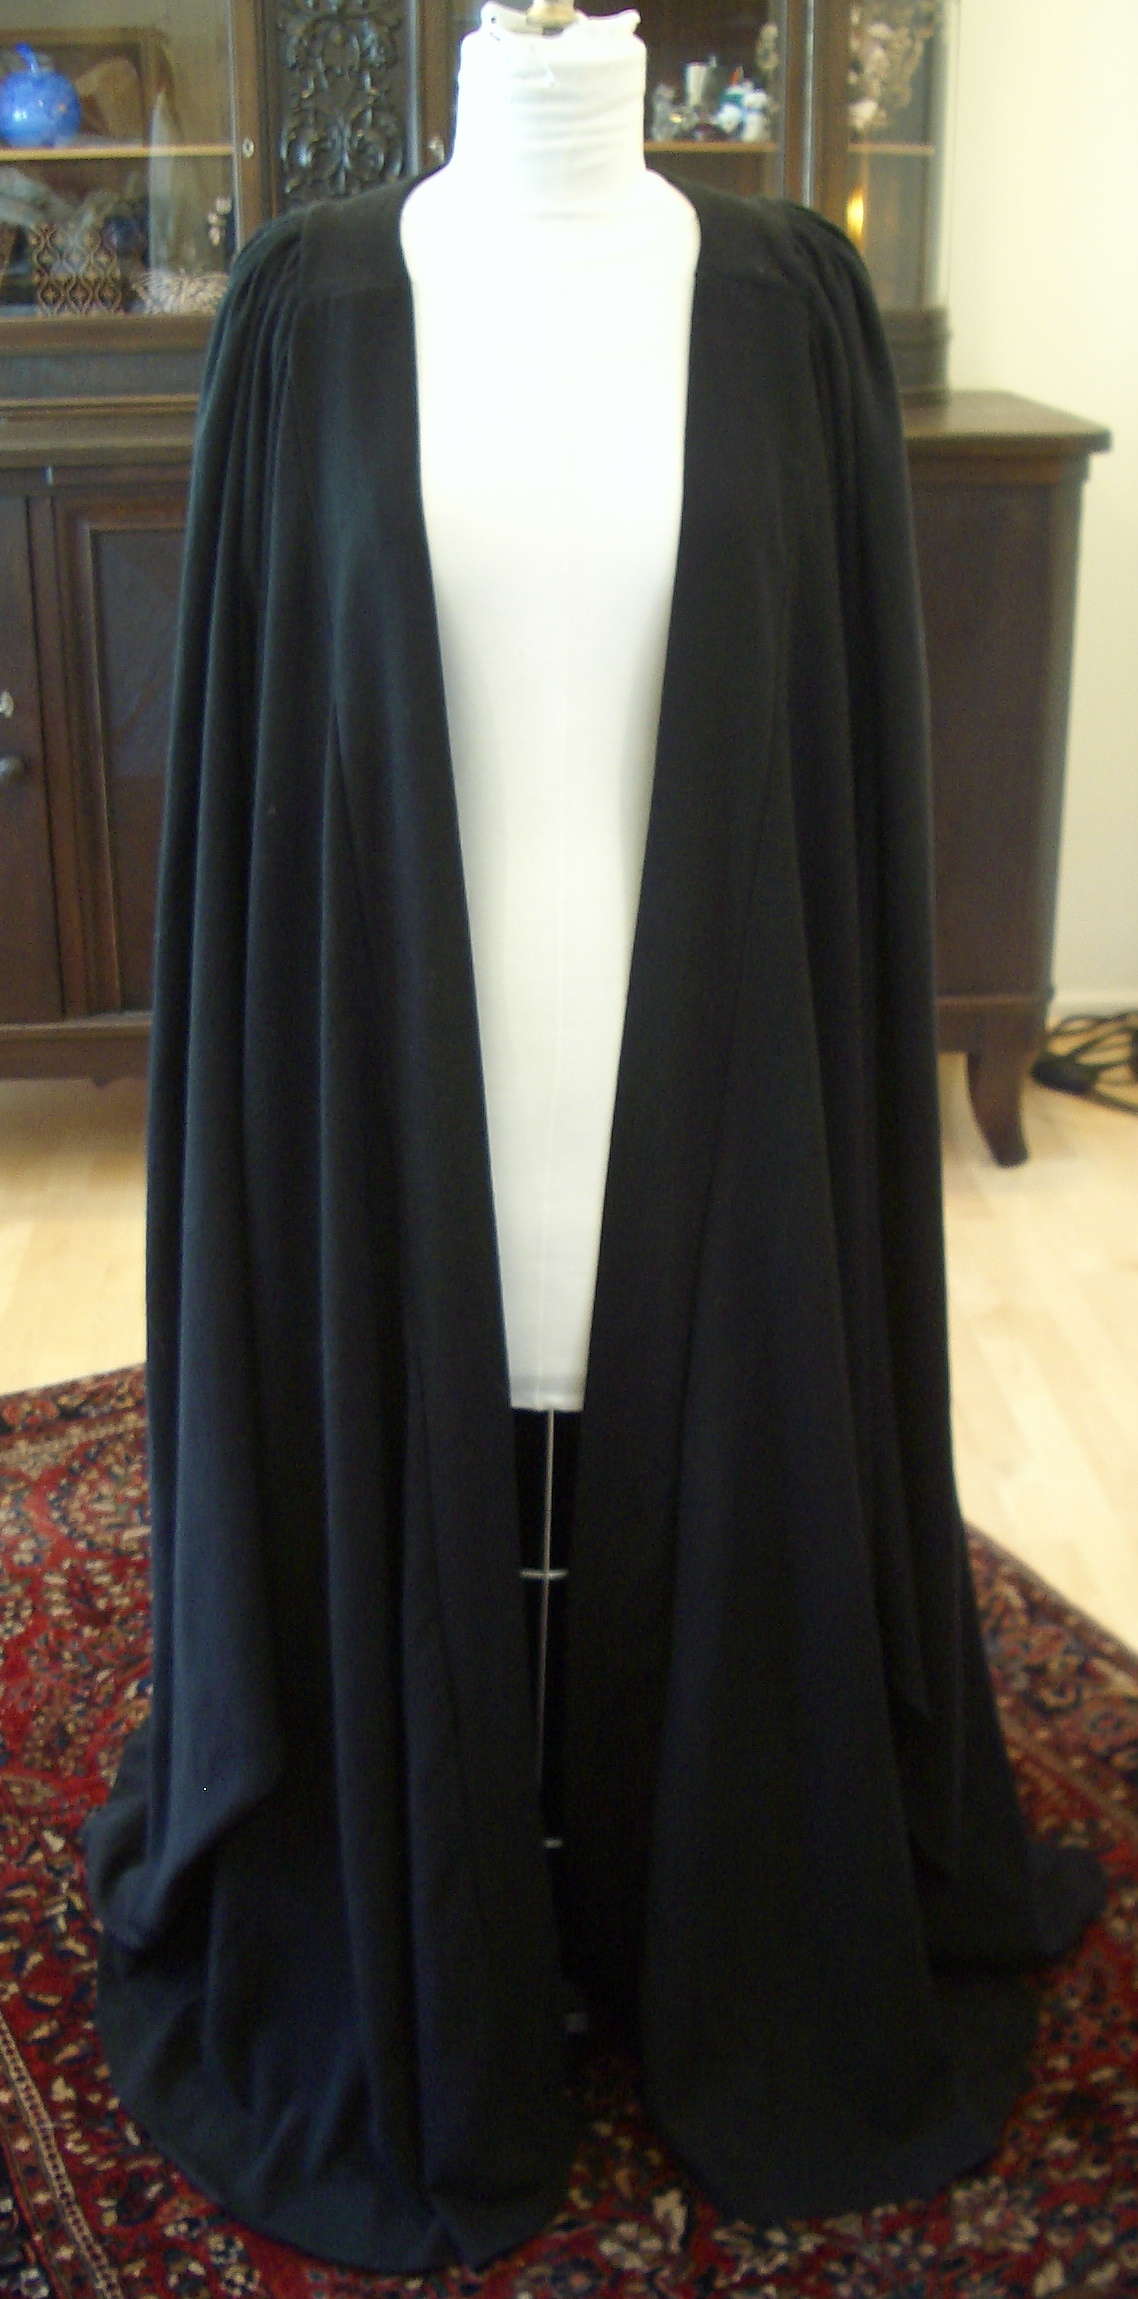
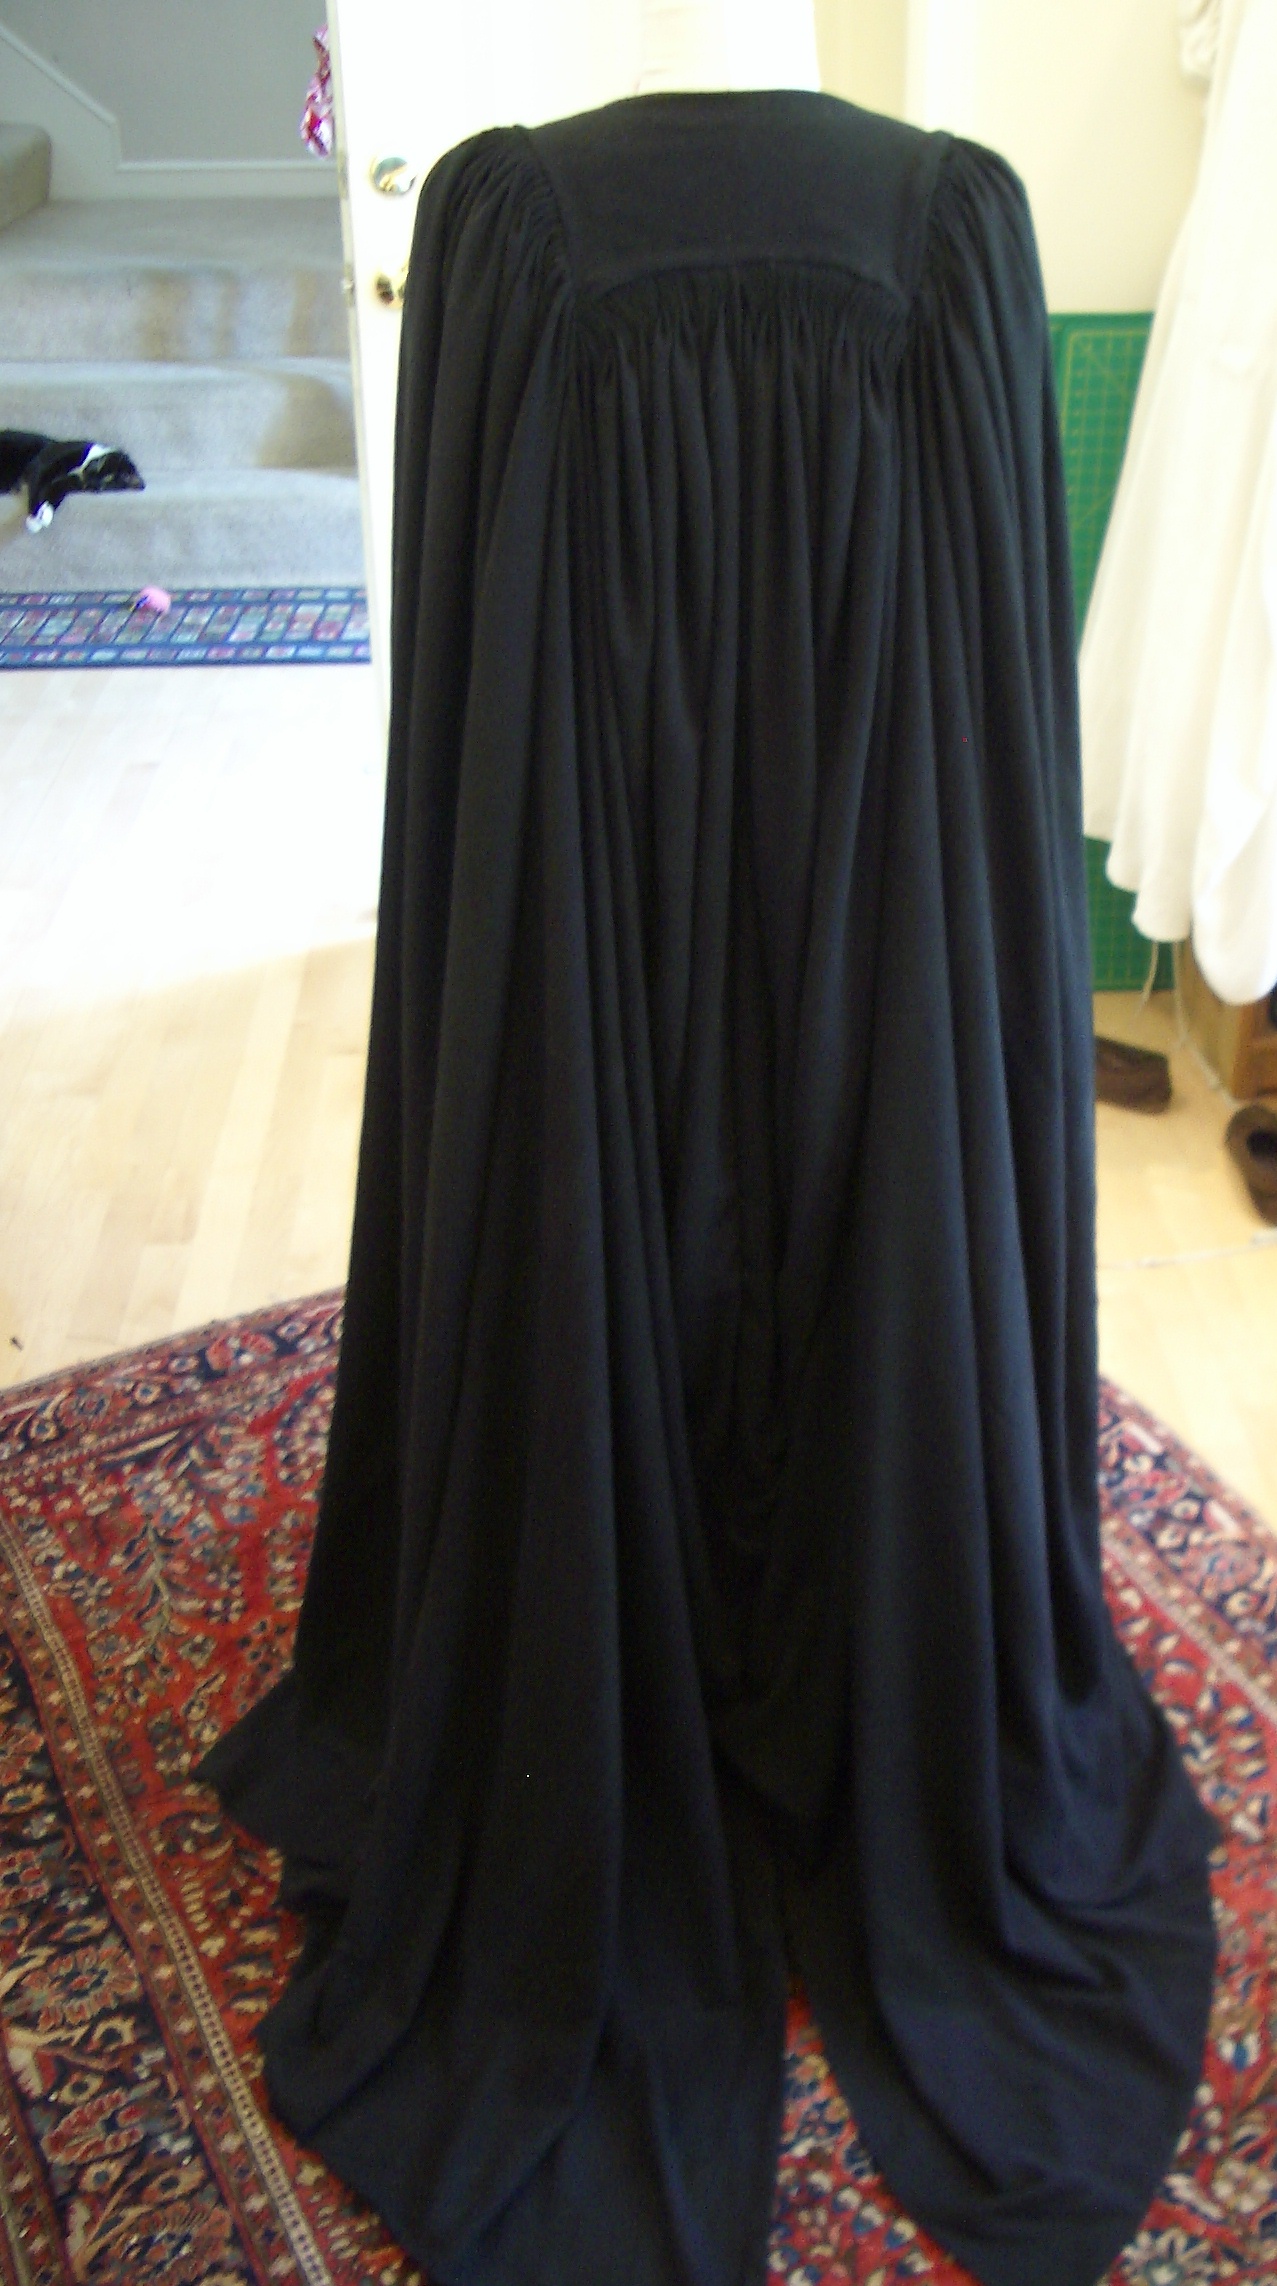
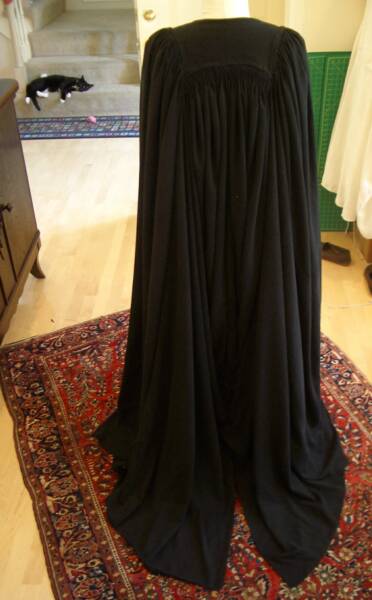
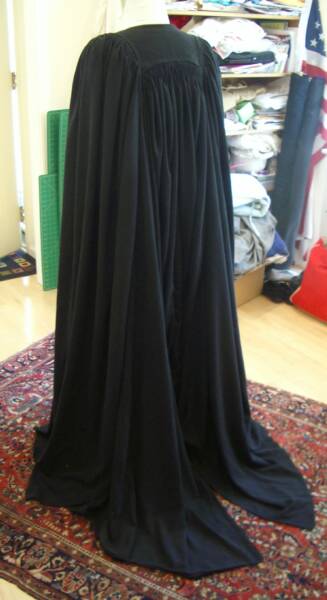
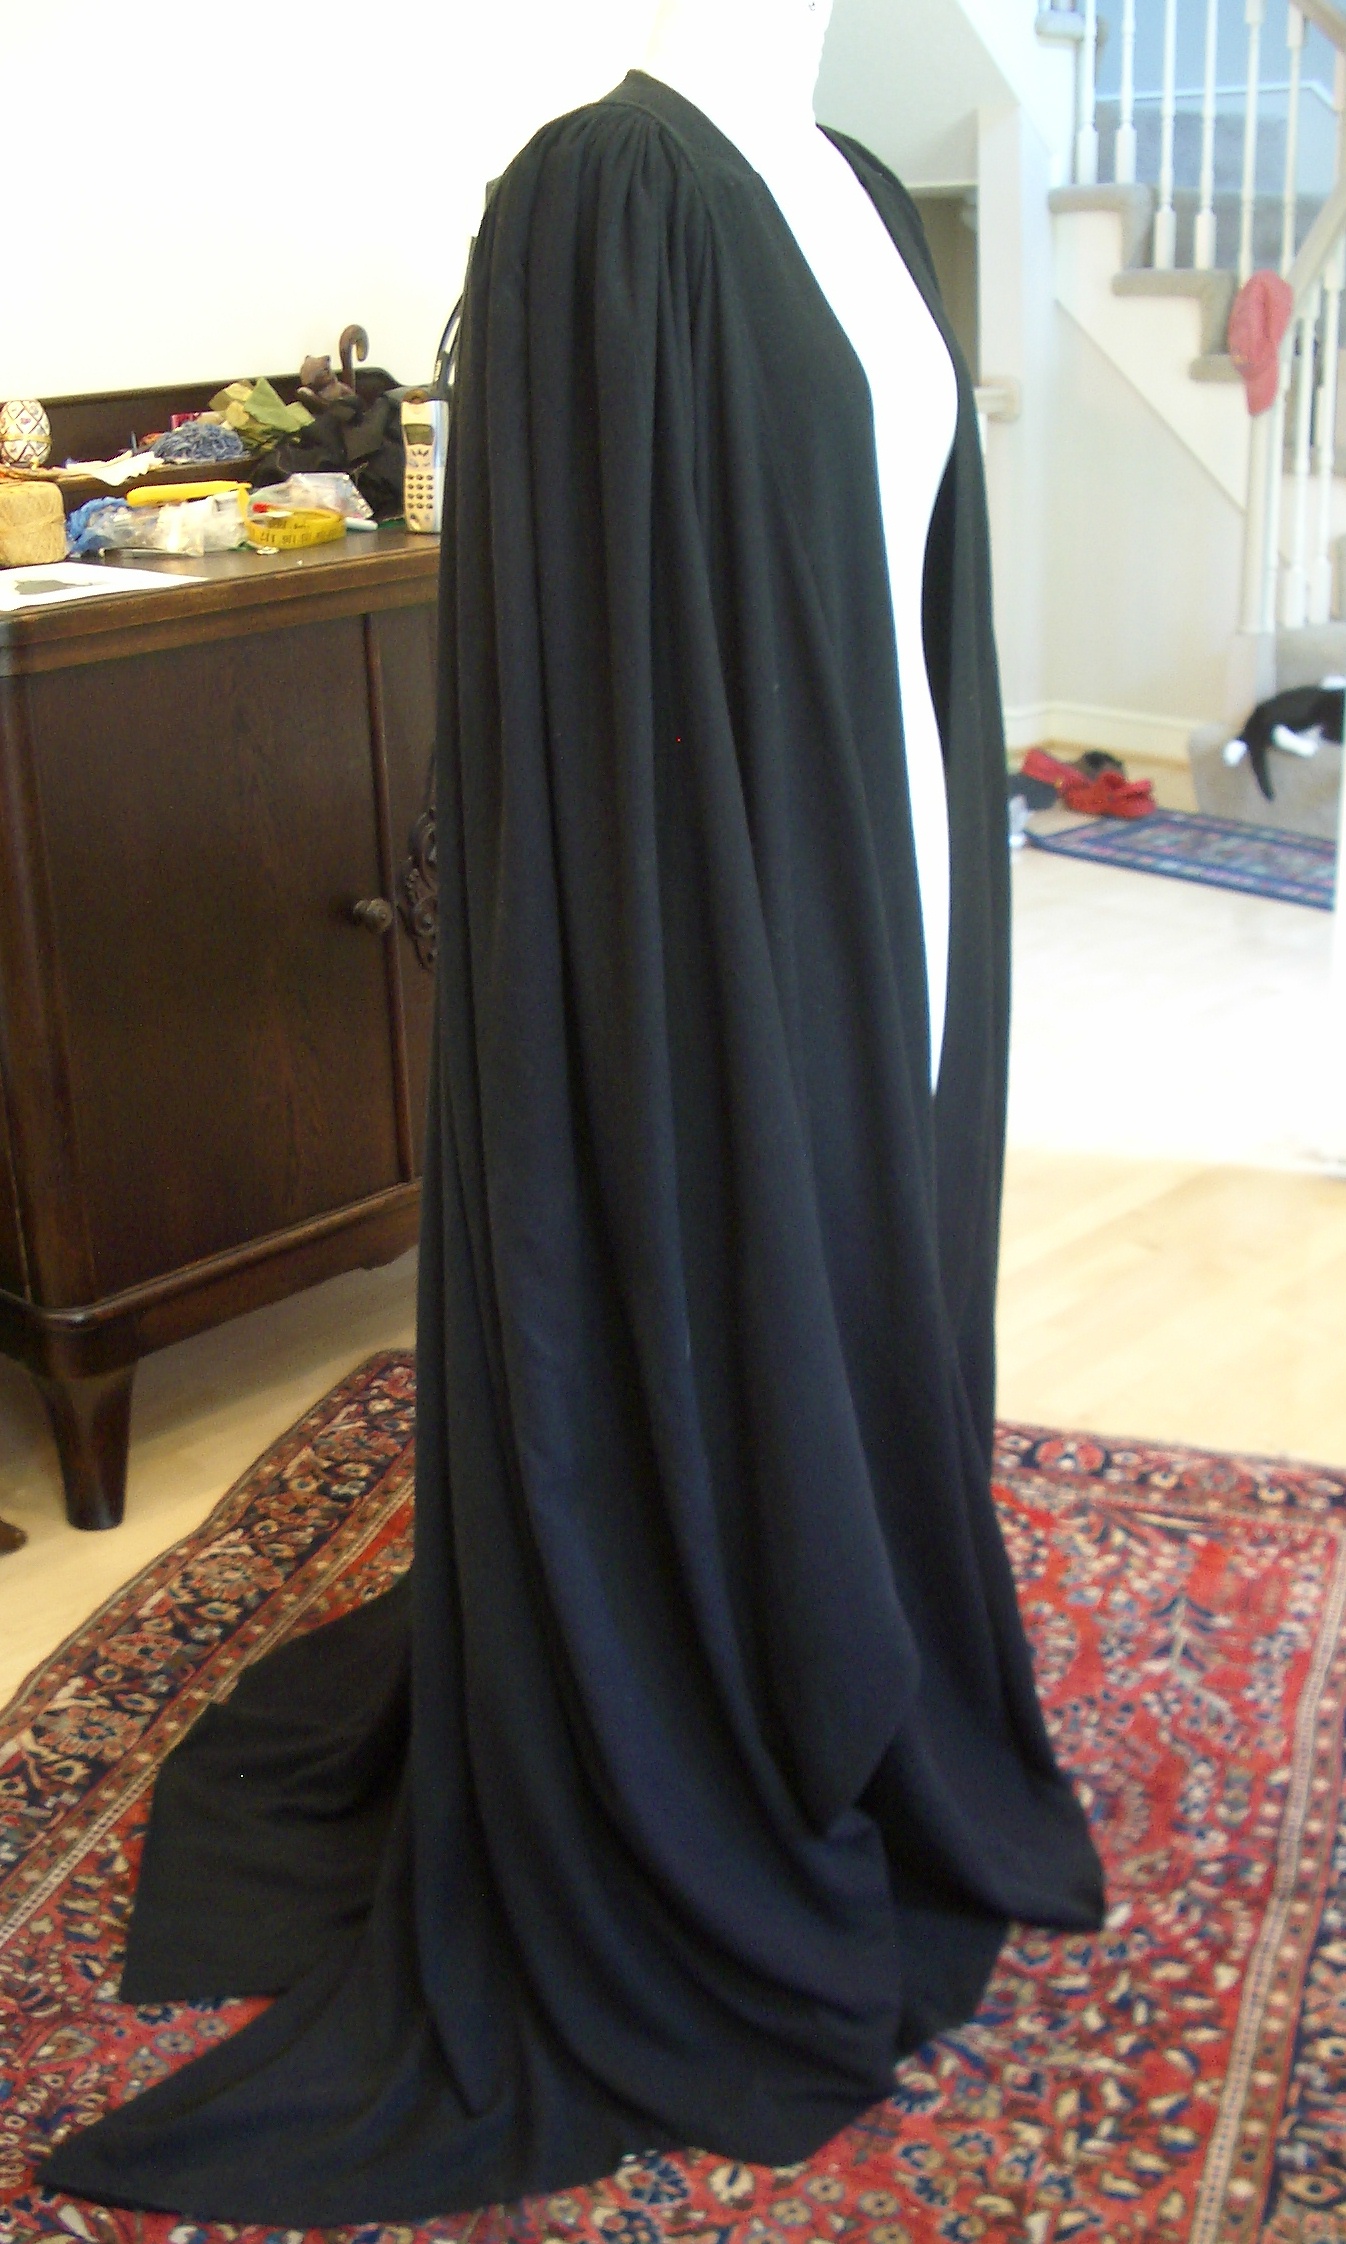
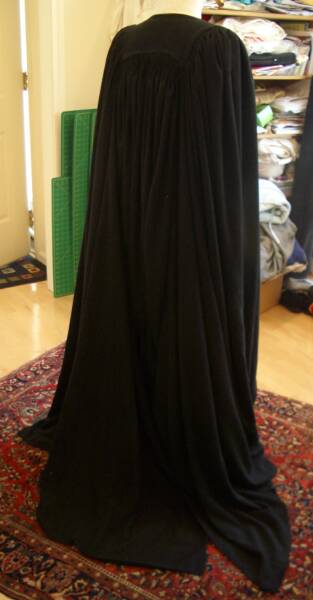
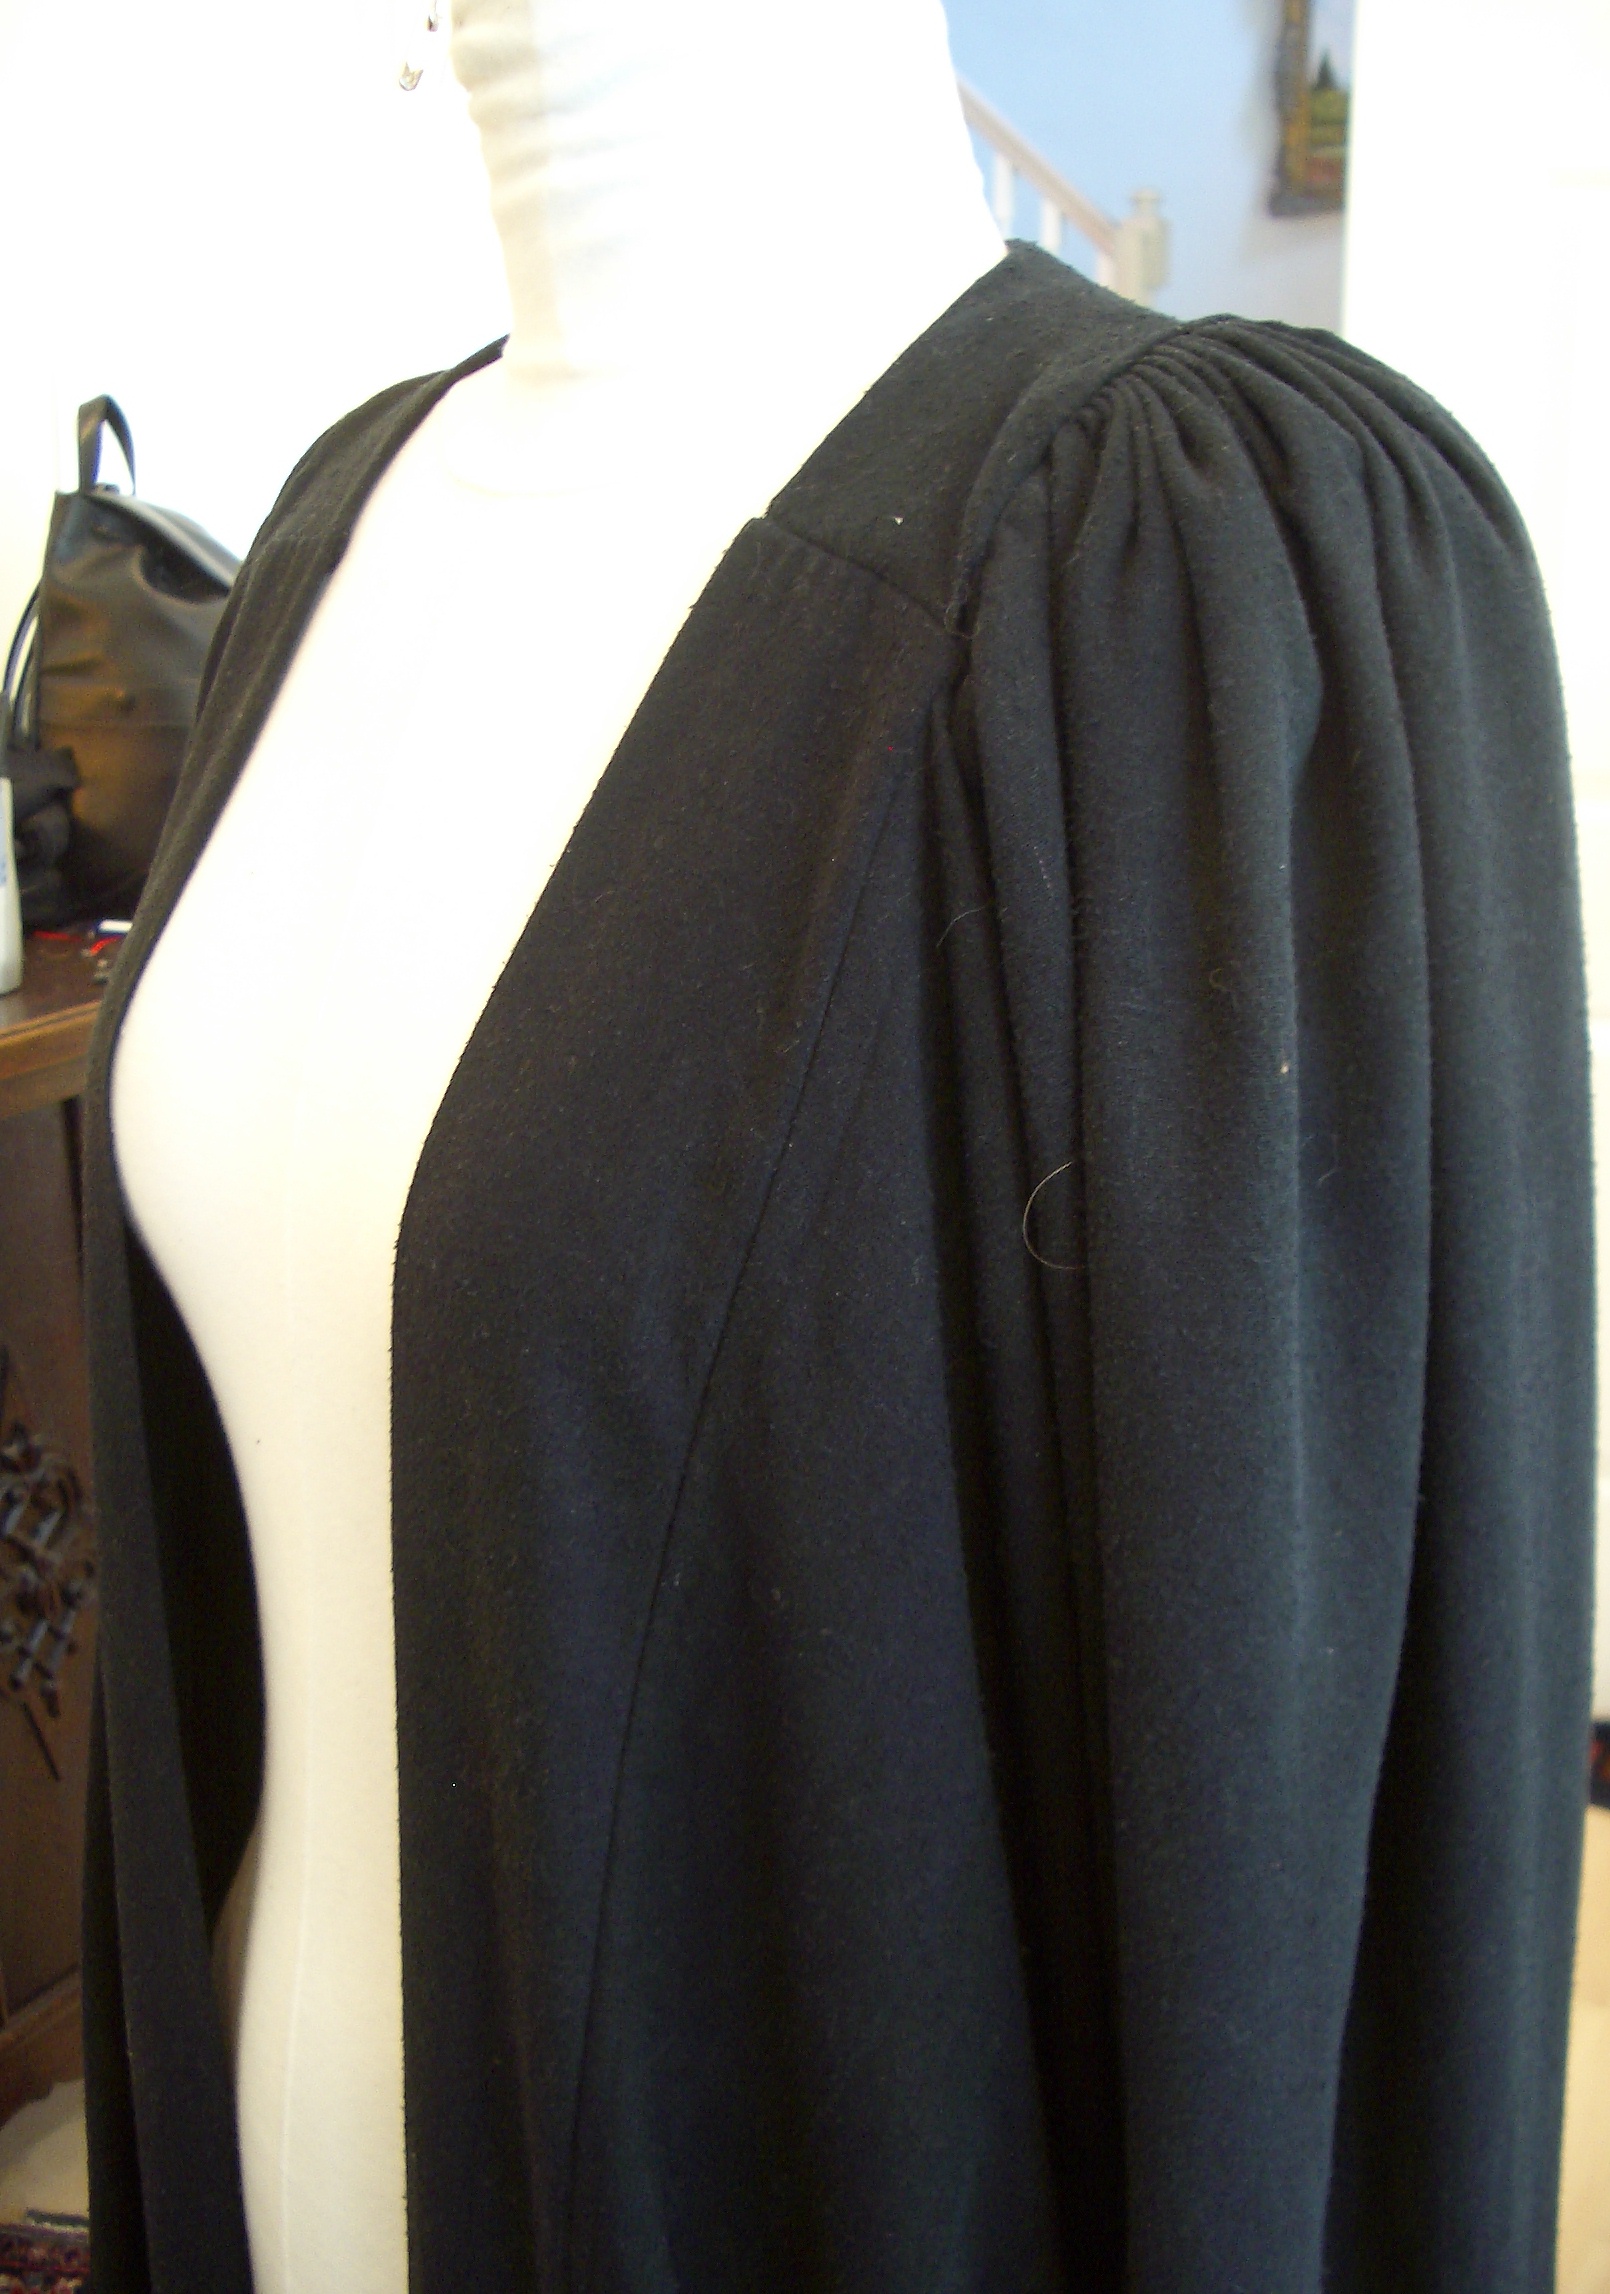
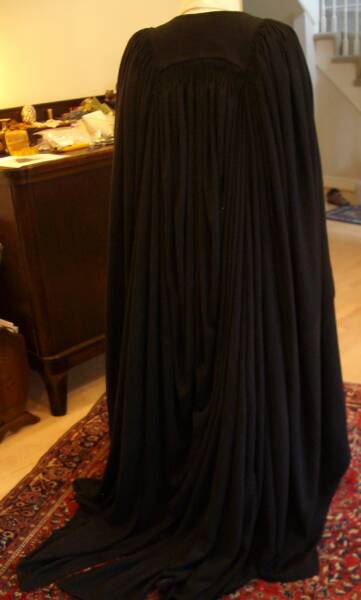
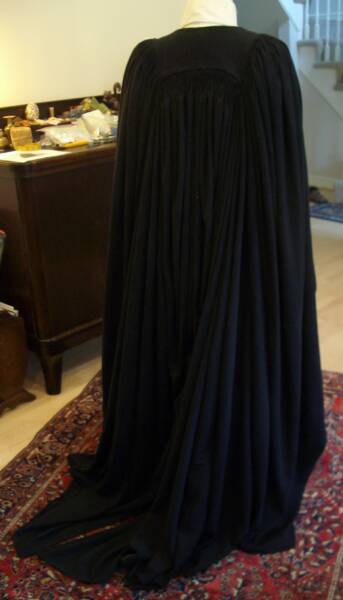
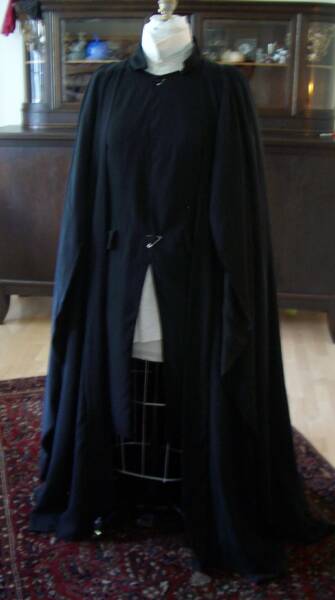
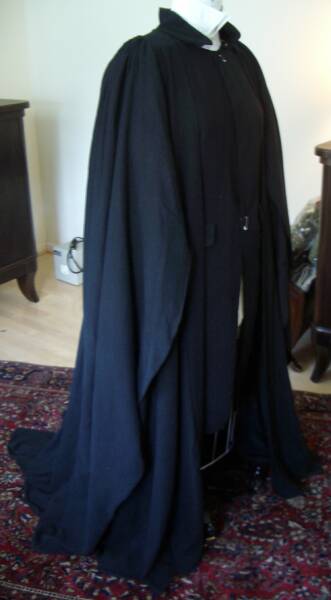
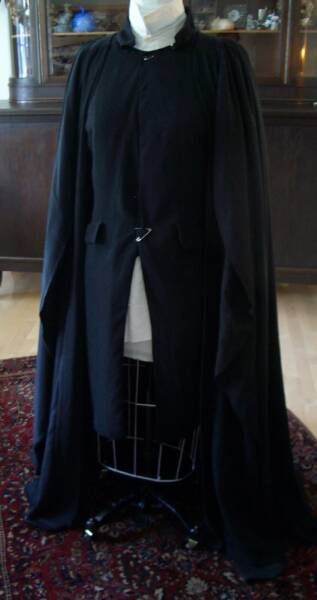
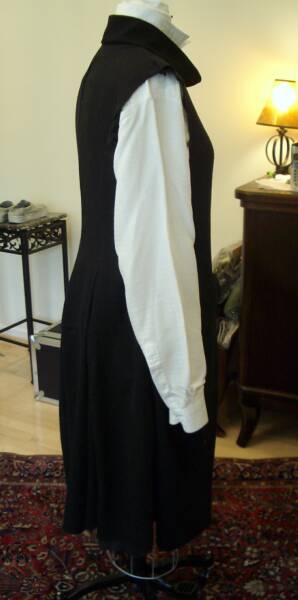
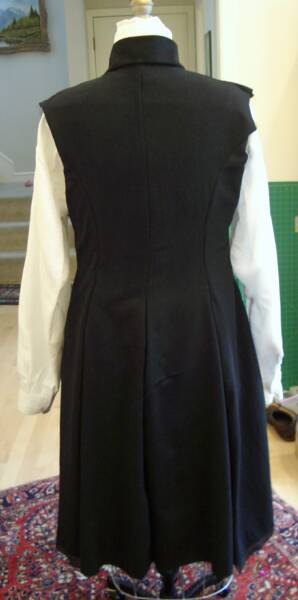
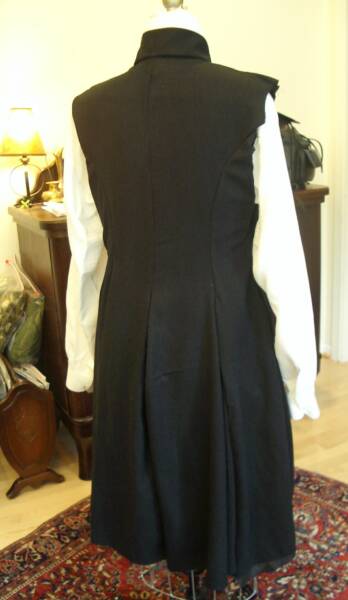
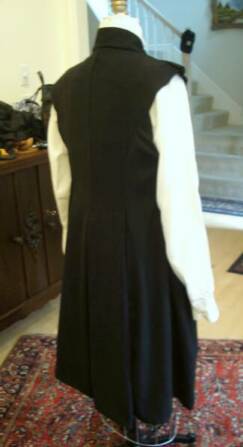
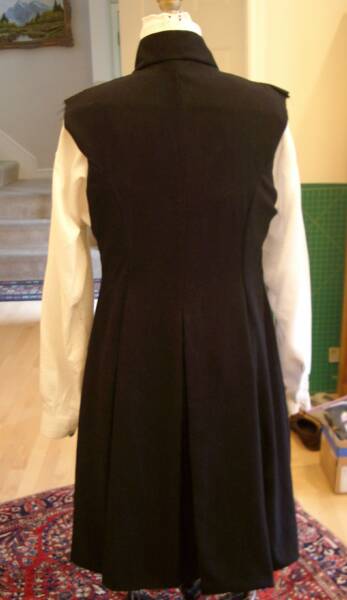
I have finished the academic robes. Here follow some photos of it.
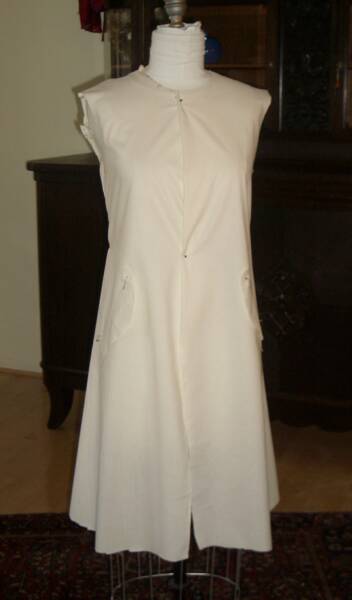
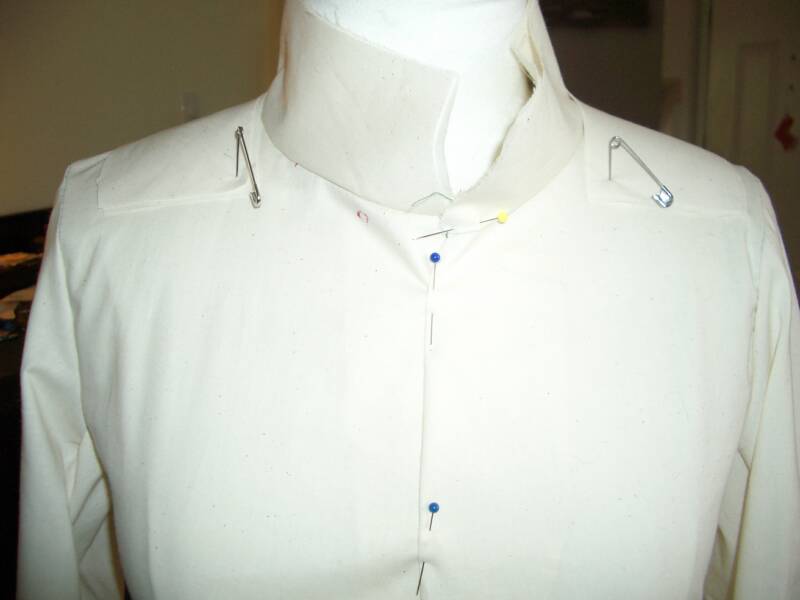
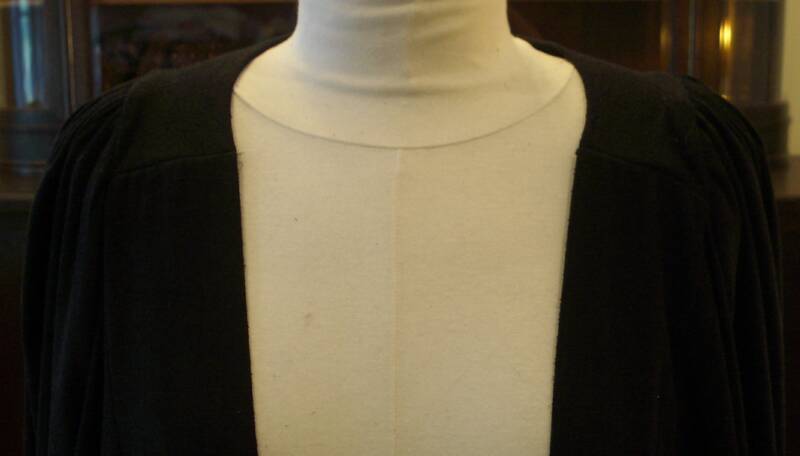
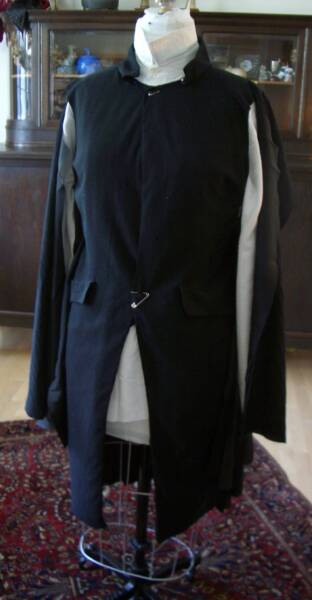
The next task is the jacket, which will also experience some changes from my muslin; mainly, altering the front closure, better placing of the pockets, and perhaps the addition of a waist seam, although I'm rather inclined to let that detail go, because it fits so well now as it is... :D
August 2, 2006:
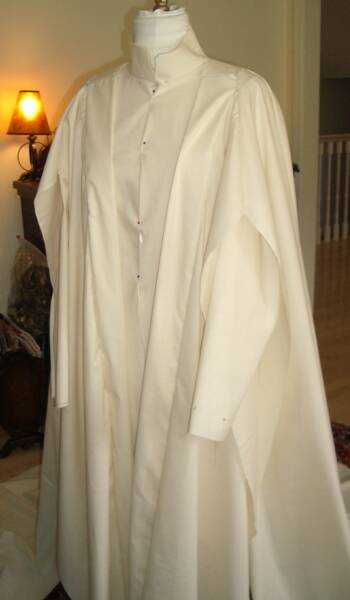
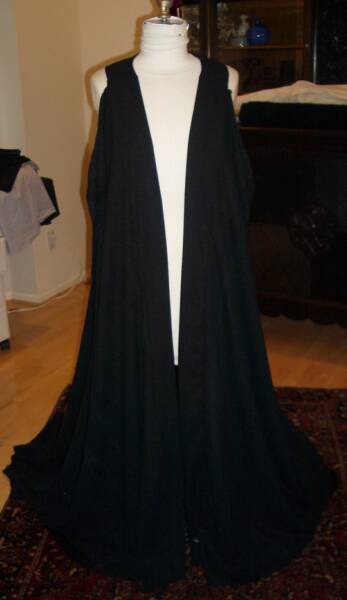
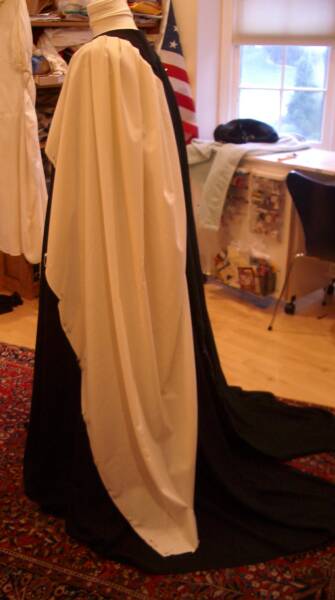
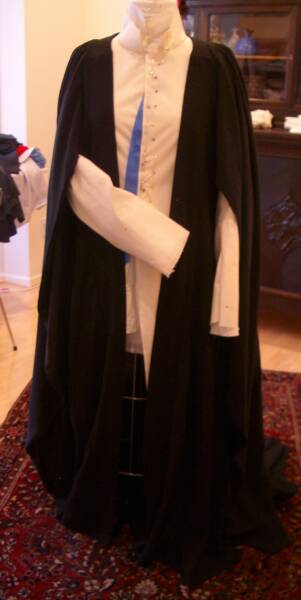
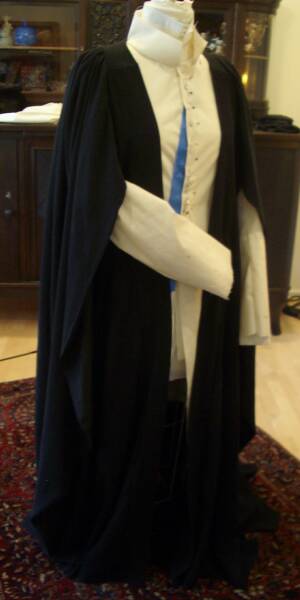
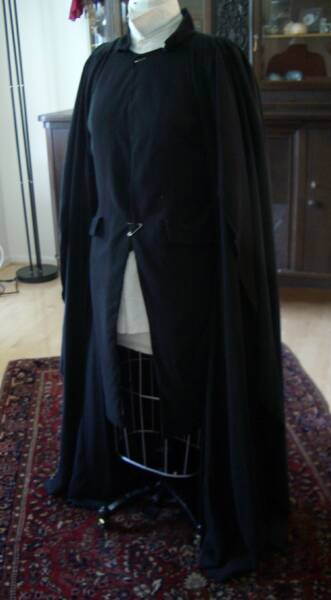
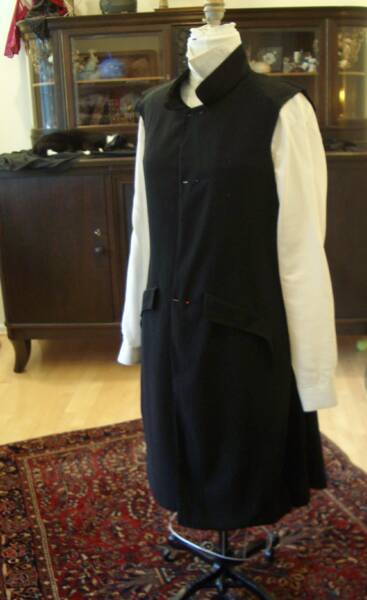
I did some adjusting on the muslin of the jacket yesterday, and today I did minor adjustments in the robes, adding two side gores giving the robes more volume in the body. Here are some photos, with the robes over the muslin of the jacket.
August 15, 2006:
Several things have happened of late. I have been requested by my very sweet and beloved friend, Logospilgrim, to create for her a set of robes like these. So, her project shall partly run along side my own. I have opened a page for her, so she can watch as I work, titled Logospilgrim's Robes, and there you can follow along, if you desire. Yesterday I placed the order for her fabric. :D
Yesterday I also cut out the lining layer of my jacket. I went very slow, because somehow I was just nervous. Tomorrow I'll cut out the outer layer, and I hope I will begin construction.
August 16, 2006:
I've completed cutting out the jacket, except for the pocket pieces I will be needing. Here you can see the pieces draping over the dress form... :D
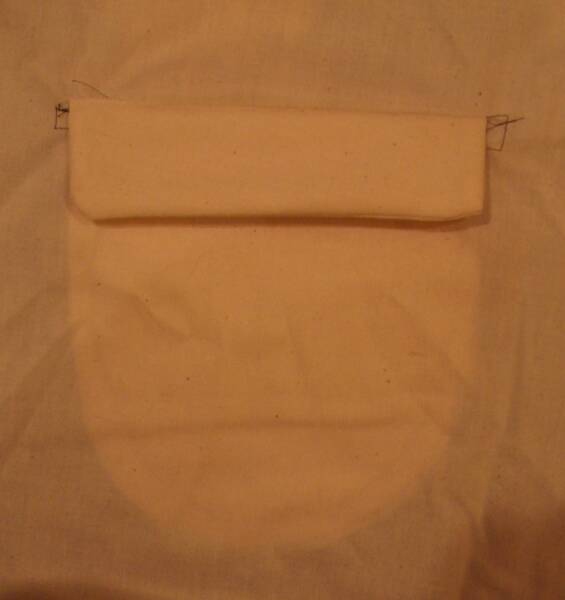
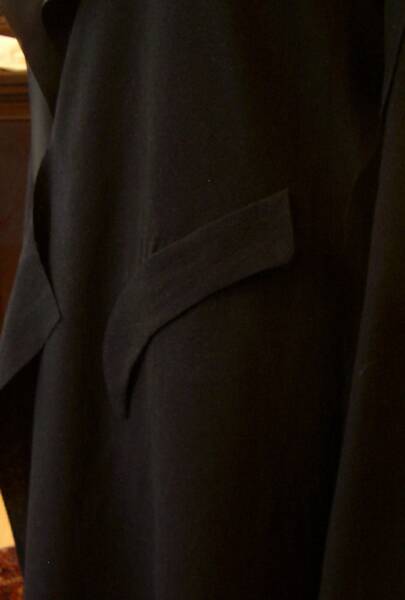
Today I also played around with the pockets... I've never done pockets, and wanted to practice; I've made two mocks, the first had two major mistakes... the slit was longer than the flap, and I sewed the pocket together the wrong way. The second one, shown below, is better. But it is not ironed, and my final version will show no stitching on the outside at either end of the flap, (and the flap is shaped differently)... I think I've figured out how to do that... :D
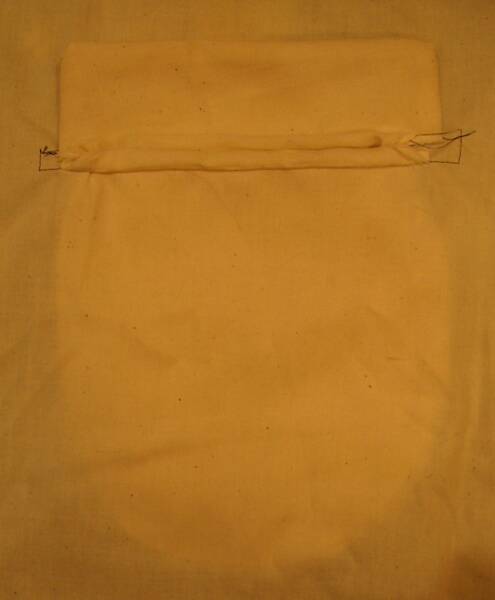
So, I went for it, and cut out the pocket lining, and the flaps, put the slit in the outer layers, and I have one pocket sewn in. Squeee!
Here is a photo:
Now, to do the other side... :D
August 18, 2006:
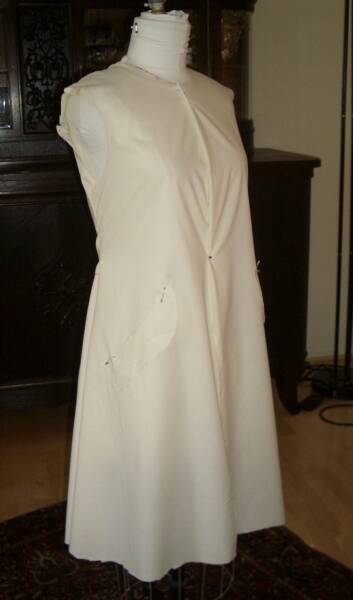
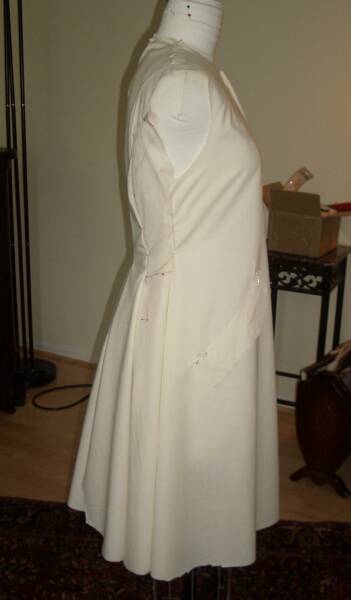
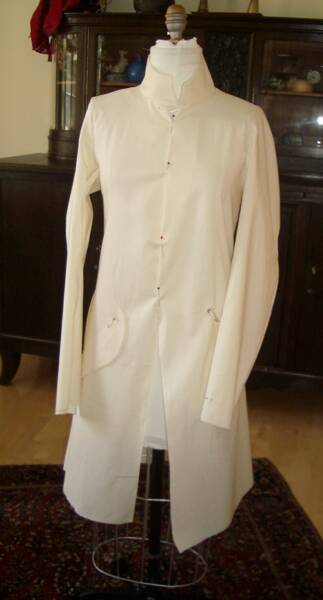
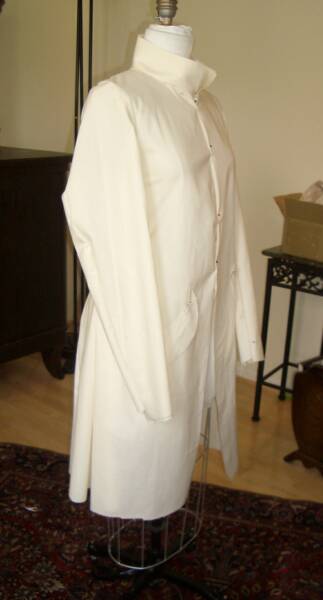
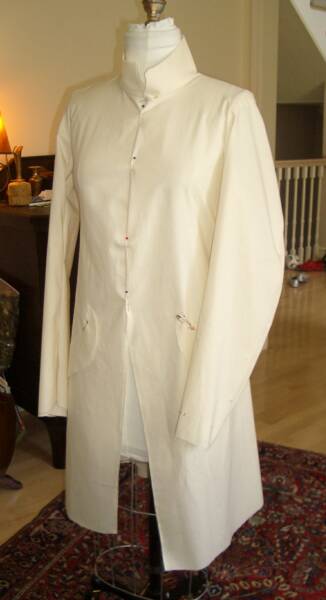
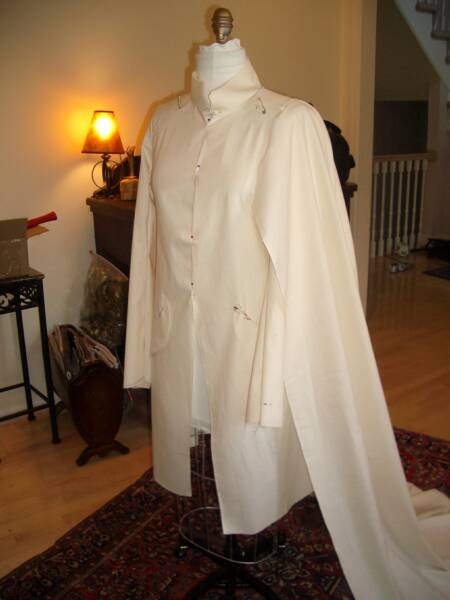
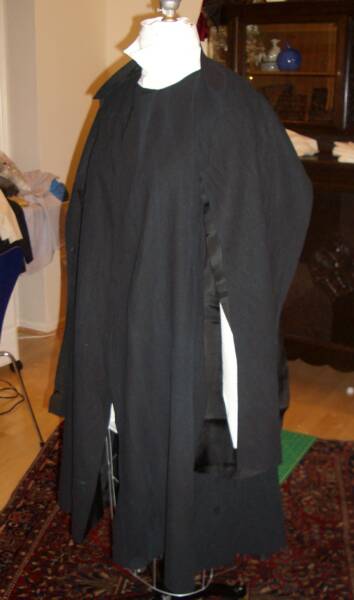
Yesterday I managed to get both the pockets in, and started putting together the body of the jacket. I stopped at 2:30am this-morning, because I had to sleep. I would have liked to keep going... but things as they are, sleep is necessary. ;)
I took a few photos of how it looks now, after the work from yesterday. Sorry, I have the unsewn sleeves pinned in; so it will distract from seeing the whole thing clearly, but I want to leave them there, so I don't get pieces mixed up. Leaving the pieces pinned on the dress form helps me when I start sewing. If I manage to pay attention, I get the bag-lined sections sewn in the right way. (I missed one of those early on, and had to spend a bit of time with the seam ripper...;)
There are also some photos of the robes over the jacket, to see the developing effect...
I am wondering if I will make a longer piece for the collar, or if this is sufficient. It is currently just pinned there. Also, the right side seam is just pinned in, as that's the time I gave up in the morning and went to bed. So, there are more lumps on the right, as a result...
Here are the photos:
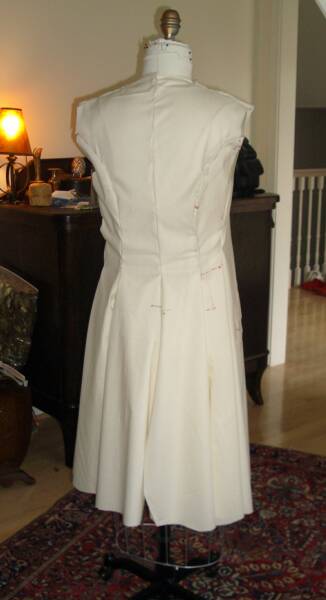
August 19, 2006:
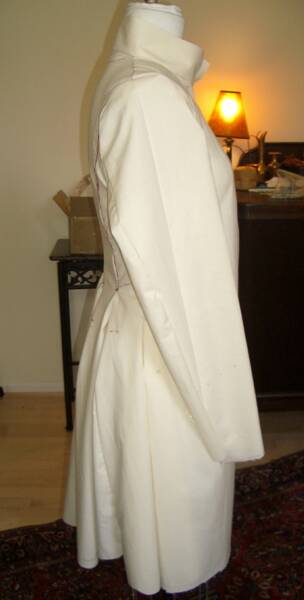
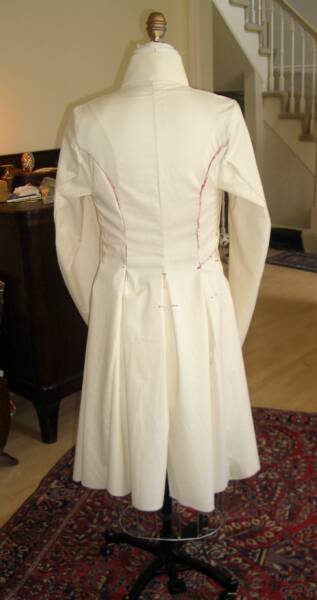
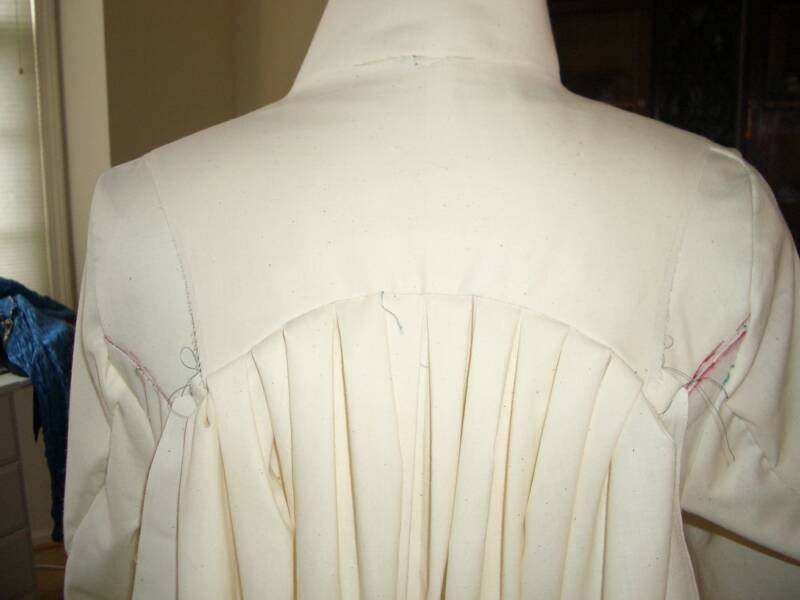
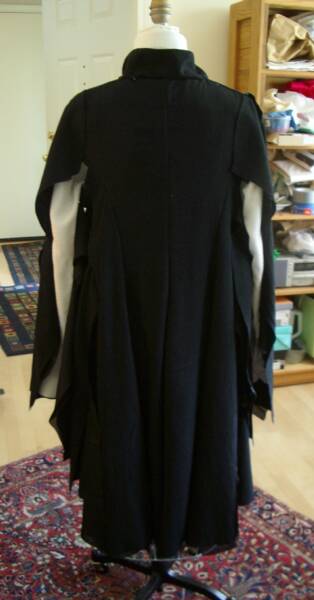
I have been working on the pleats of the jacket, and have a few photos of the progress.
I had the jacket a little crooked on the dress form, so the center back seam isn't in the center... o.O
But anyways.
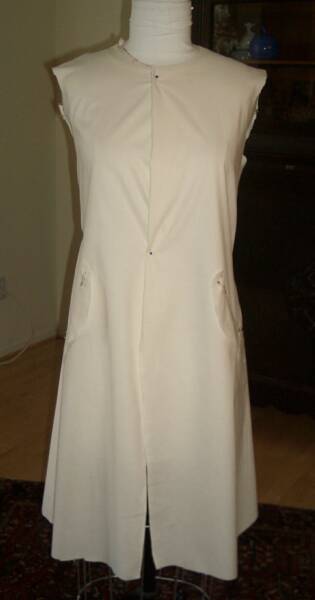
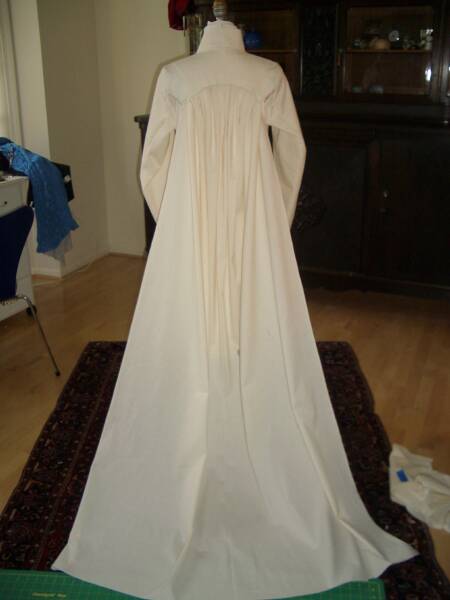
I need to press it.
Here; now it has been hemmed and pressed. Next will be putting in the sleeves.