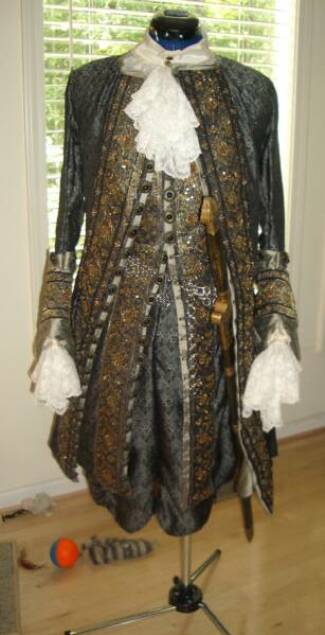
Julien's 18th Century Blue Ensemble Construction Page...
Welcome to Yvette's
a costume site
June 11, 2009:
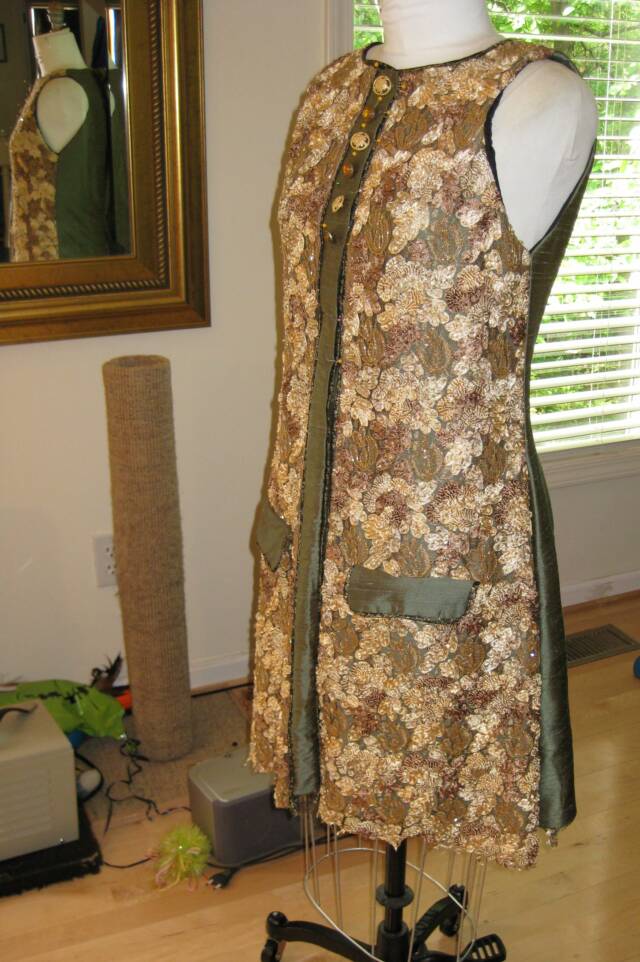
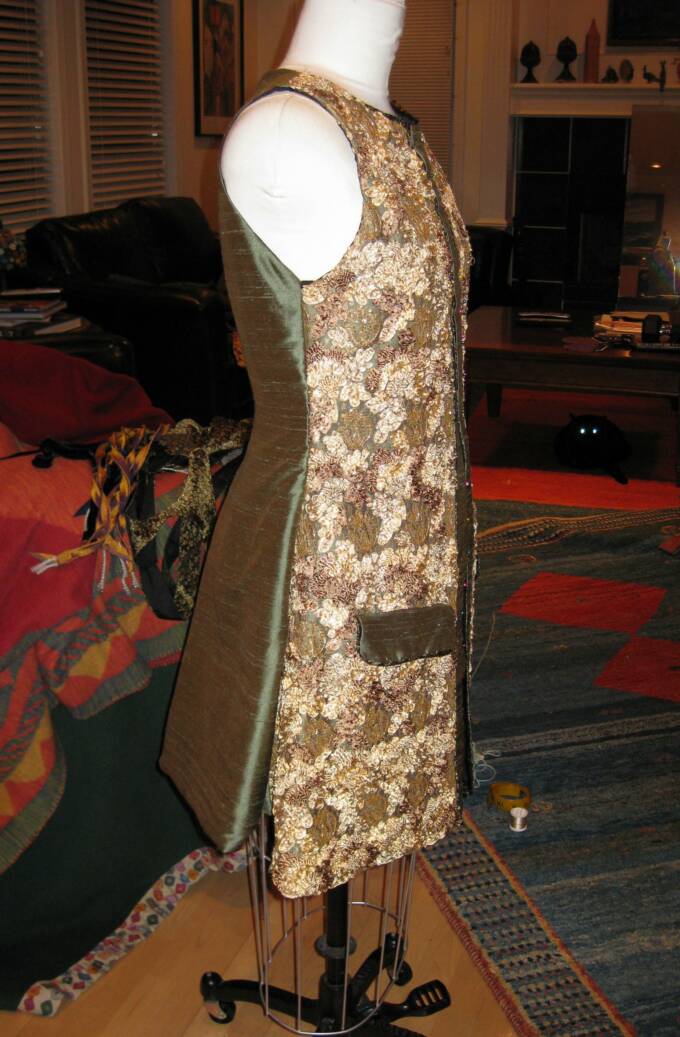
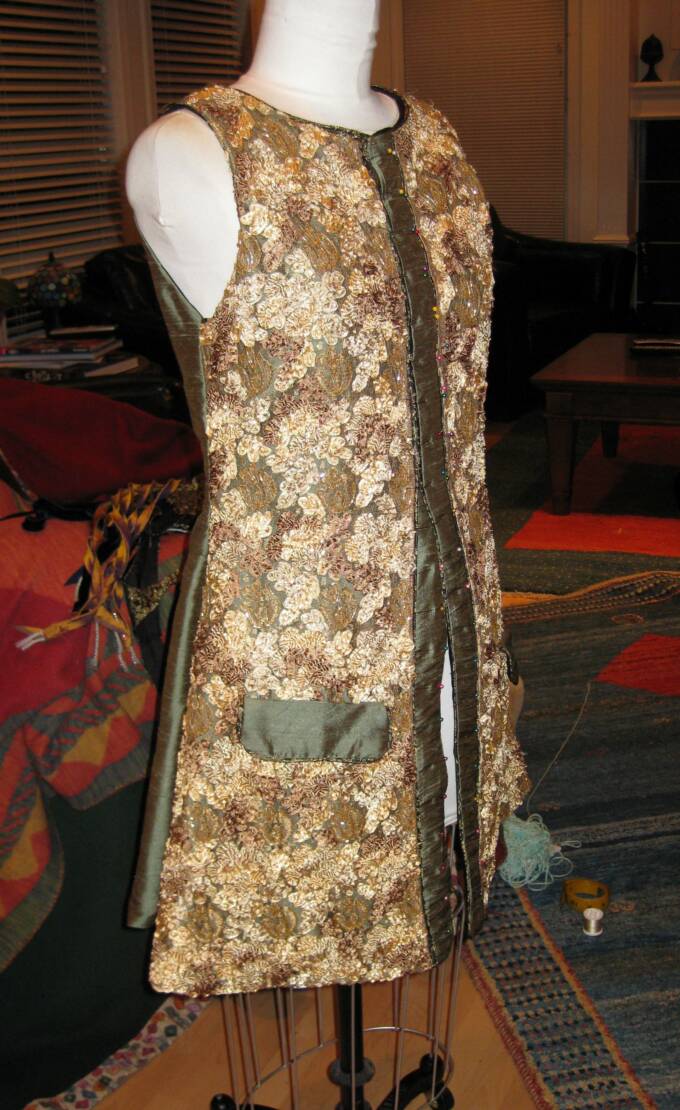
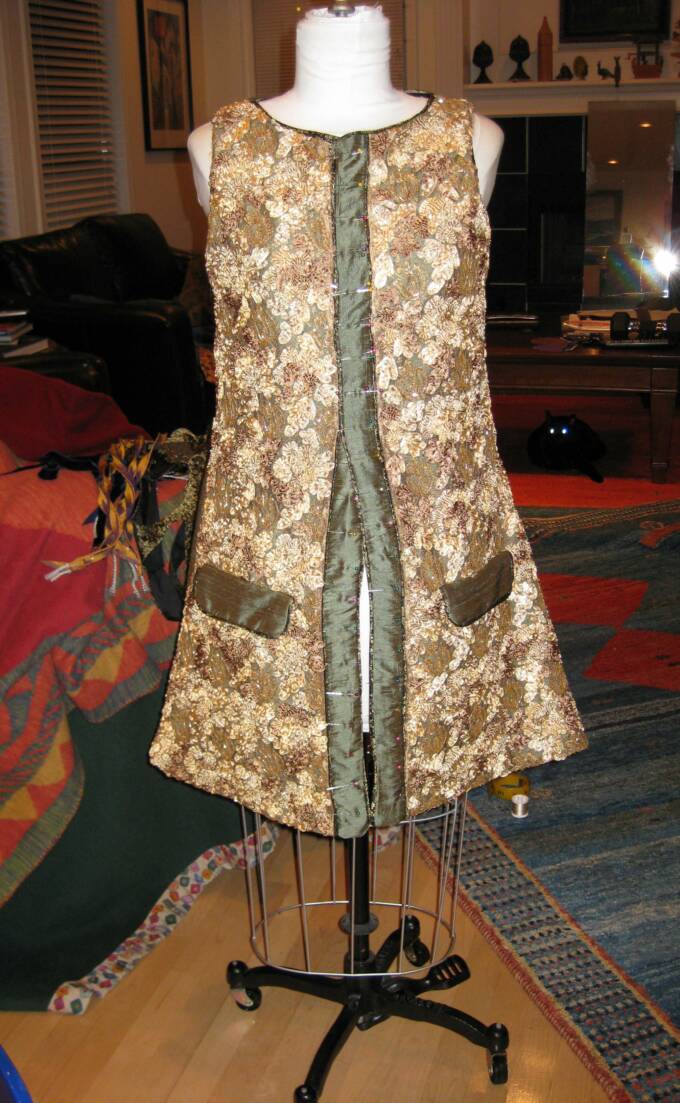
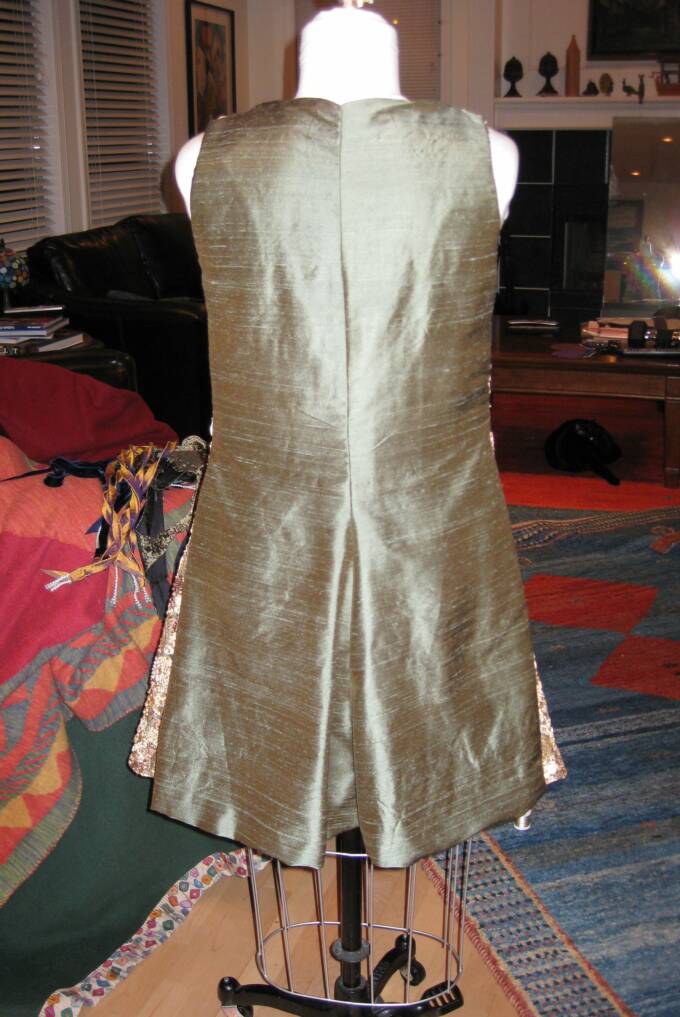
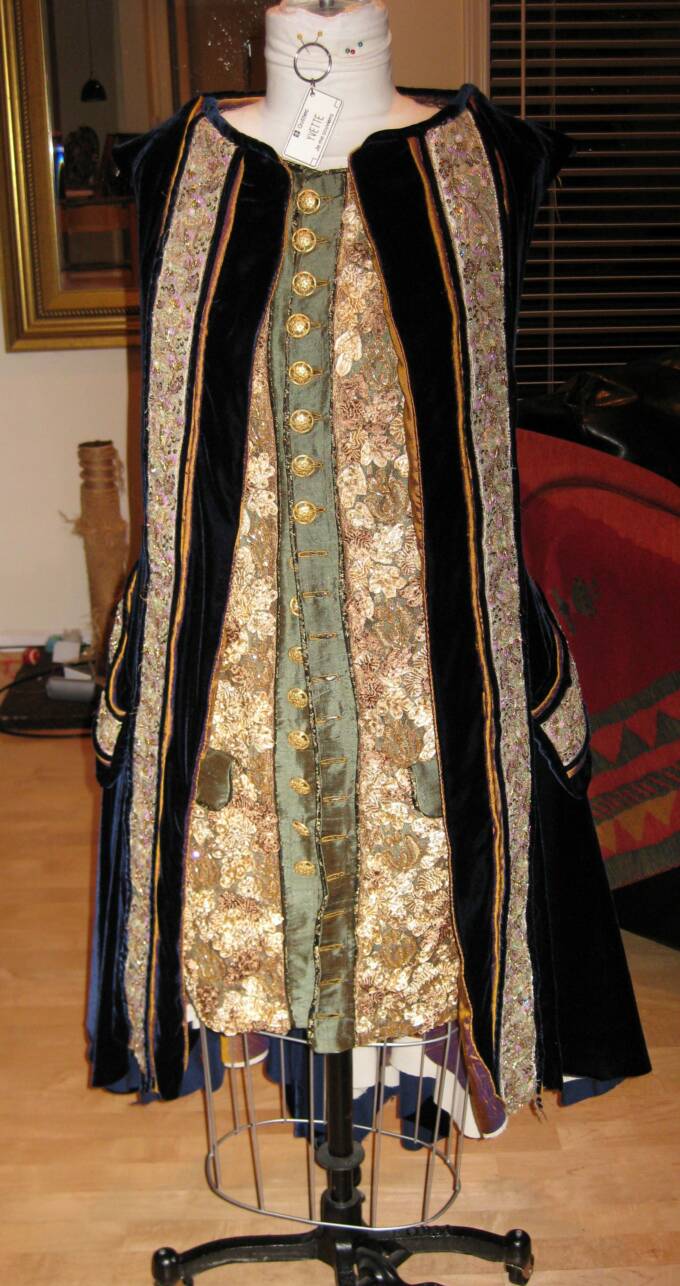
Last year I worked on Julien's Green Ensemble, and started a waistcoat that was put on hold. I documented the decision on Julien's Green's construction page, as I decided it did not go so well with the brocade in the coat in that ensemble. I've come back to it, and am getting started on making a new coat. This will be Julien's Blue Ensemble.
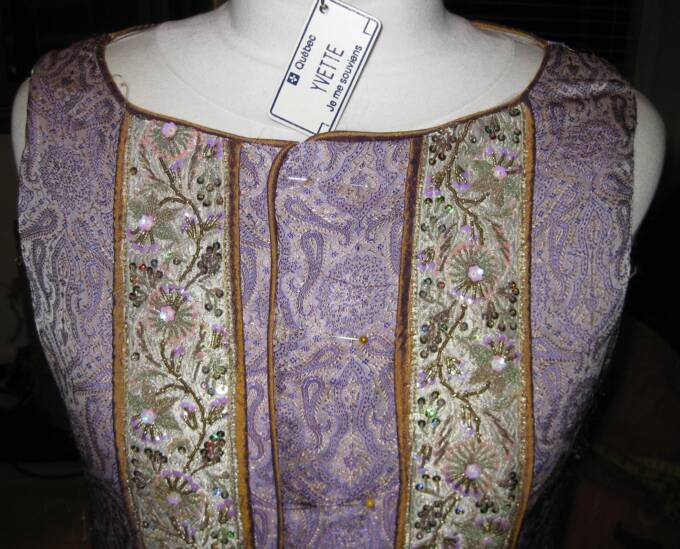
Here's a reminder of what that waistcoat looked like, along with progress of how it's looking now, as I've been working on it:
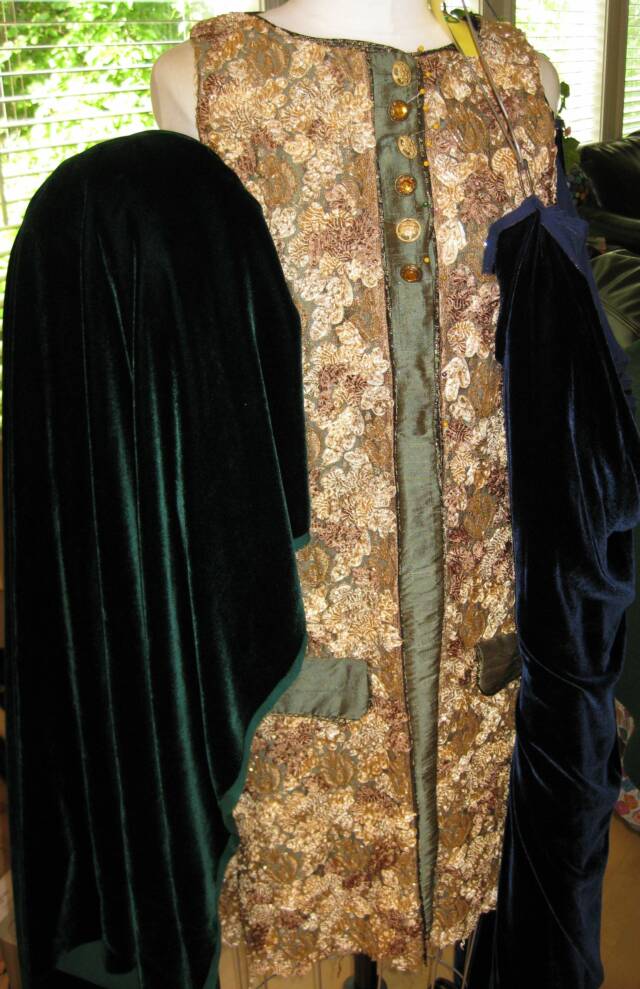
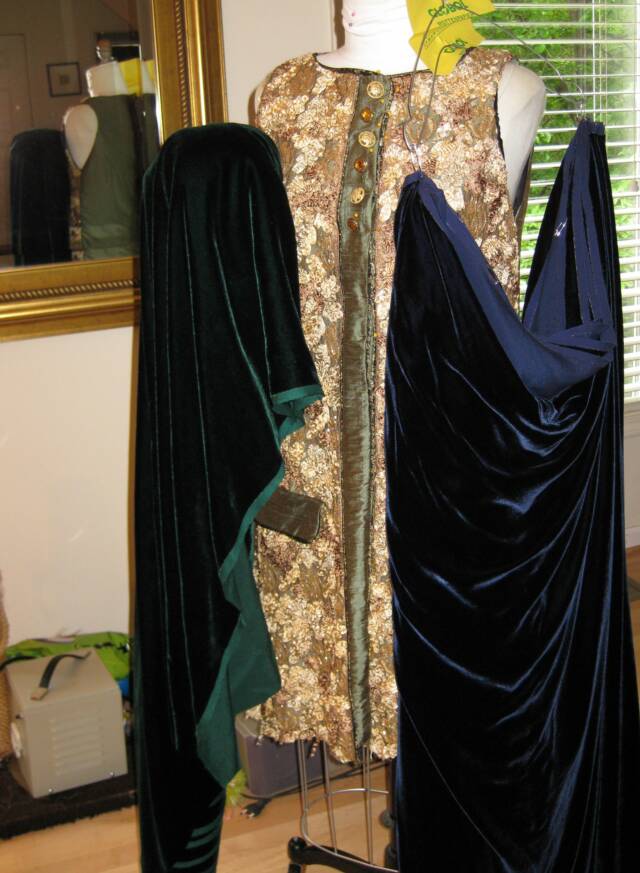
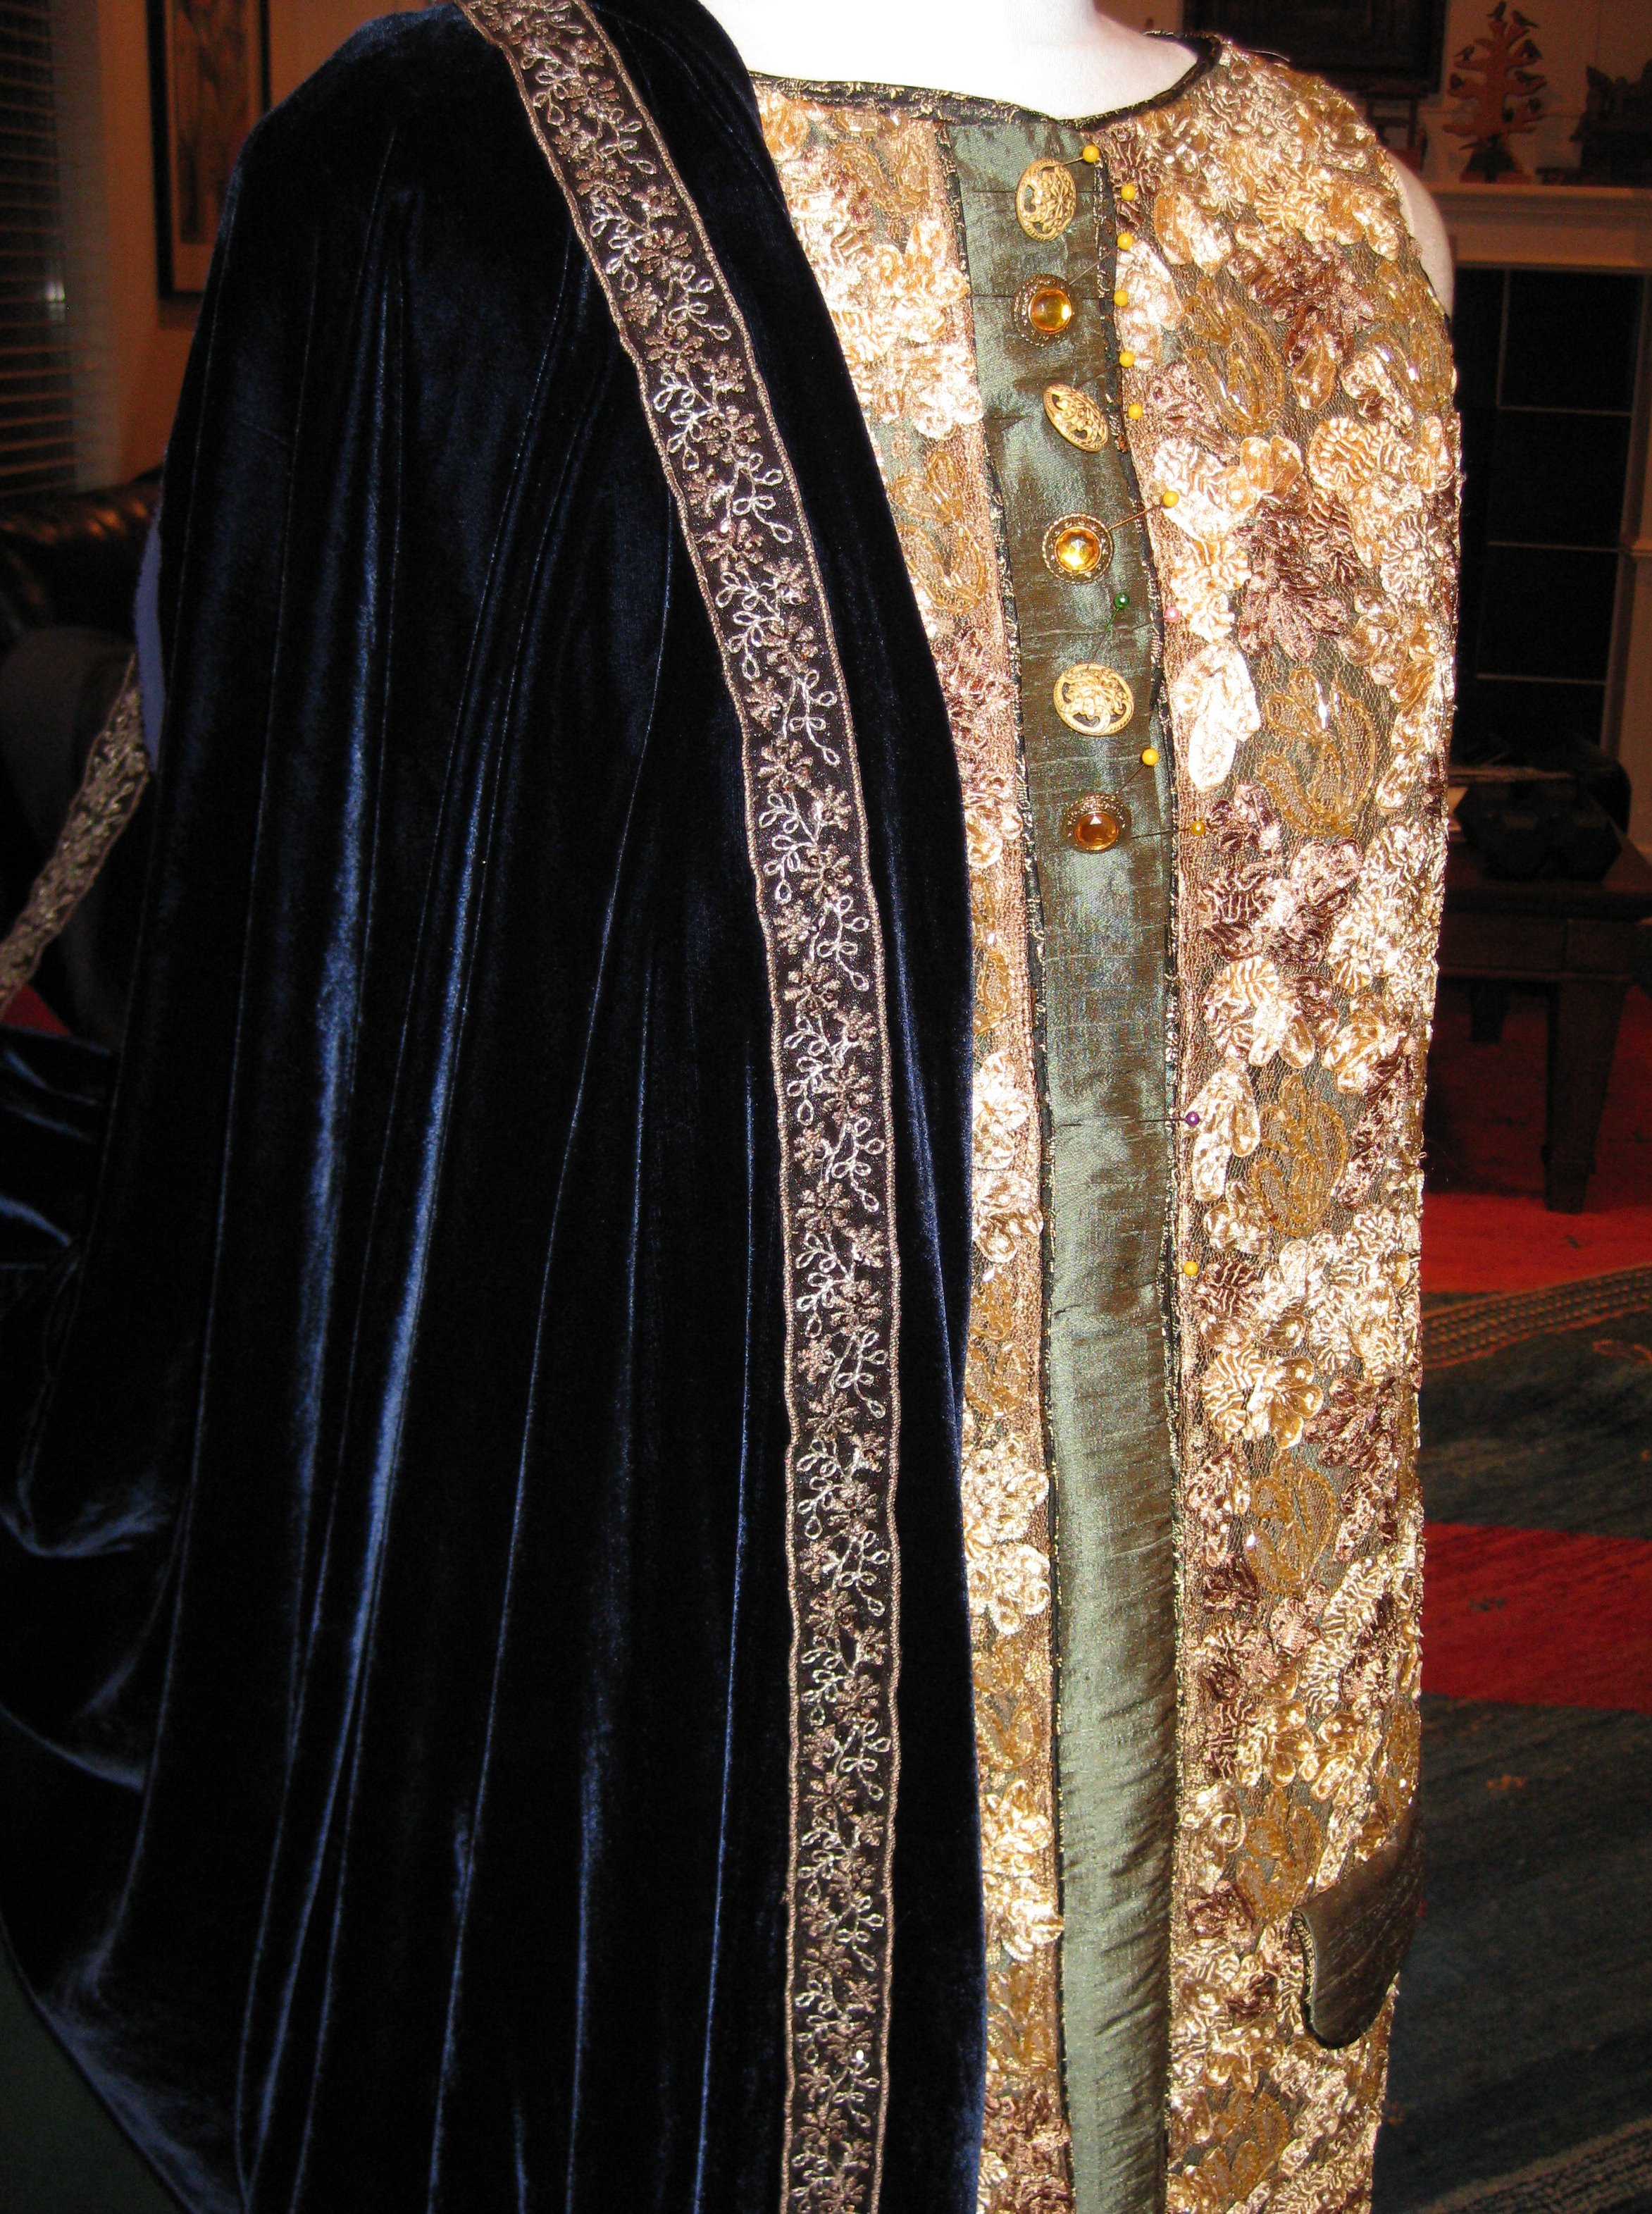
I didn't come to the decision on a blue coat right away. All I knew was that I wanted it to be a solid velvet, and I have several here at home to choose from. At the same time, I was trying to make a choice for the buttons in the gold waistcoat. The choices:
I discarded the idea of brown right away. I like the green, but it's too obvious, so I chose the blue. And I chose the jeweled buttons for the gold waistcoat. Here's a close up of the button choices:
Deciding how to trim the coat was the next step. This trim was the final contender...
The trim is very pretty on the blue, but it takes away from the impact somehow.
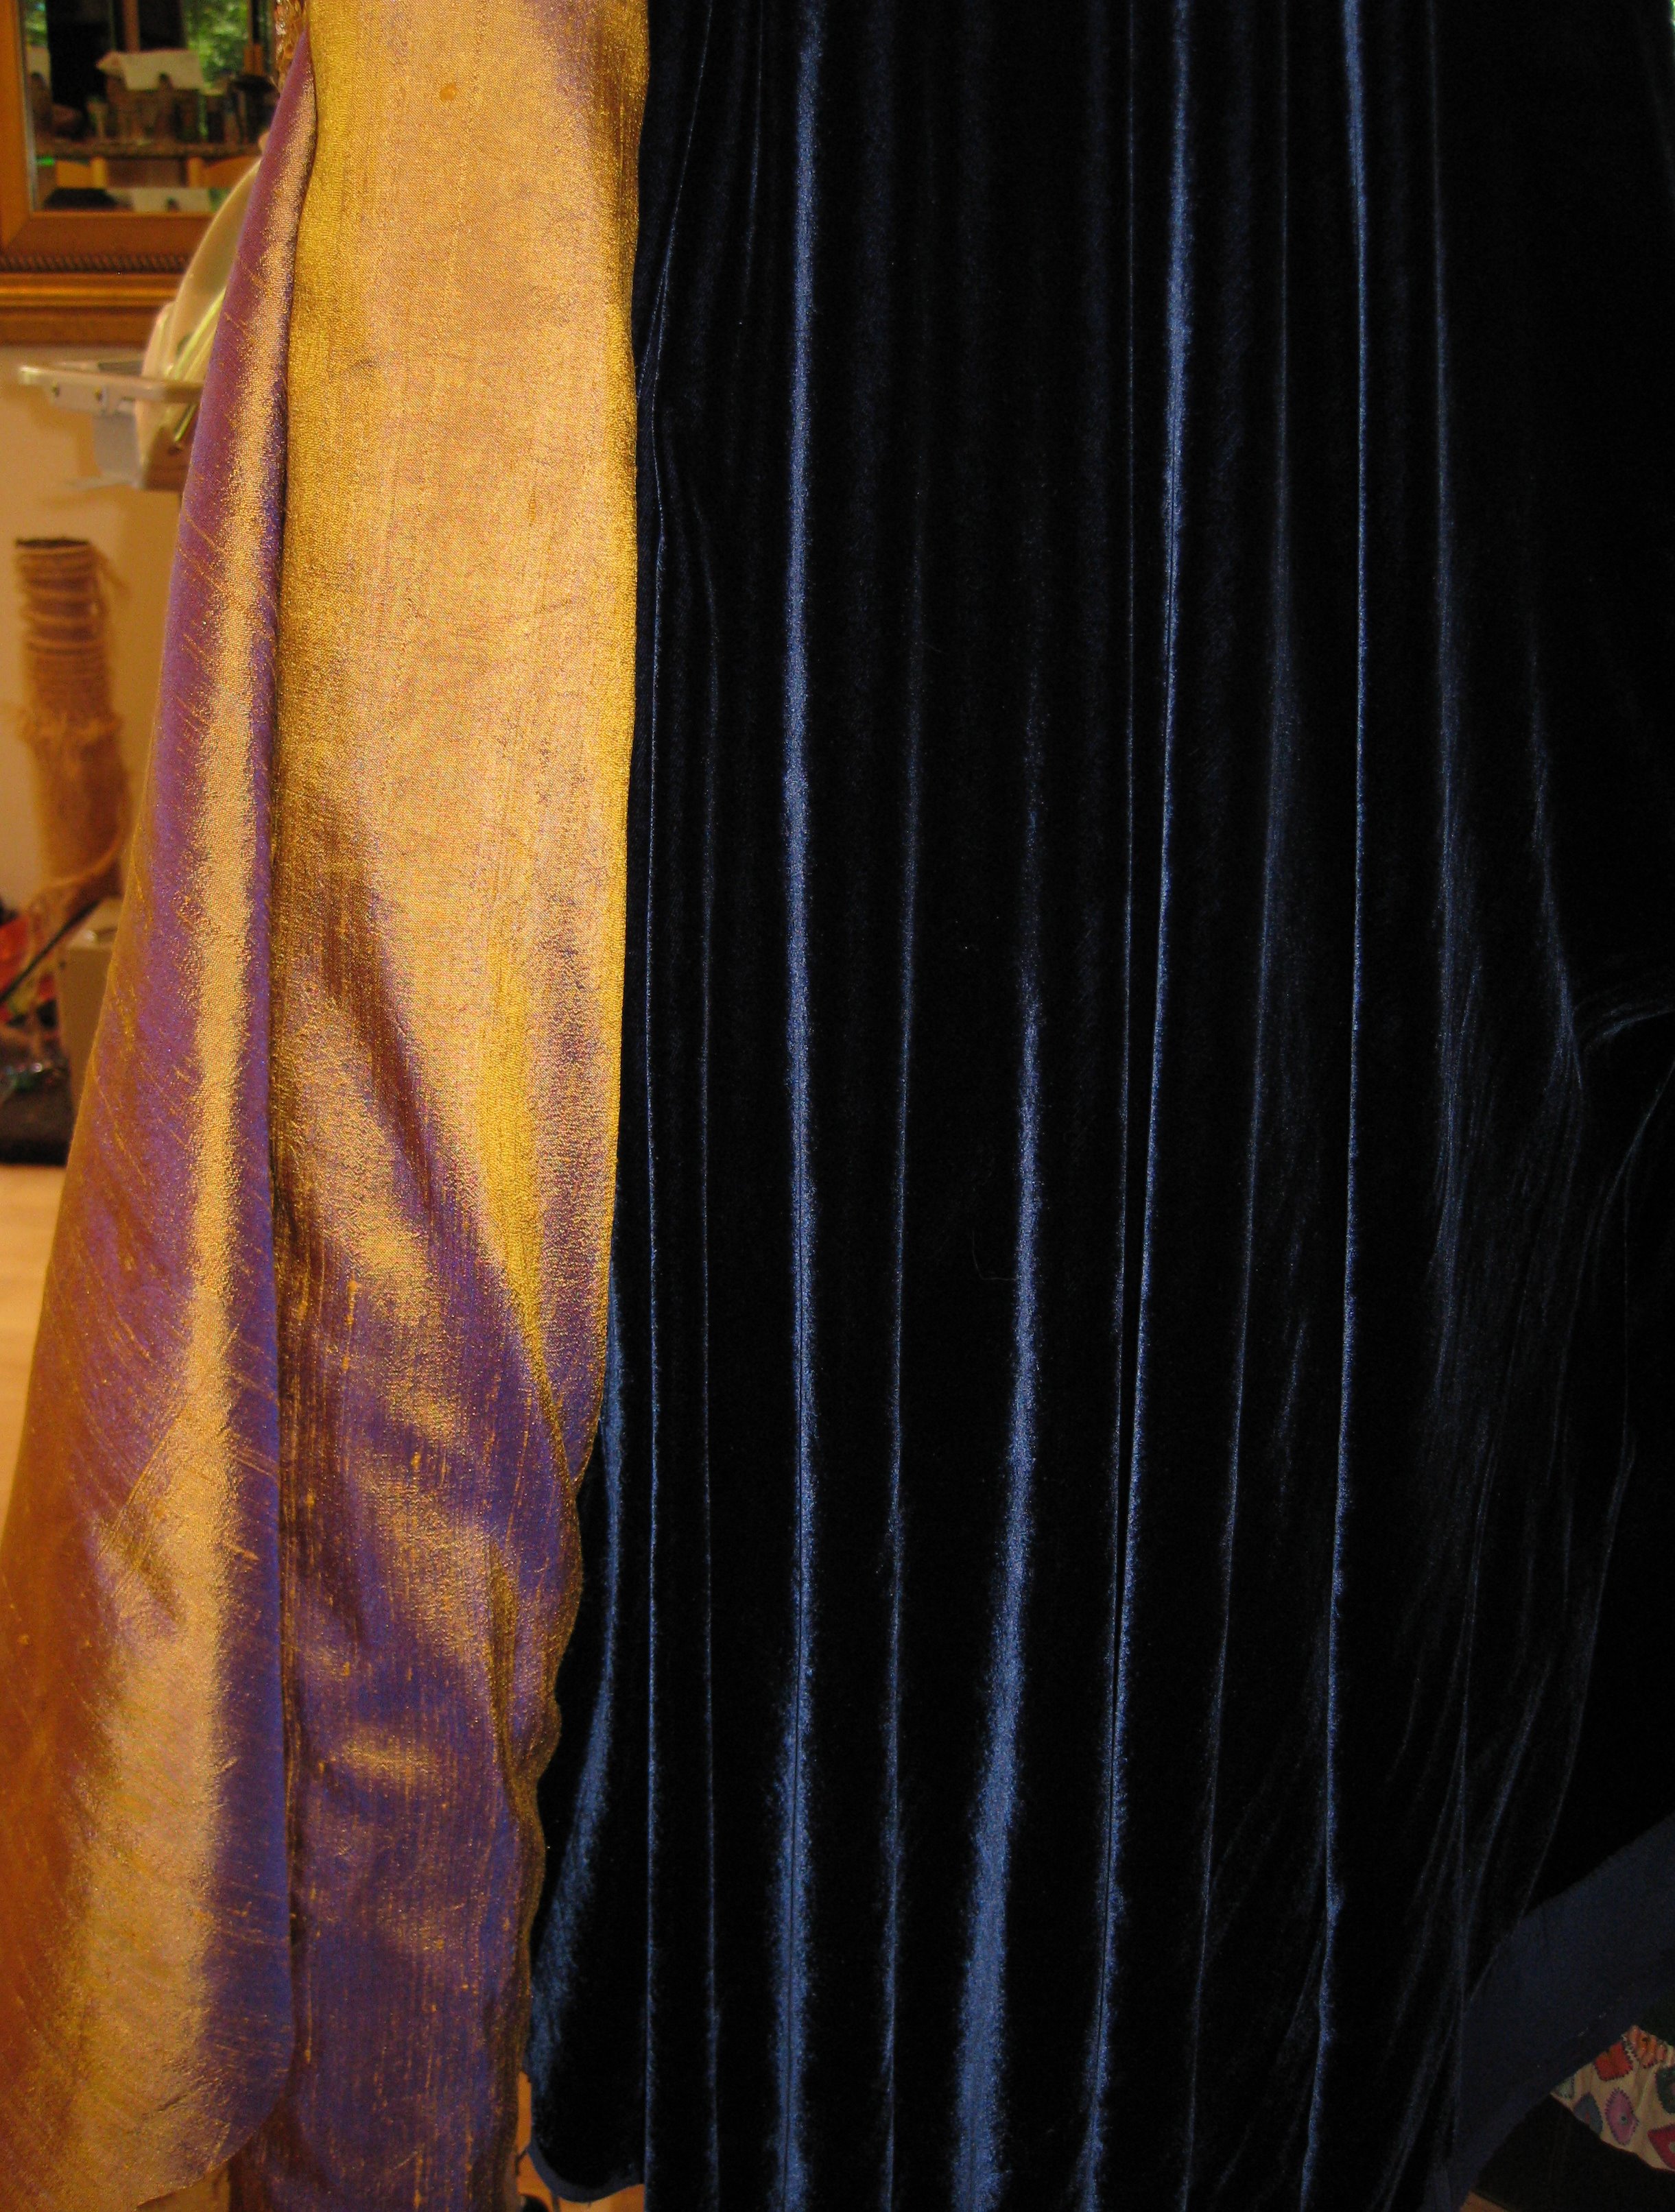
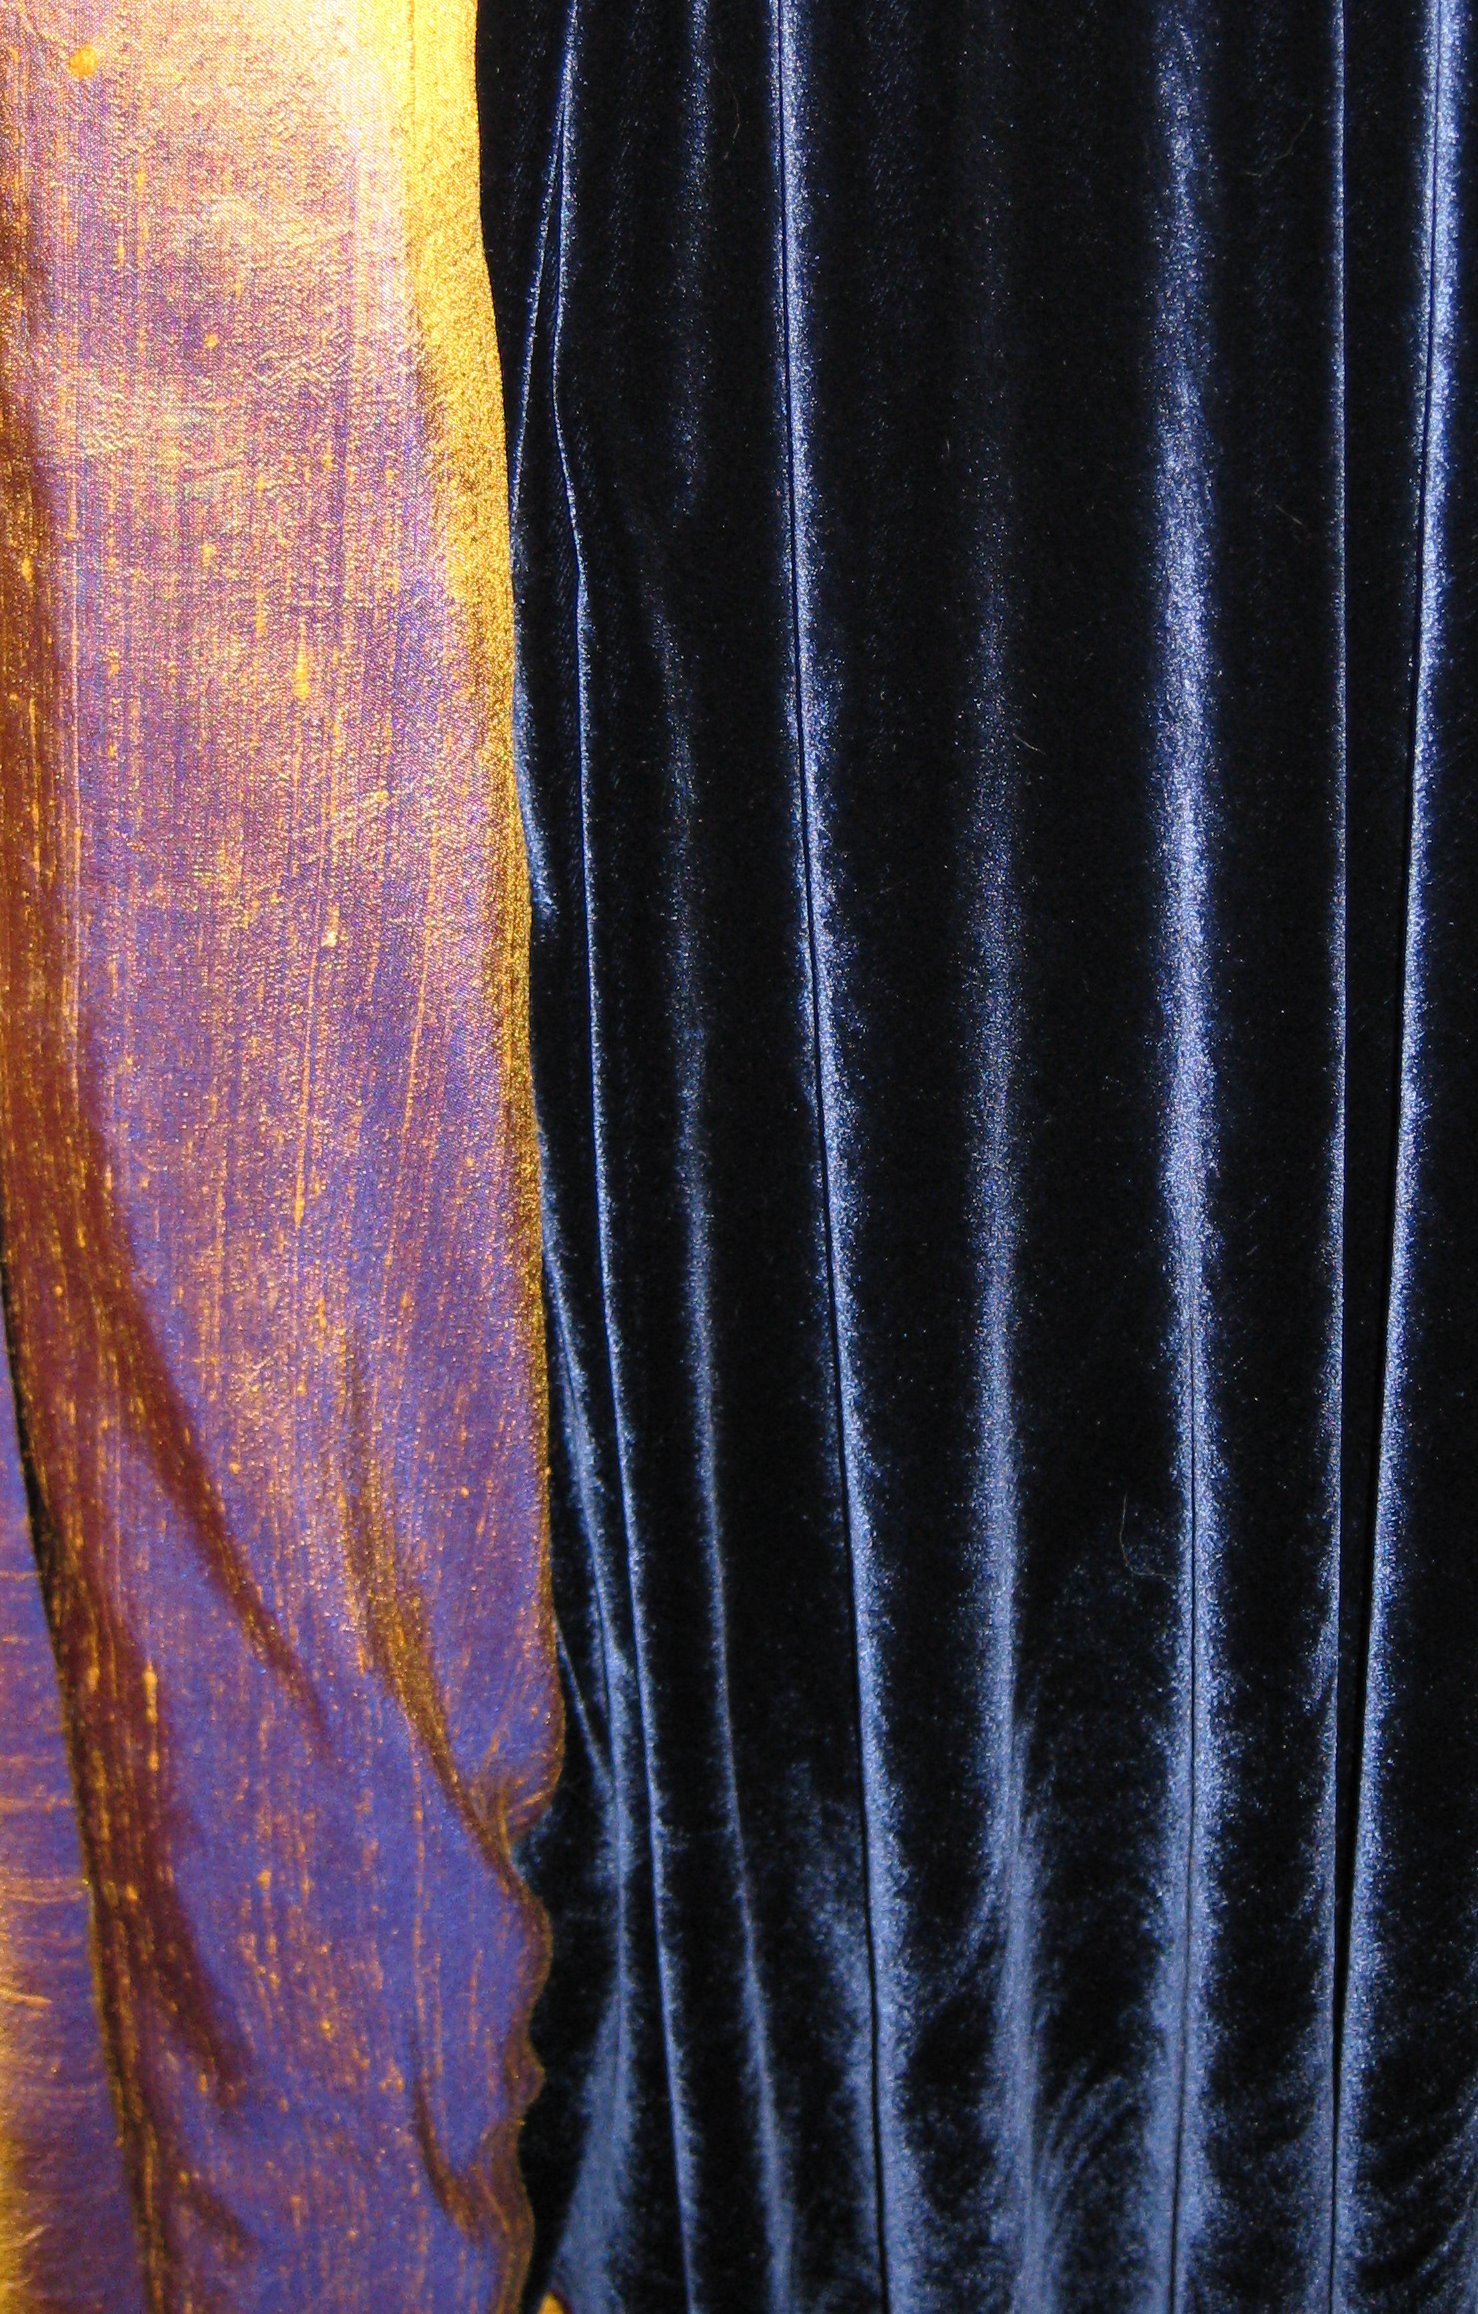
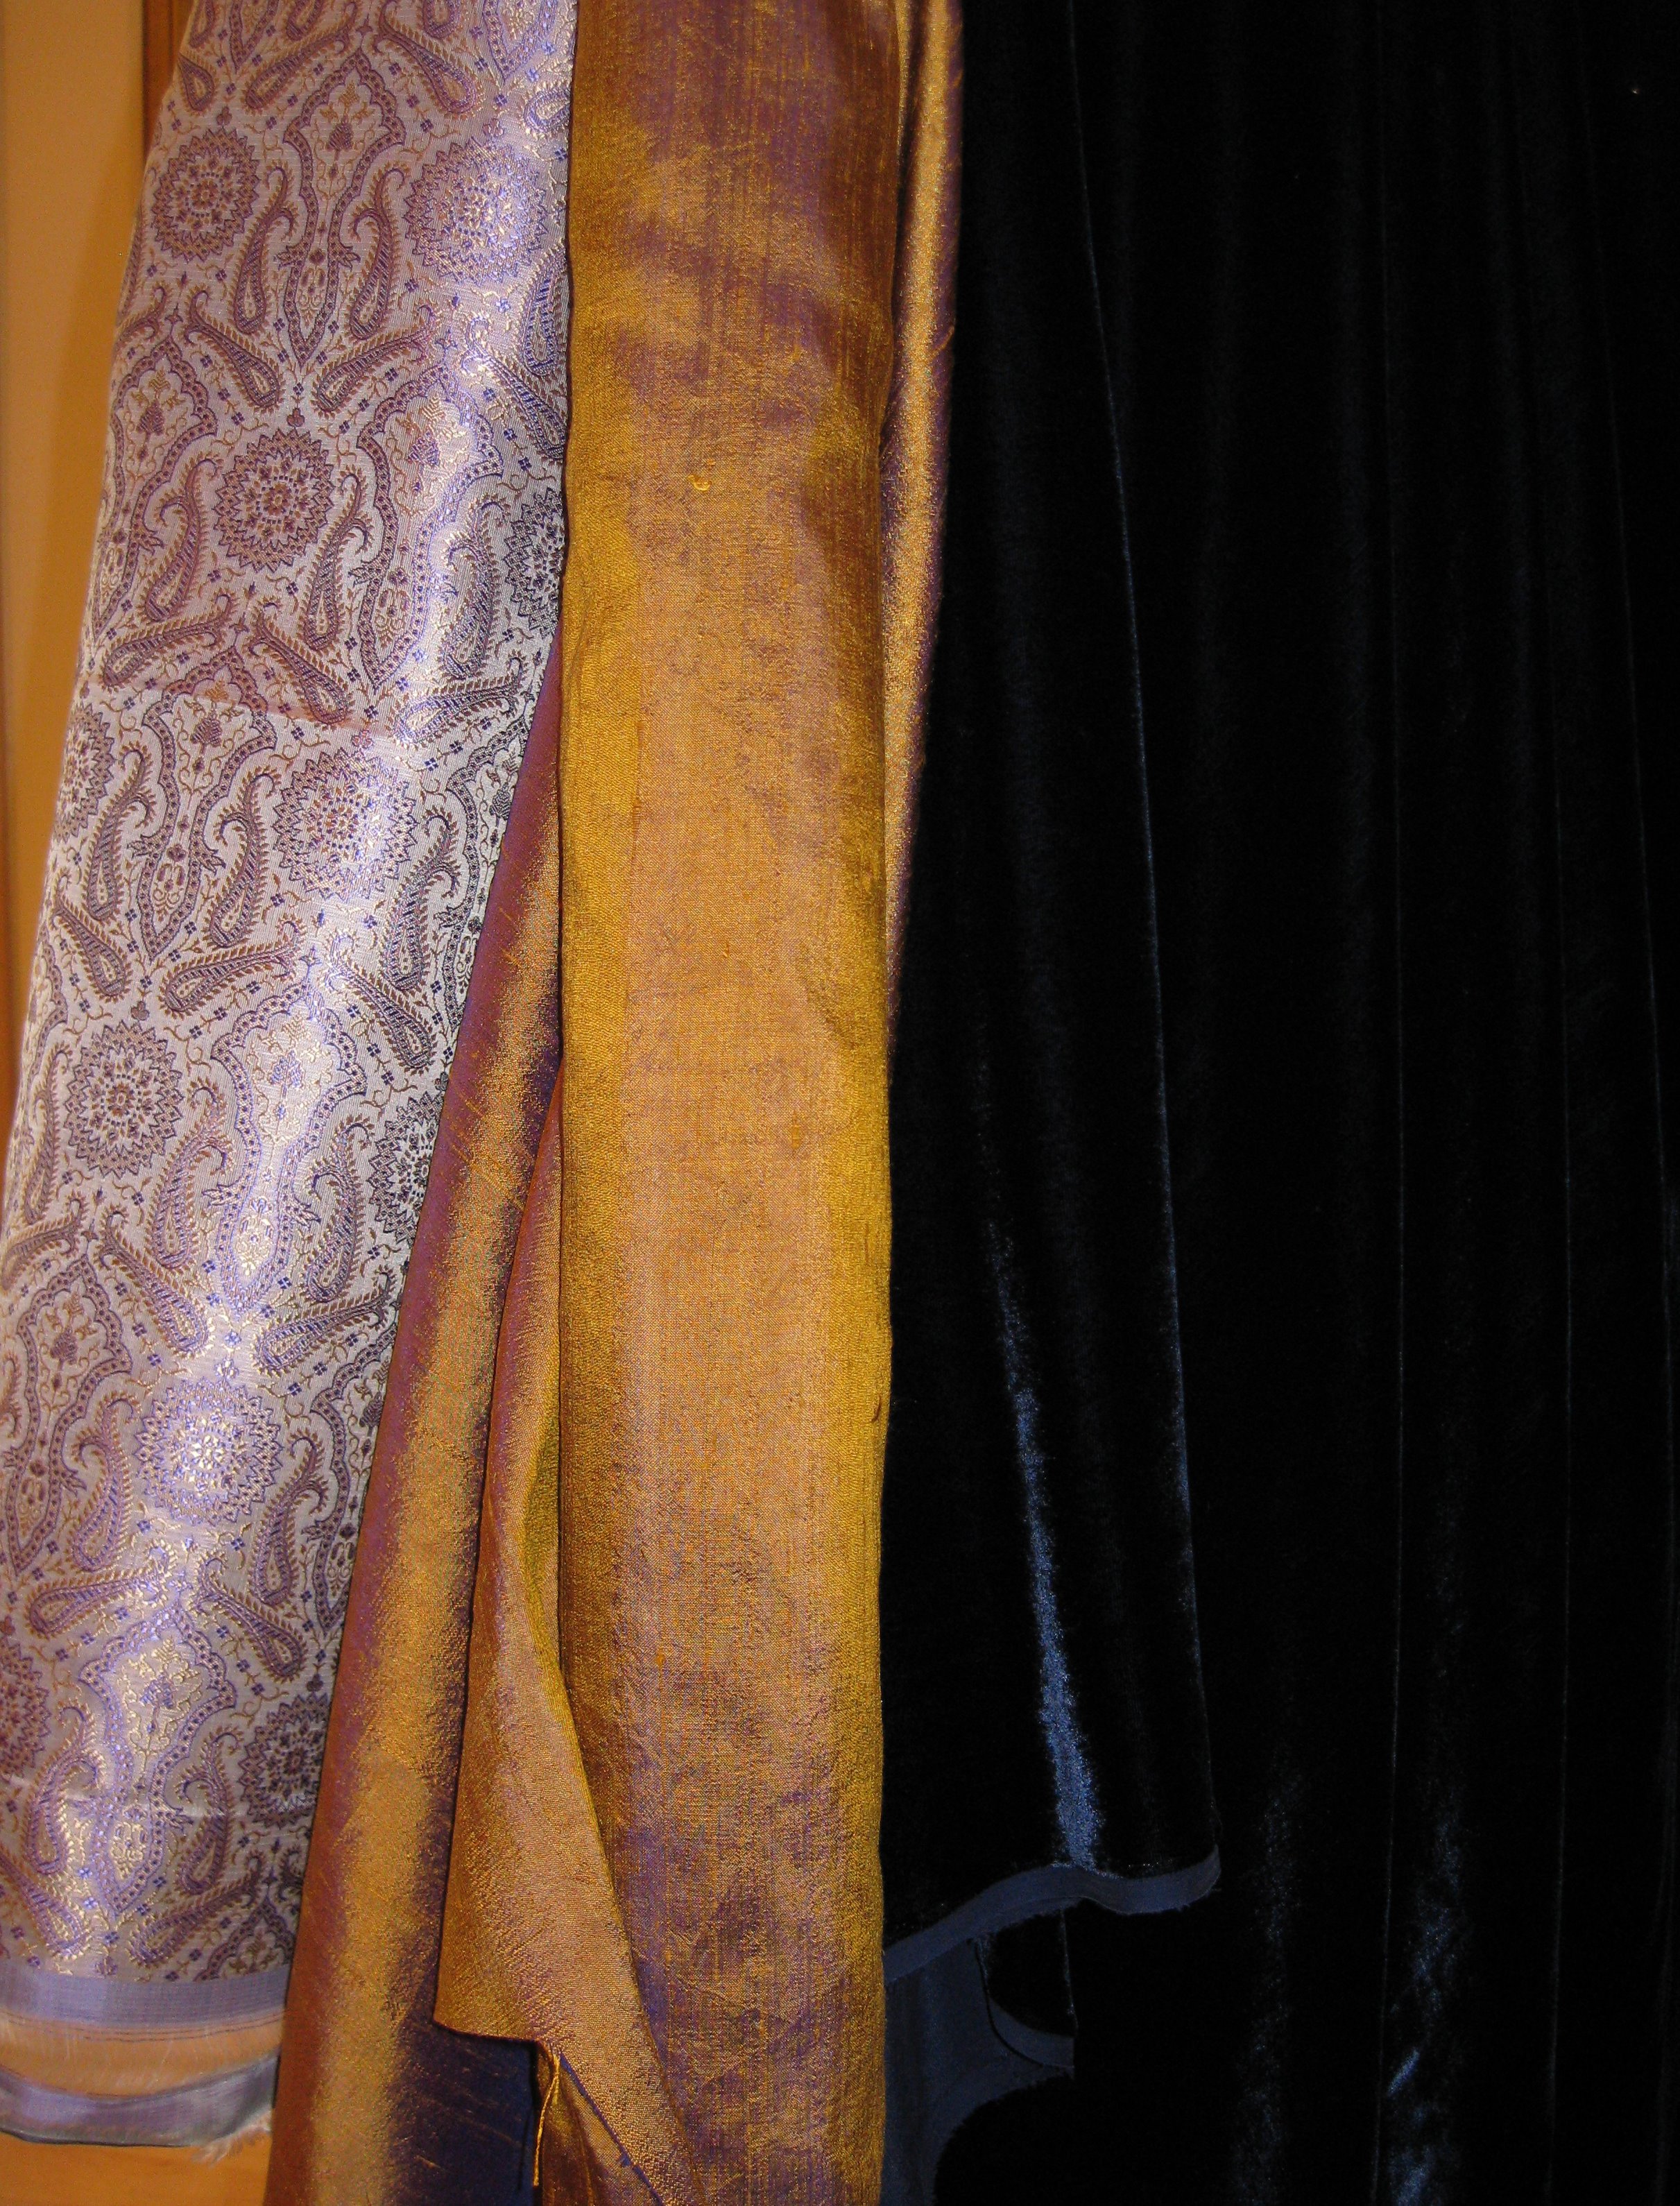
It didn't take me long to discard all ideas of trim. I'm going to use solid blue silk velvet lined with a cross dyed silk dupioni. I will use fabric covered buttons, but I don't know yet in which fabric. Here are the fabrics together.
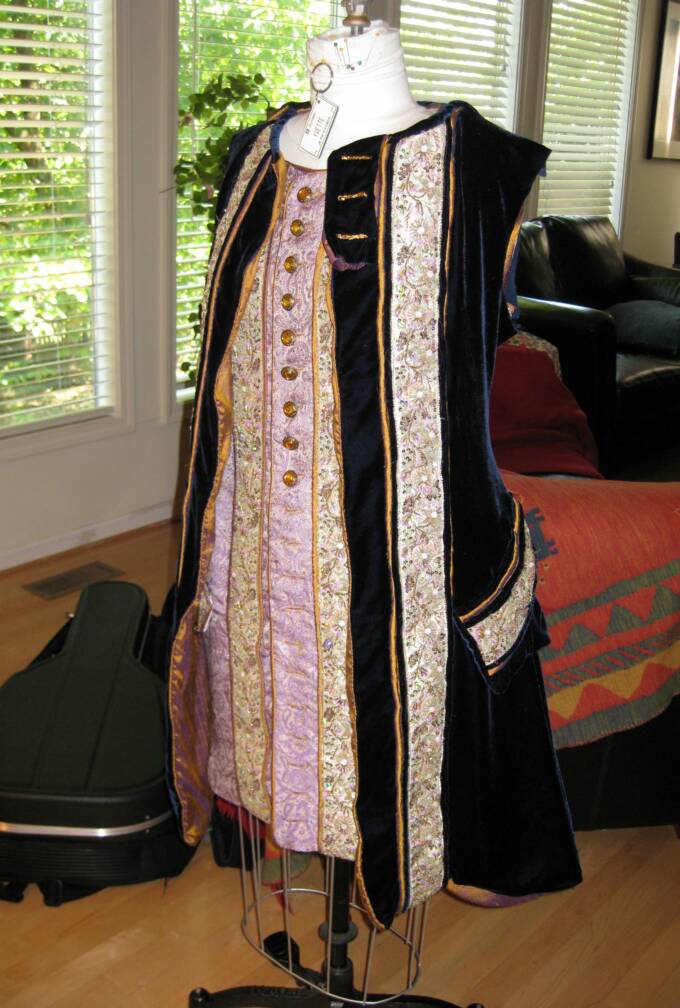
As I looked through my stash of fabrics, I noticed another brocade that blends with the blues above very nicely. So... I'll be making two waistcoats on this page, the golden waistcoat above, and the lavender waistcoat. The lavender waiscoat fabric is on the right next to the coat fabrics below:
I've cut out most of the coat pieces. Still need to cut the pocket, pocket flaps and pockets, and the gores.
June 13, 2009:
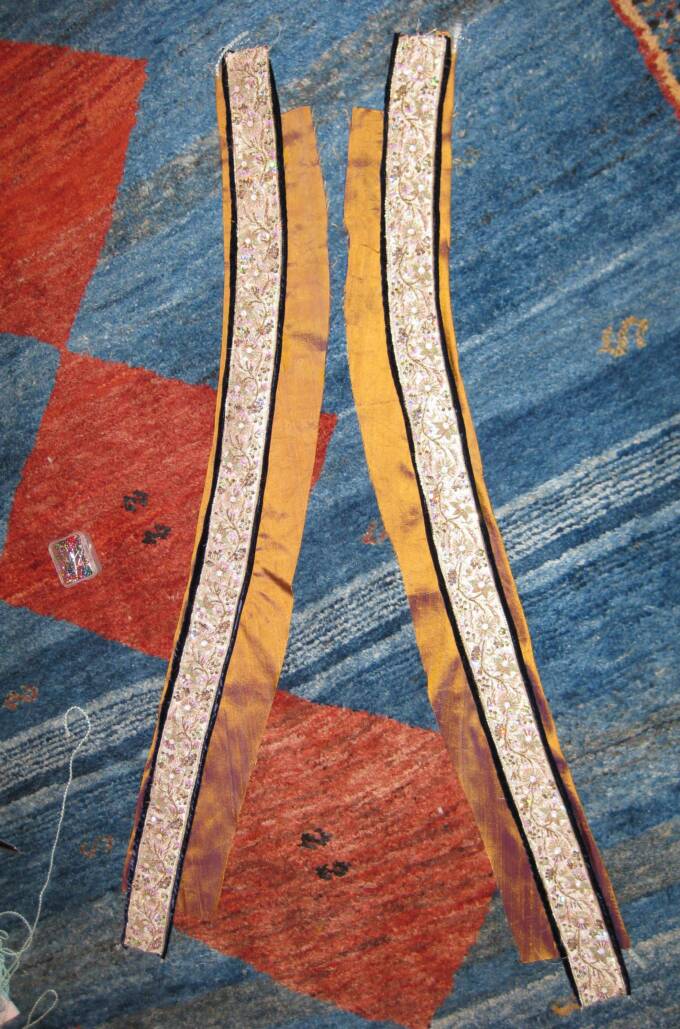
The whole coat is cut out, and I've washed and ironed the lavender fabric. While I was at it I had a look at a trim I bought a long time ago... I thought of it in combination with the lavender, and decided to look at it against the blue, too. Images:
I'm not sure I'll use it on the coat... I want to see it in daylight, in the morning. But, it looks like a wonderful contrast, and it pulls the green of the waistcoat together.
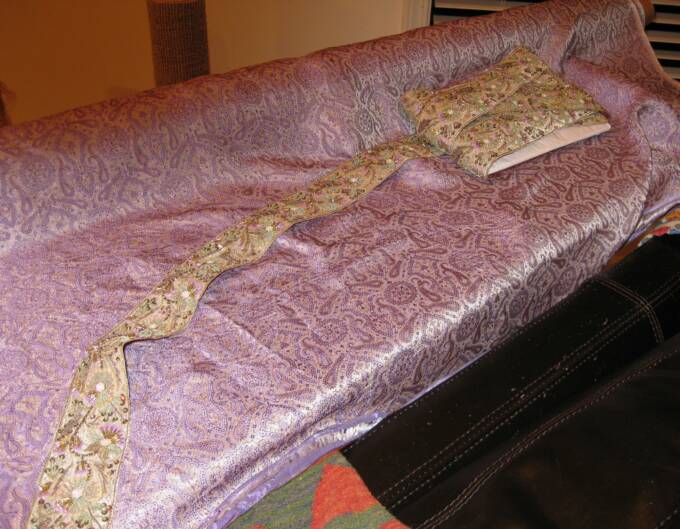
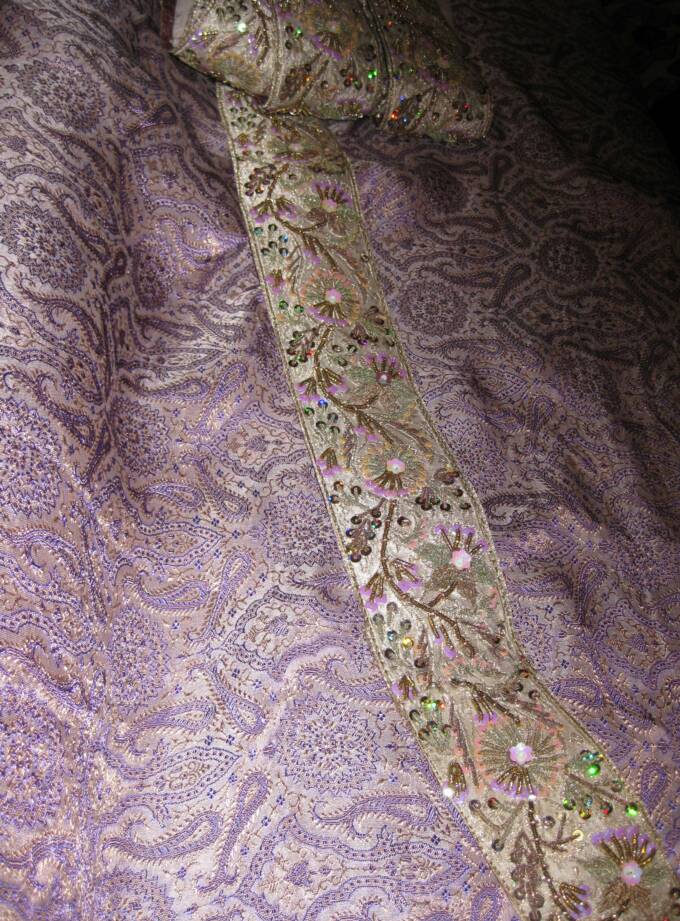
One thing is certain; I will use it in the lavender waistcoat. Interesting how it changes according to the different backing fabrics. More images:
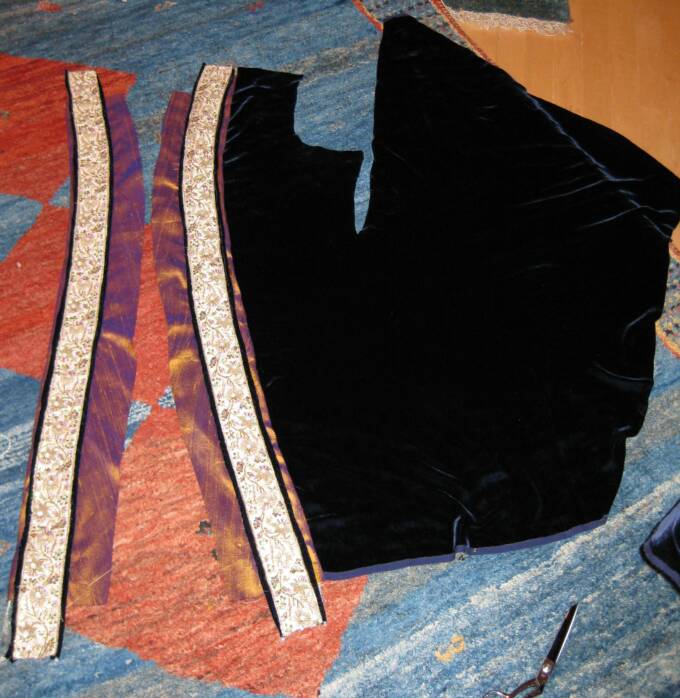
I found it interesting to re-discover that the gold/royal blue shot dupioni I'm using in this ensemble was a fabric I considered for the original justaucorps. I chose the silver for that one, saving this gold for later, for now. In any case, Julien gets it.
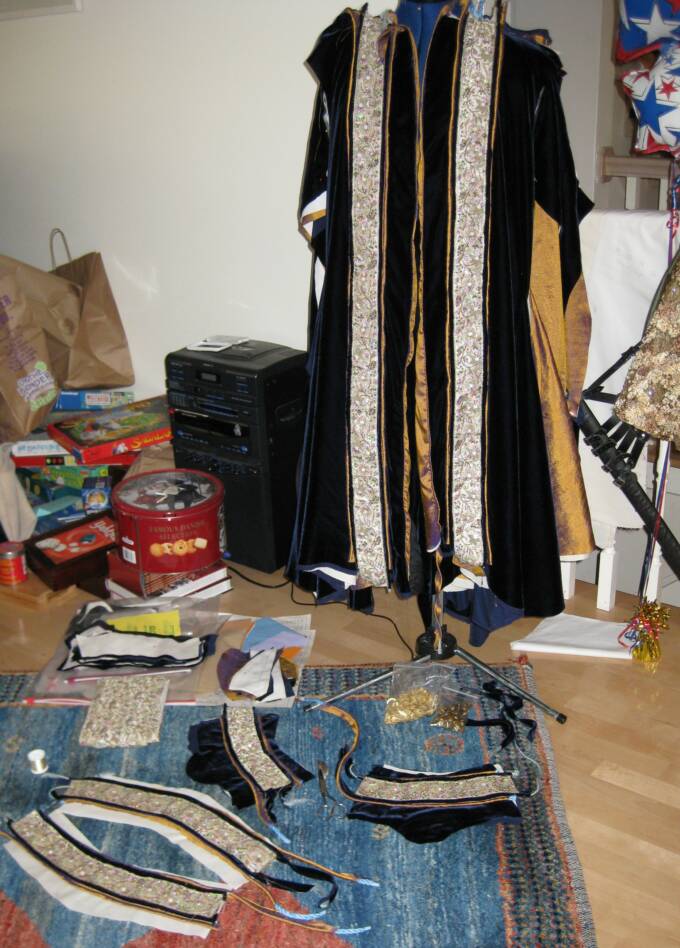
June 16, 2009: All the parts of the justaucorps, lavender waistcoat and breeches were left to hang, and I've completed two kinds of piping, out of both the velvet and the golden blue dupioni. Next, I started contemplating button choices.
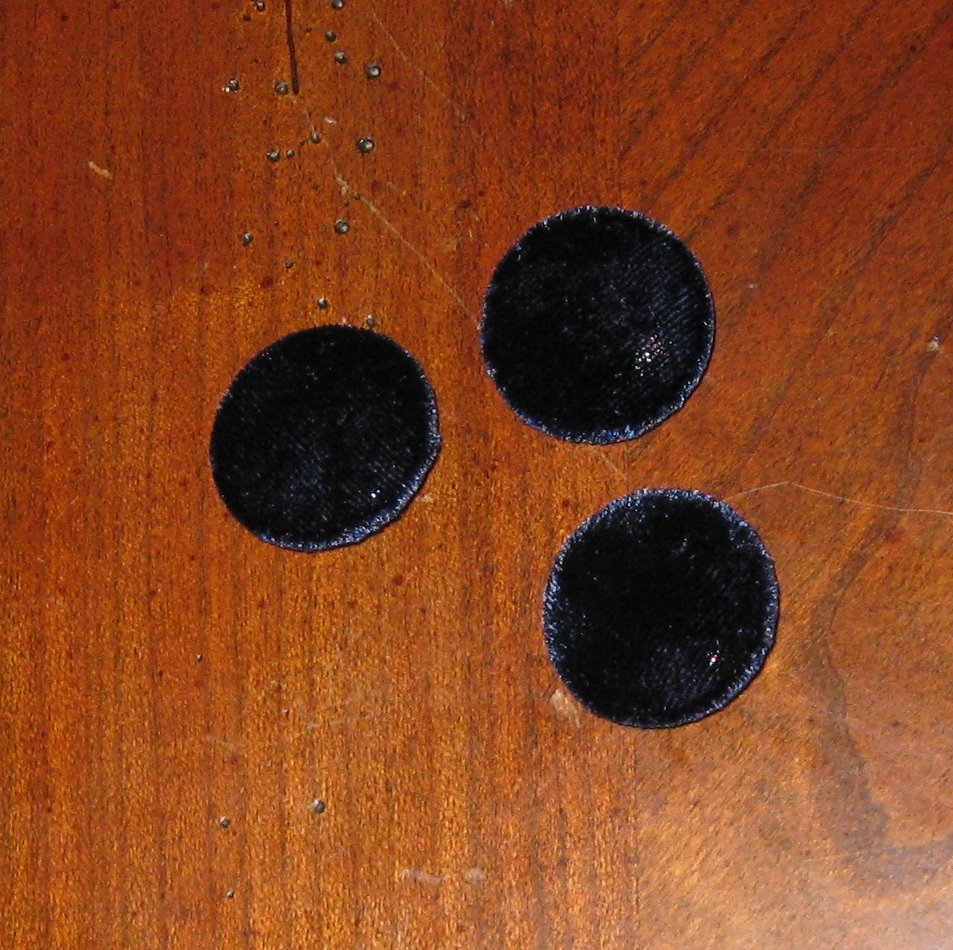
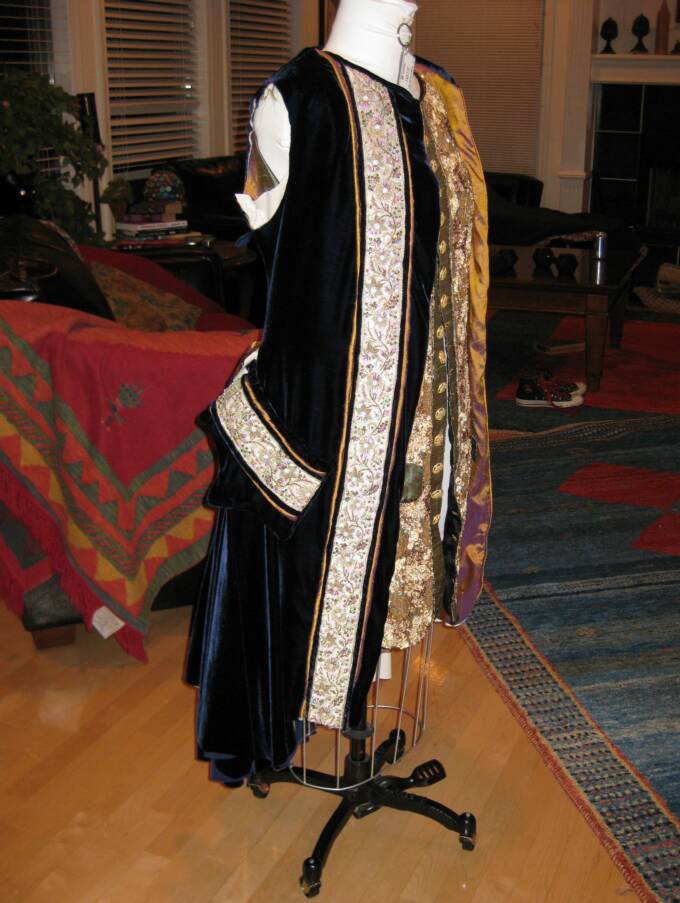
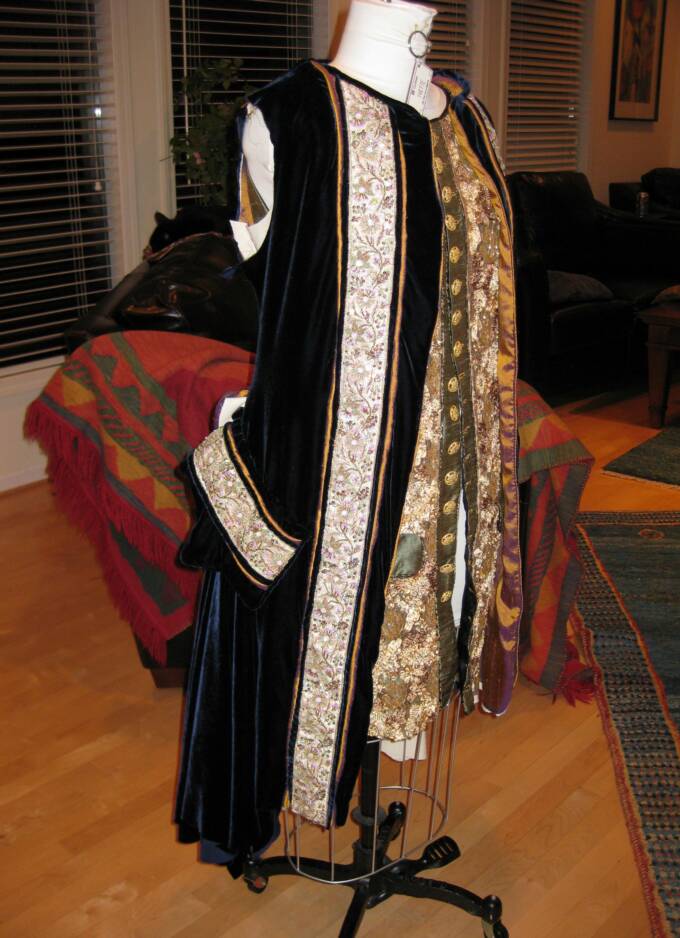
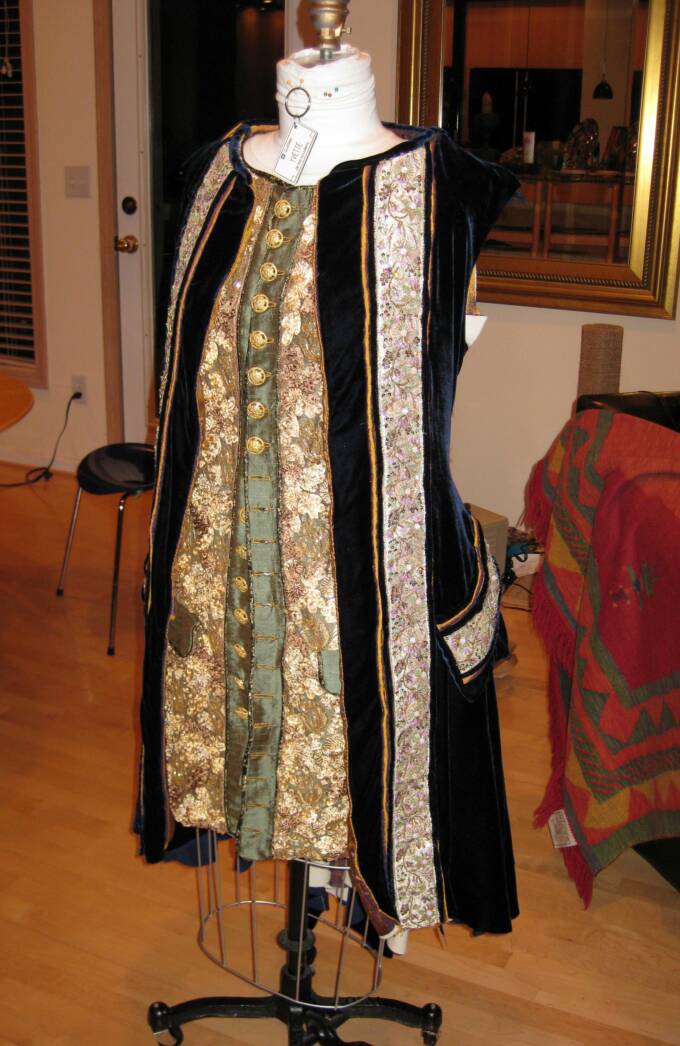
For the coat, I wanted blue velvet covered buttons, after nixing the idea of gold covered buttons or metal ones. Still wanting to veer blue, I tried velvet over velvet, but that fails. It needs some contrast, and this will involve making a gold border along the front opening of the coat. Here's some photos of the figuring out process.
June 15, 2008:
I decided I will use the trim in both the coat and the lavender waistcoat. It just works too well not to.
Next, I started making velvet and gold & blue piping, and then cut out the rest of the coat, the waistcoat and the breeches.
June 18, 2009:
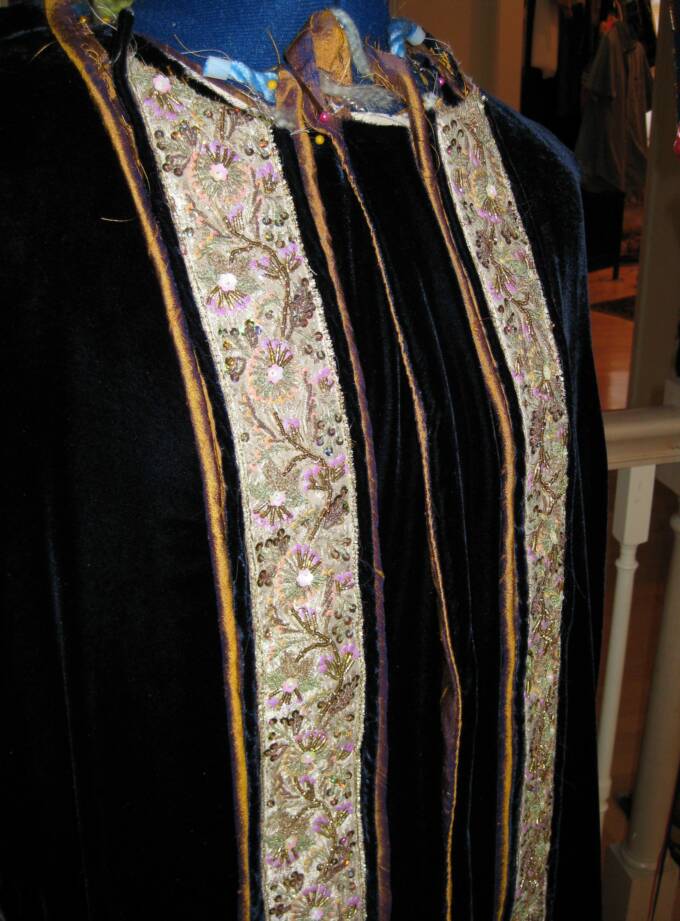
I began construction by sewing on the trim, with piping, to the gold & blue dupioni edging that will go onto the coat opening in front.
Then, I sewed the trim border onto the front of the coat panels, & hung them back up with the rest of the cut pieces.
June 21, 2009:
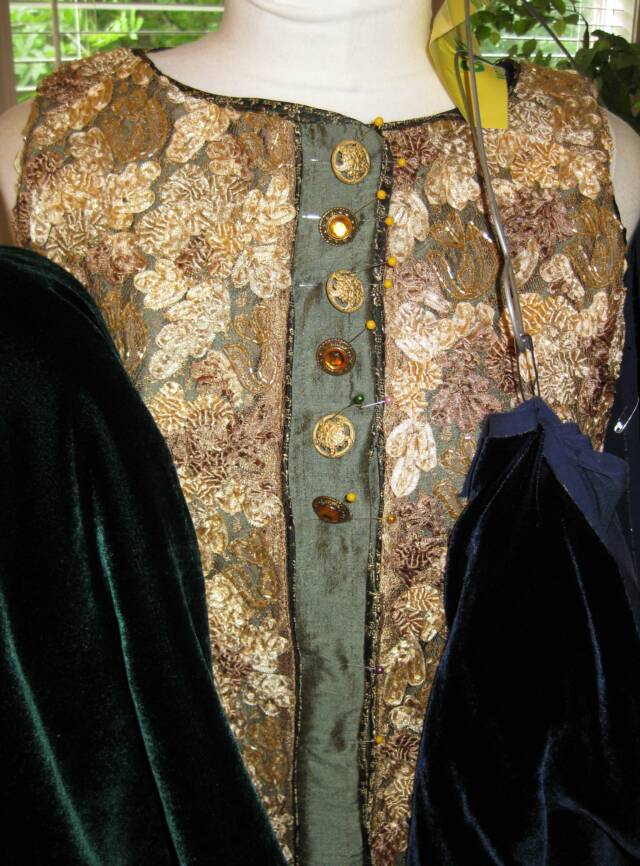
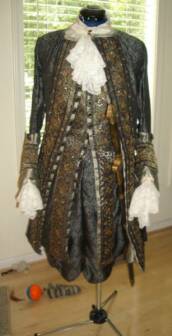
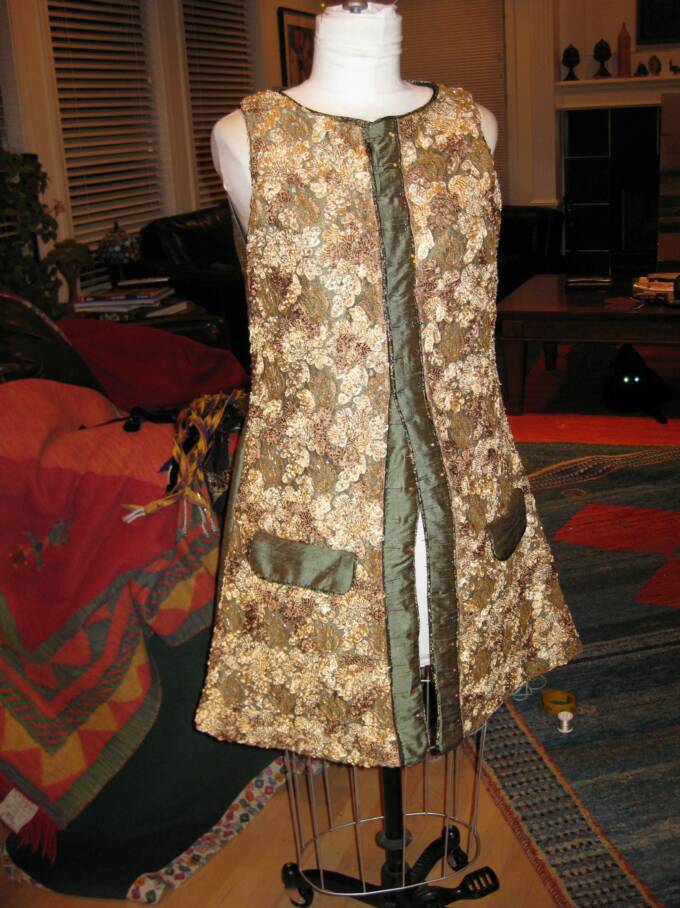
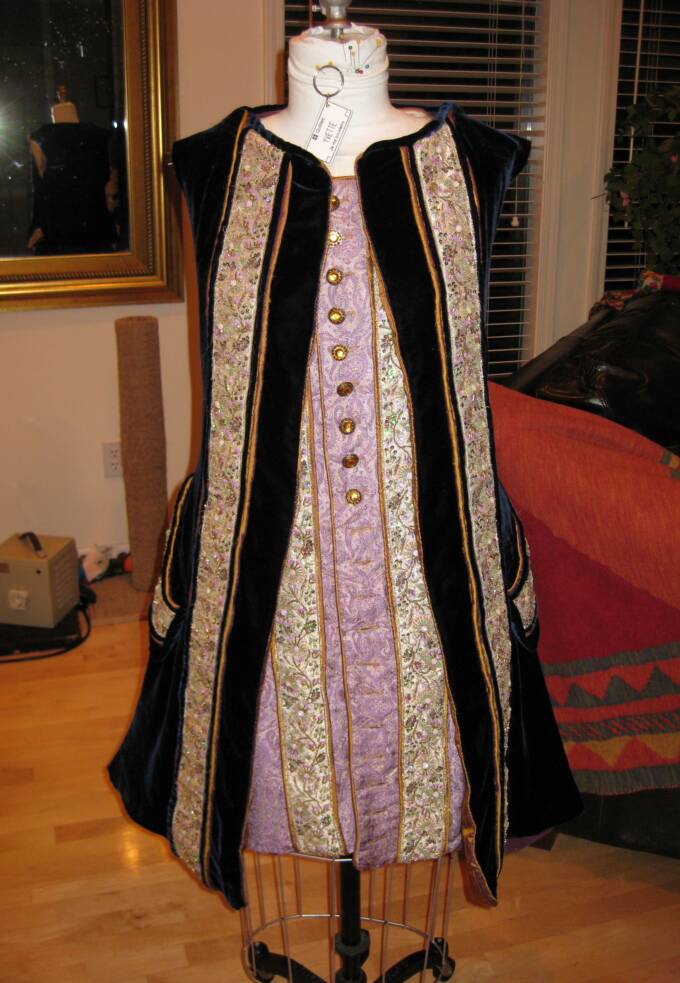
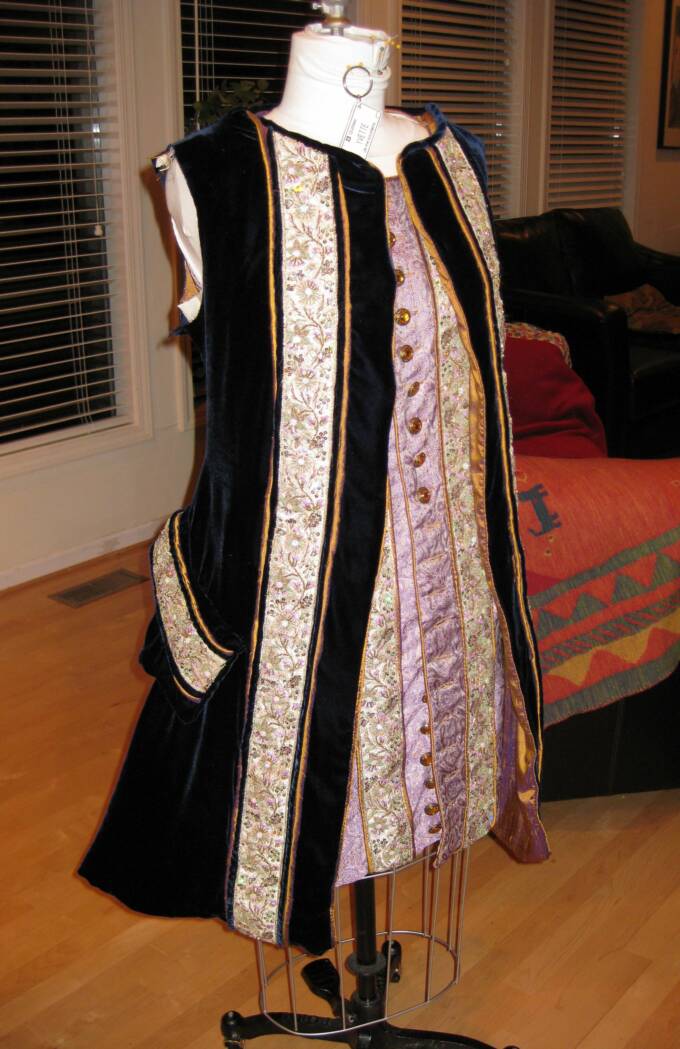
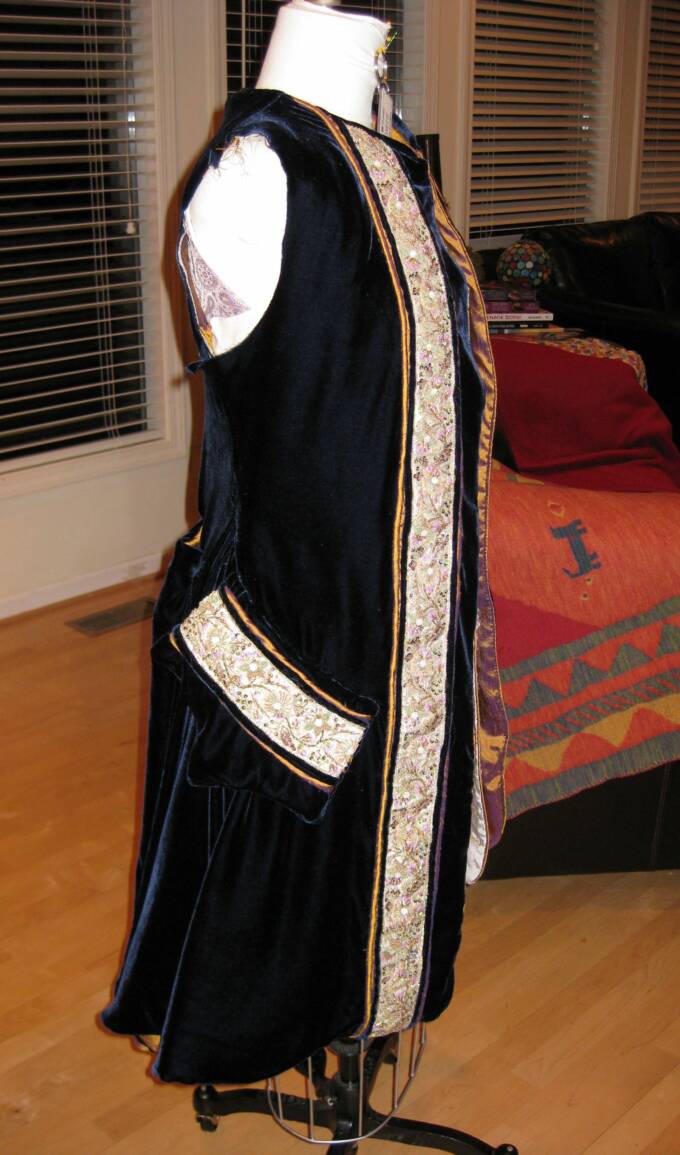
I'm almost done with the golden waistcoat. Here are some photos before I put in the button holes. The button holes are in now, and all that remains is sewing on the buttons. I like it much more than I thought I would.
You can see Jojo watching me from under the coffee table. ;)
July 7, 2009:
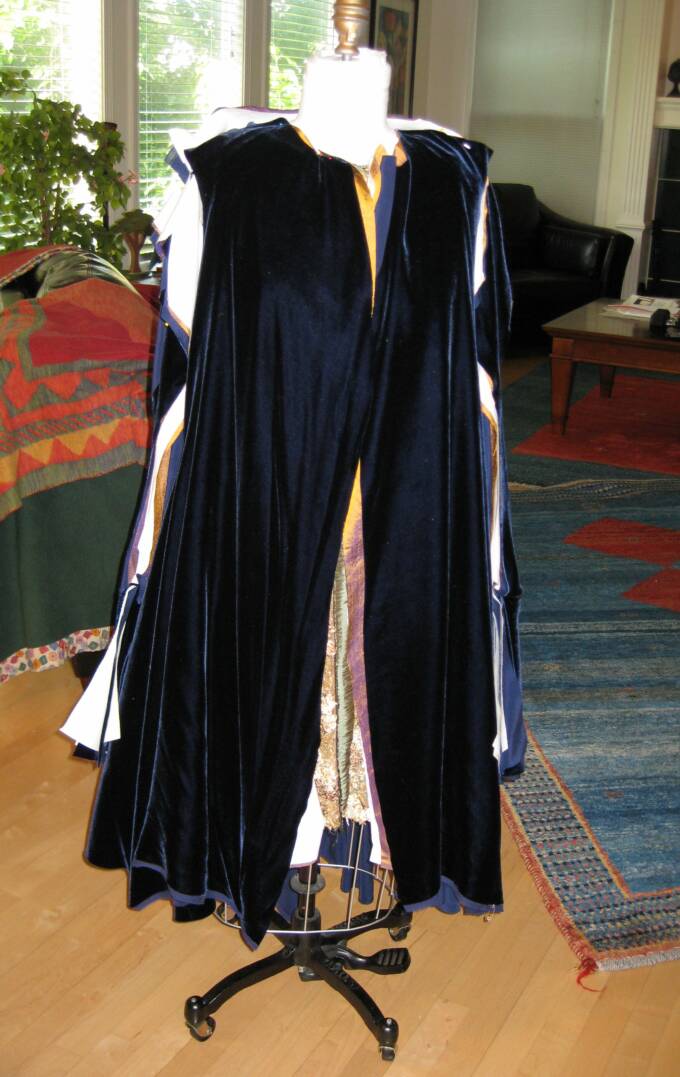
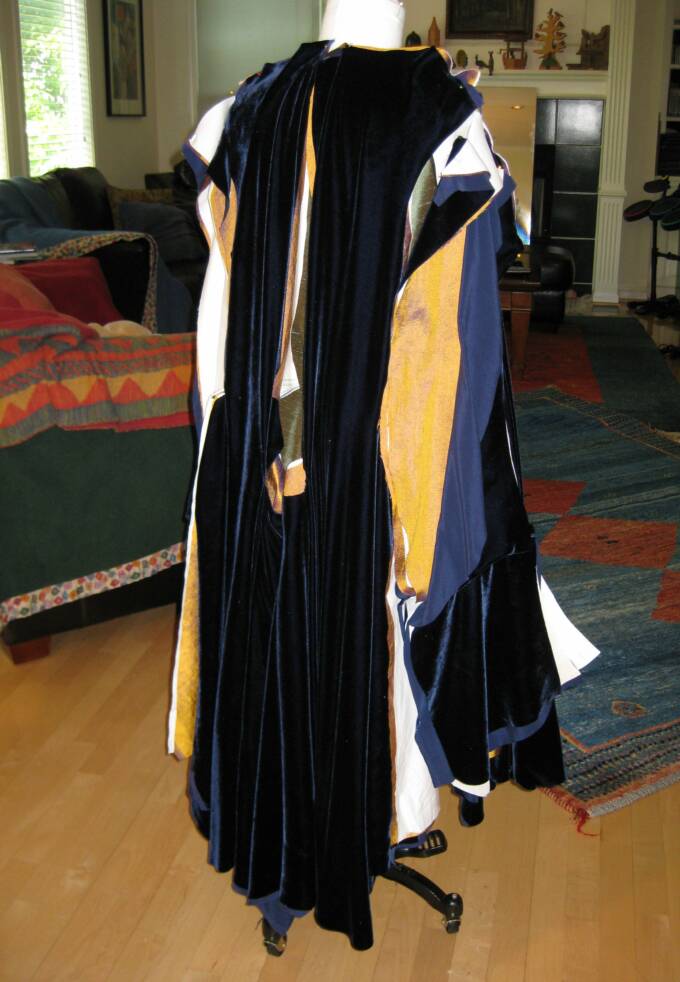
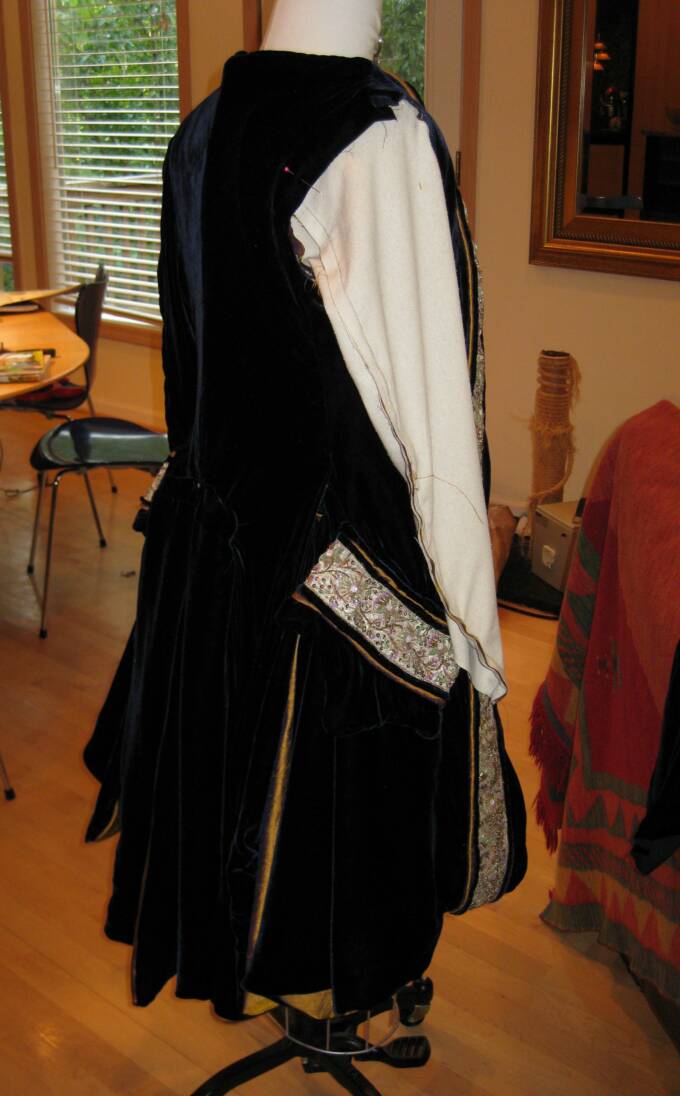
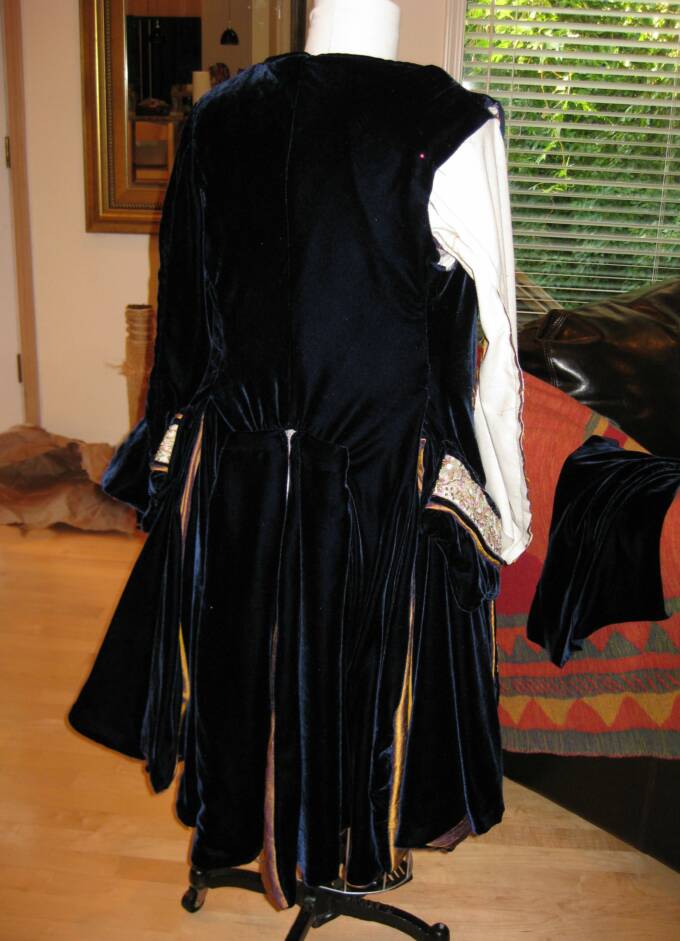
I started sewing the lining layers to the top layer at the front openings of the coat. Because of the velvet piping it was necessary to do this by hand. It's not finished inside yet, I've got to go over it another time and secure the internal layer of velvet, too. It makes for a nice thick layering for this part of the coat that I find very stabilizing.
So far, I'm only on the left side. I need one more long strip of velvet piping for the right.
July 11, 2009:
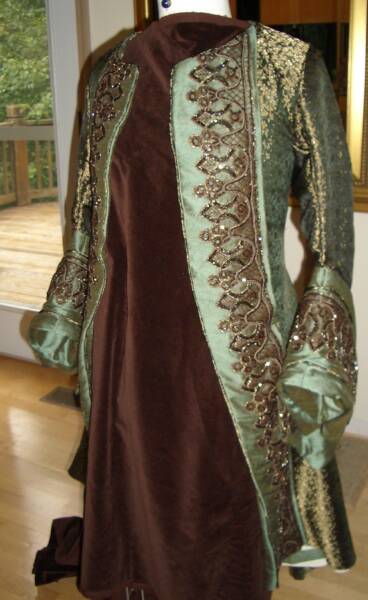
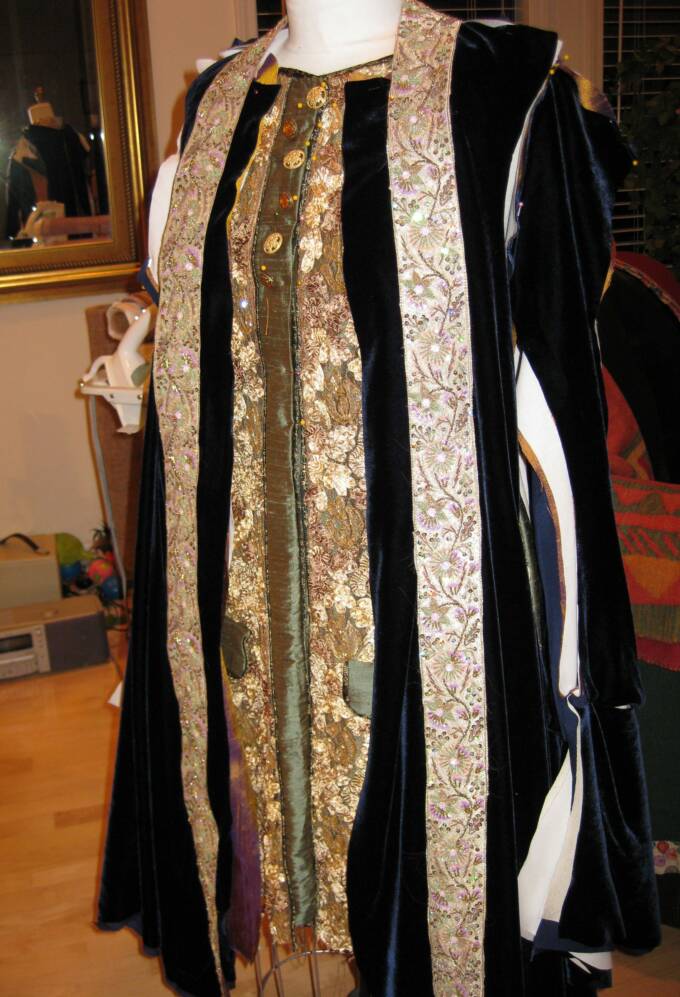
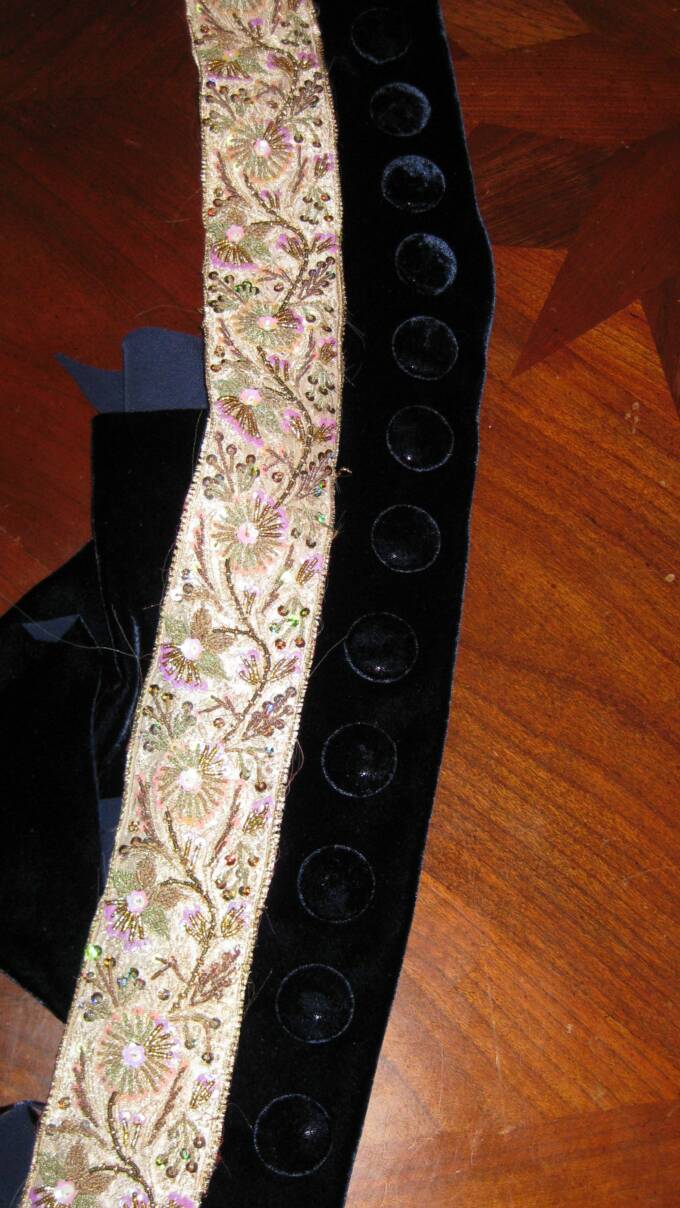
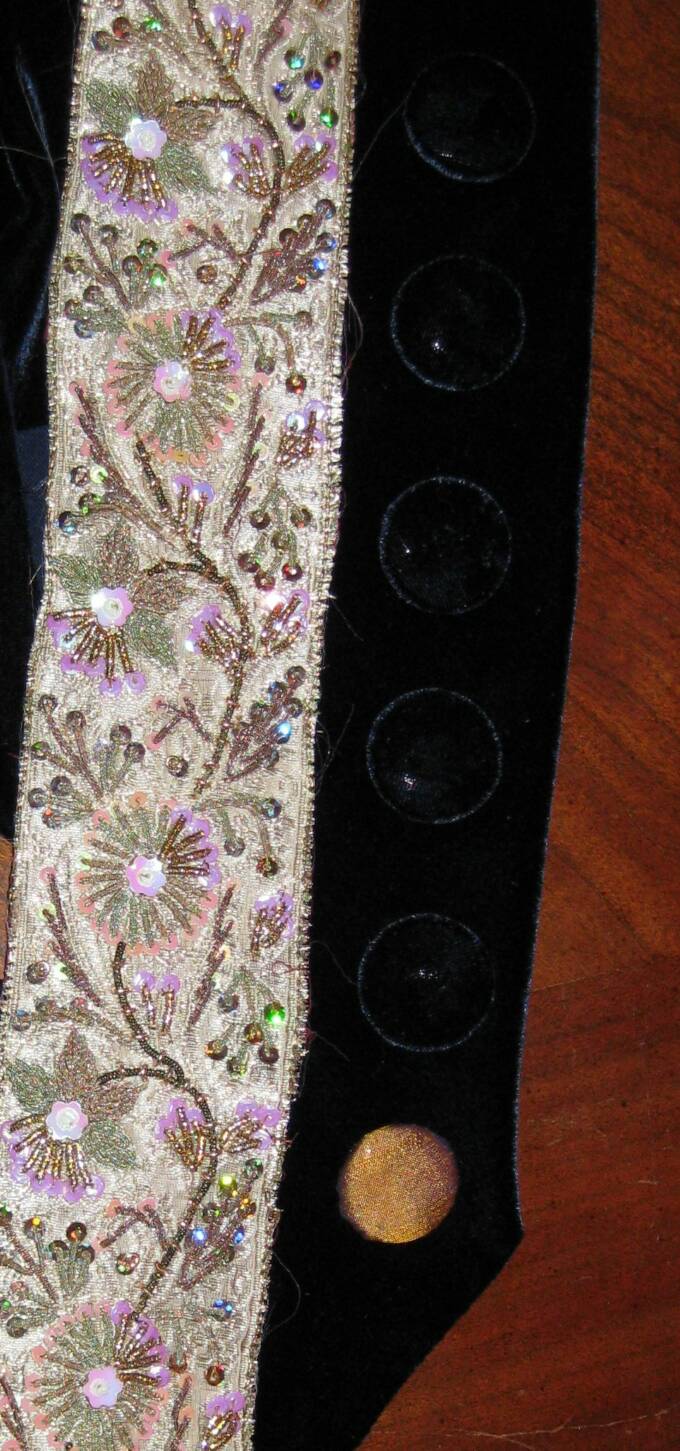
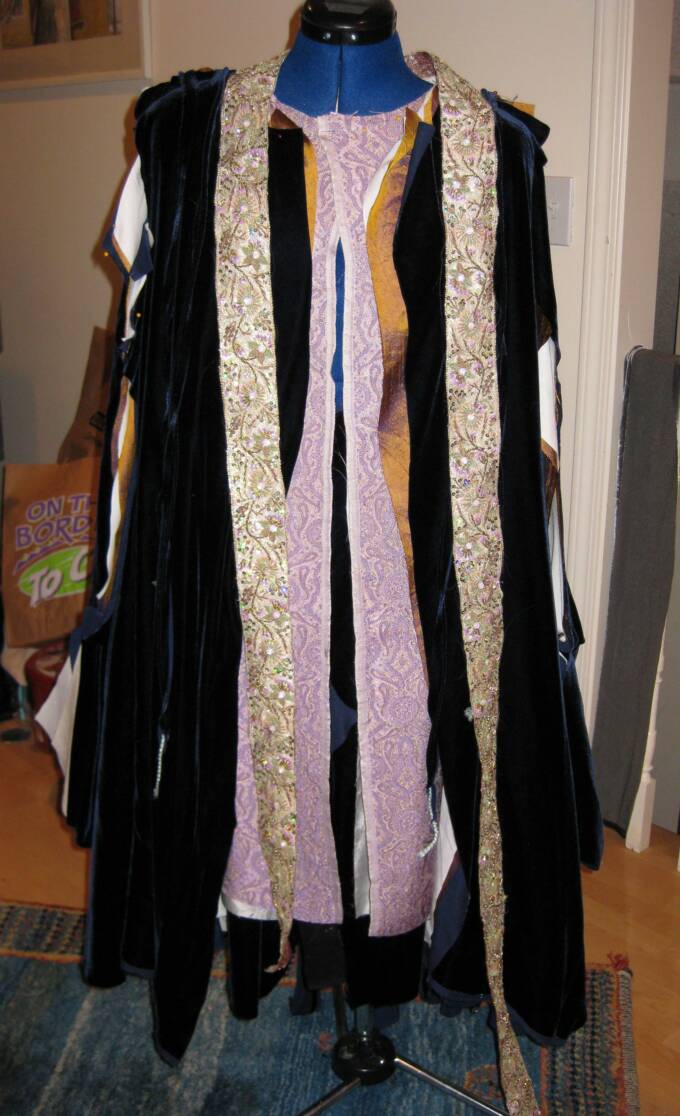
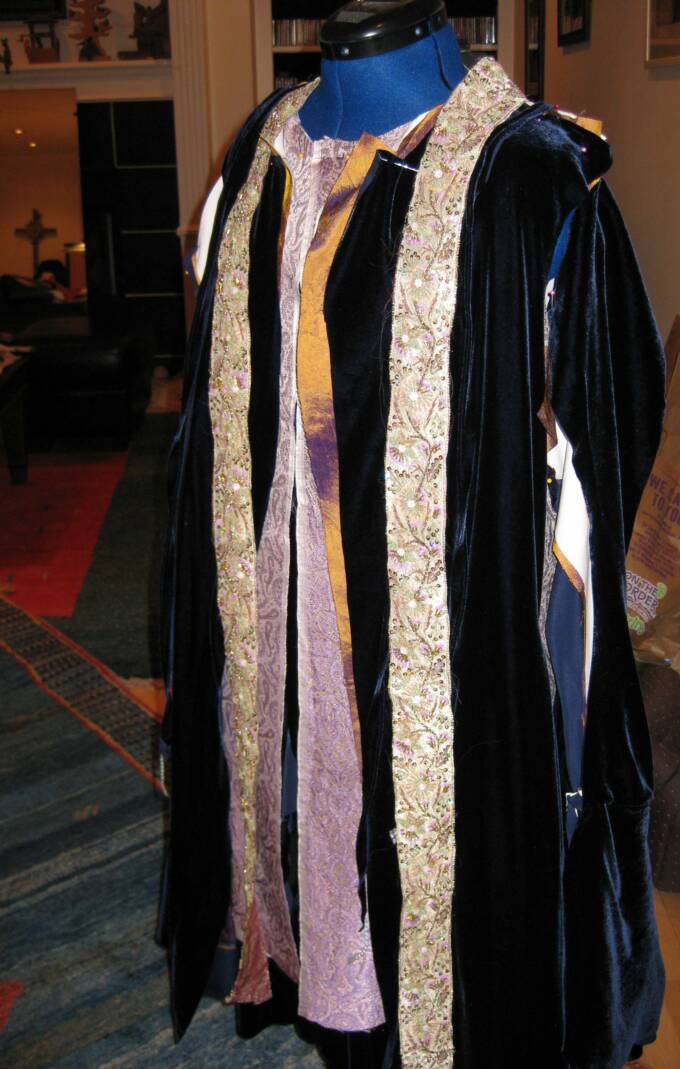
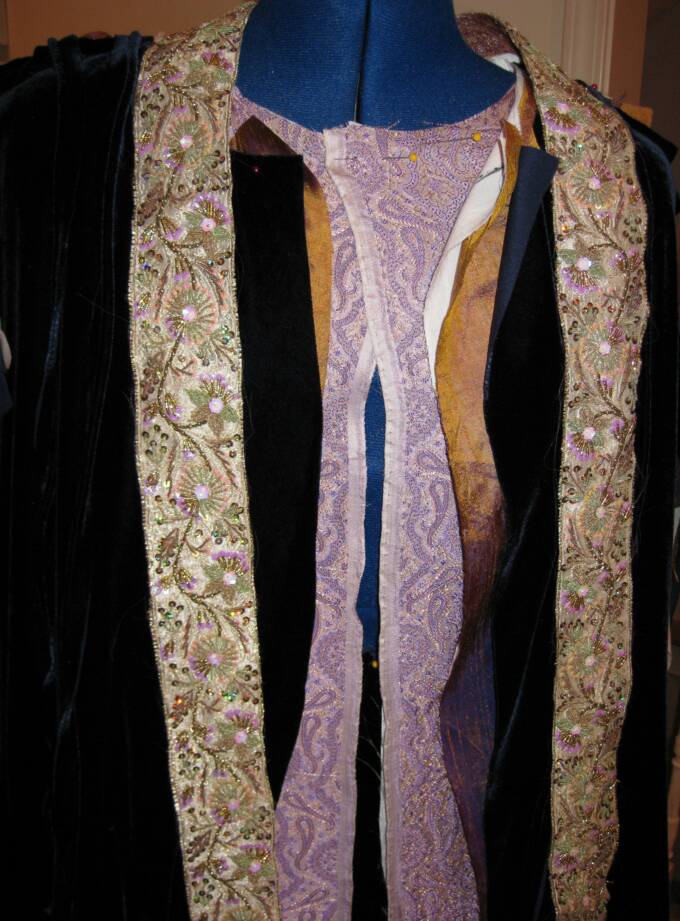
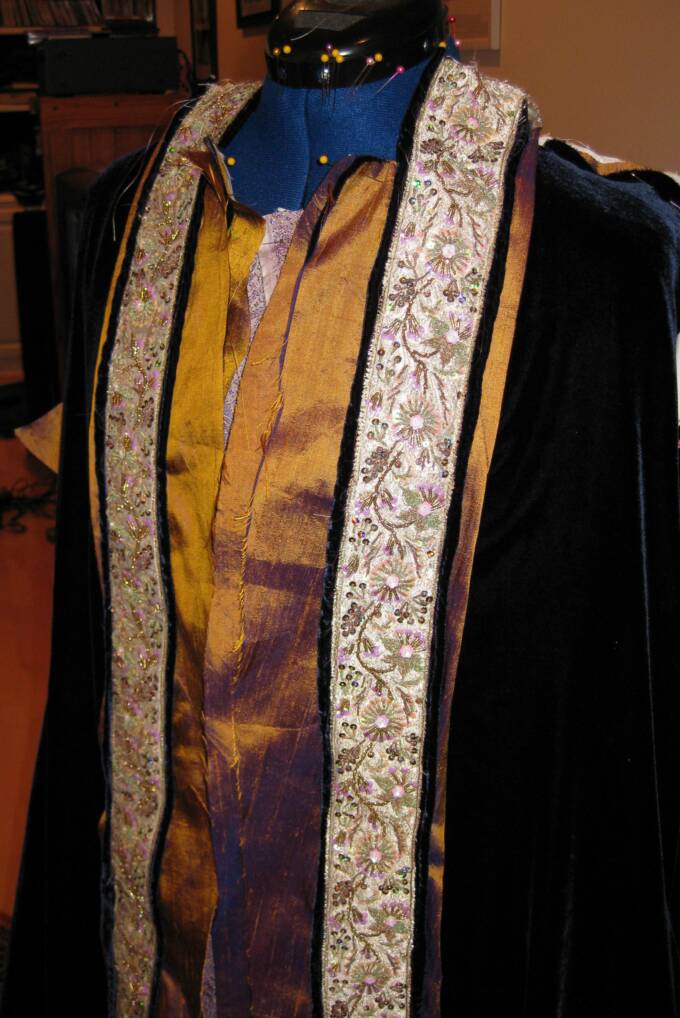
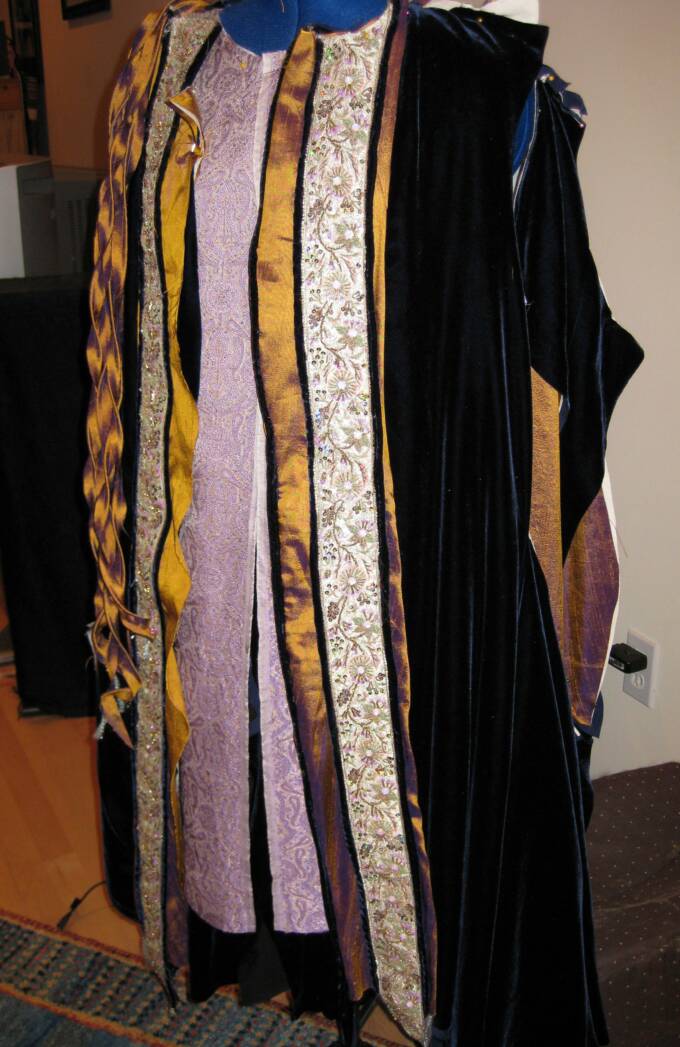
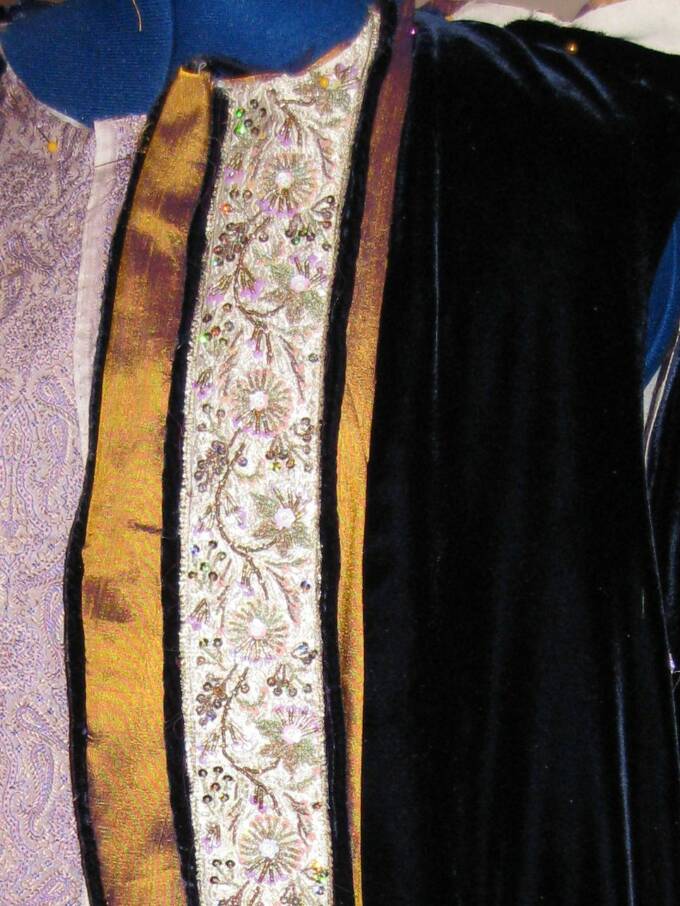
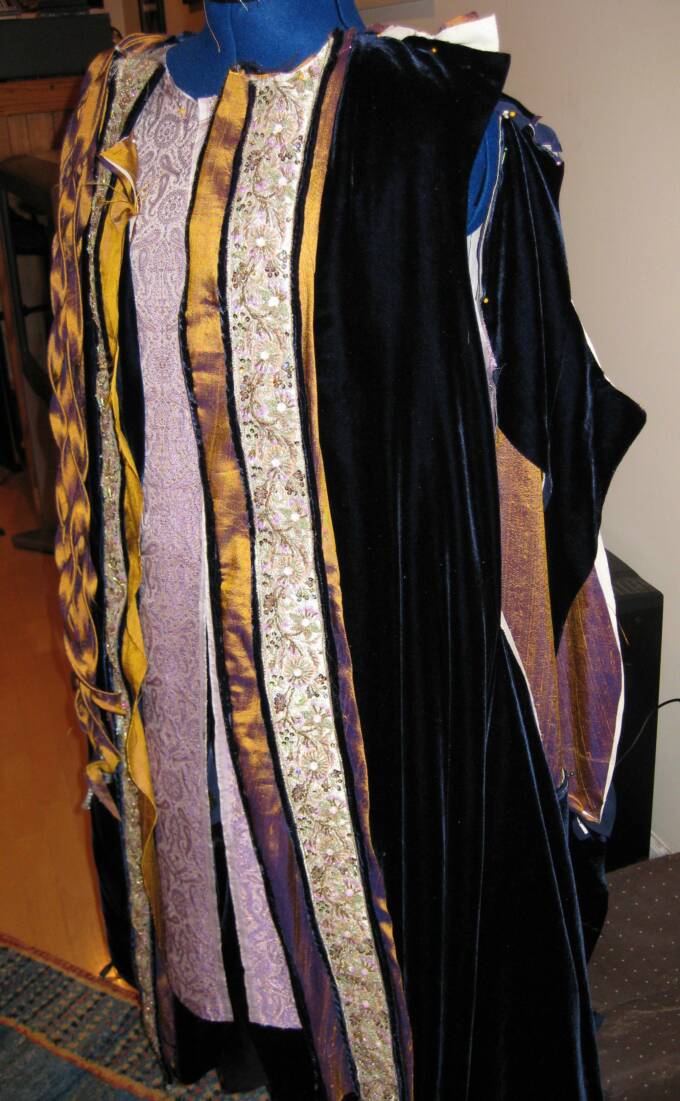
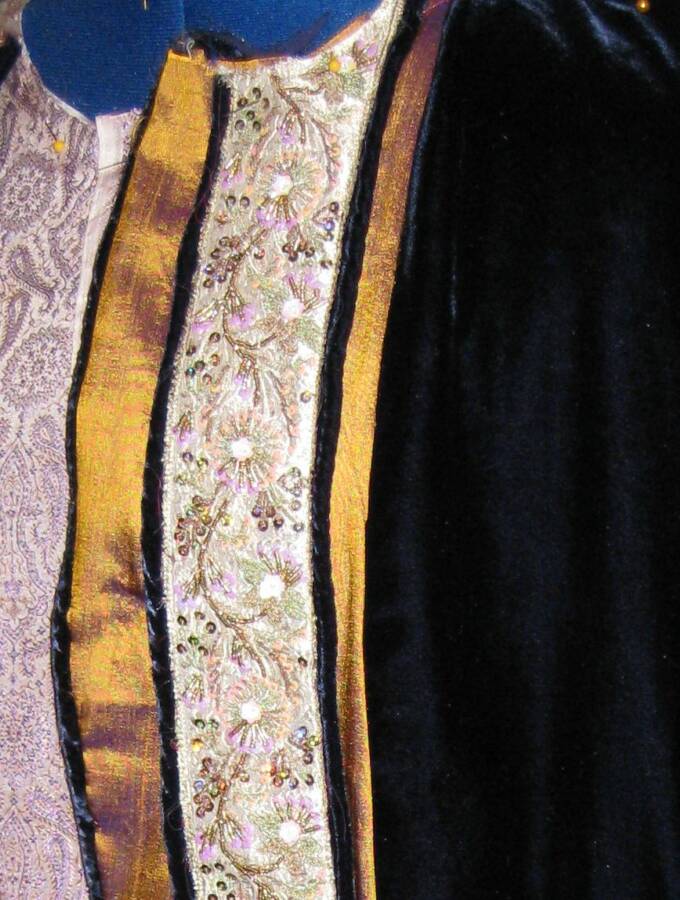
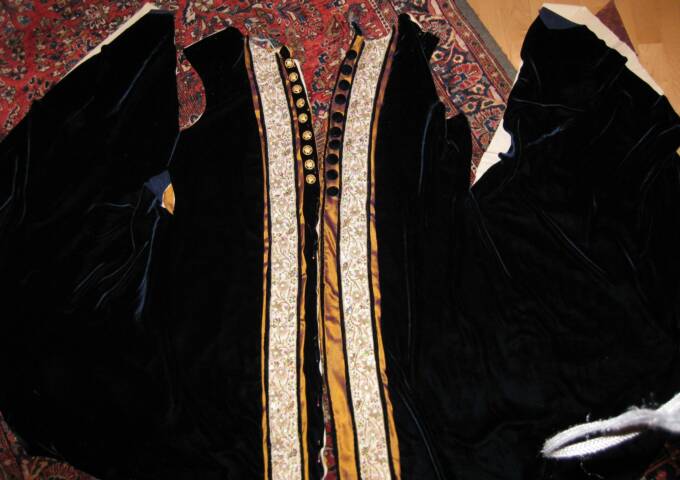
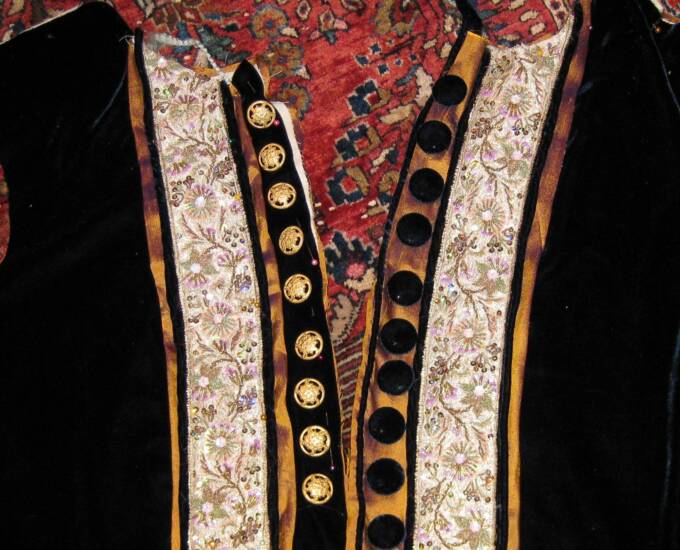
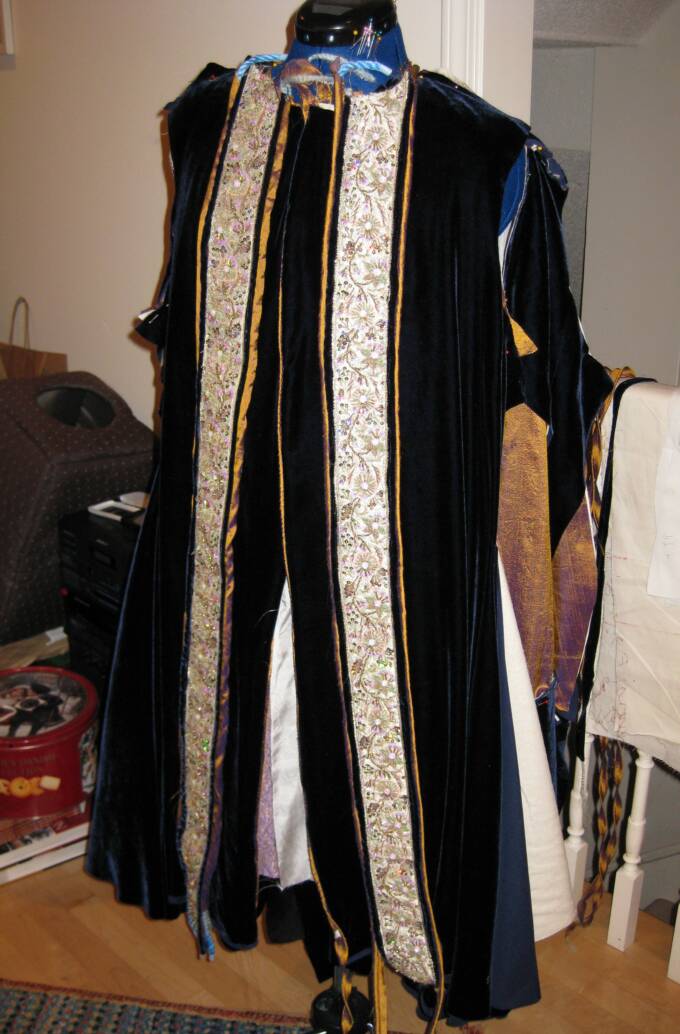
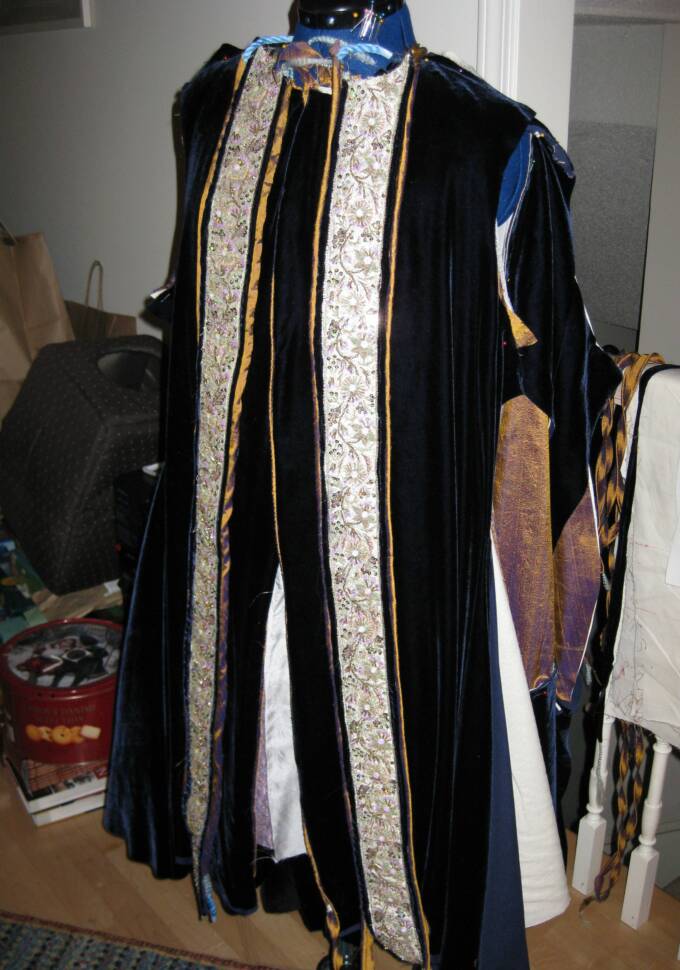
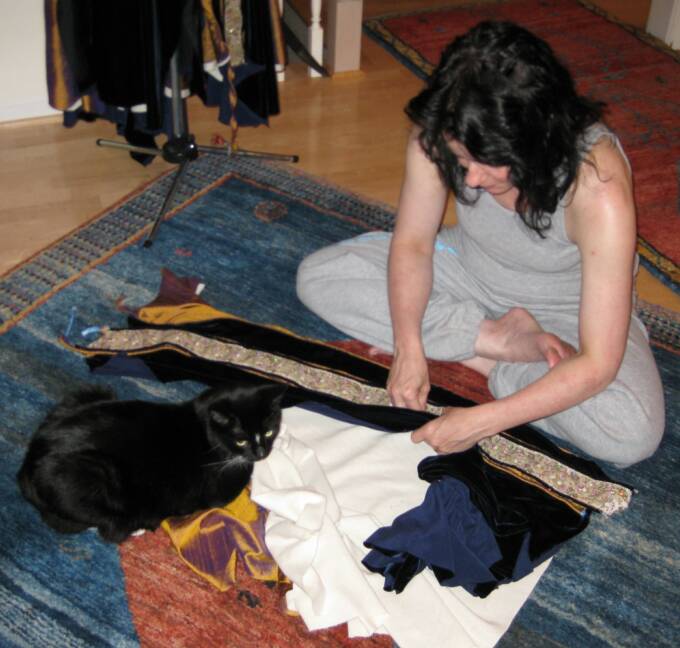
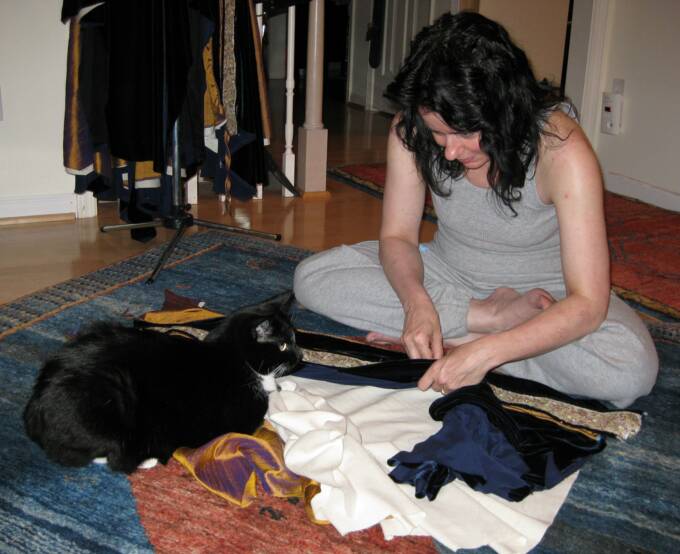
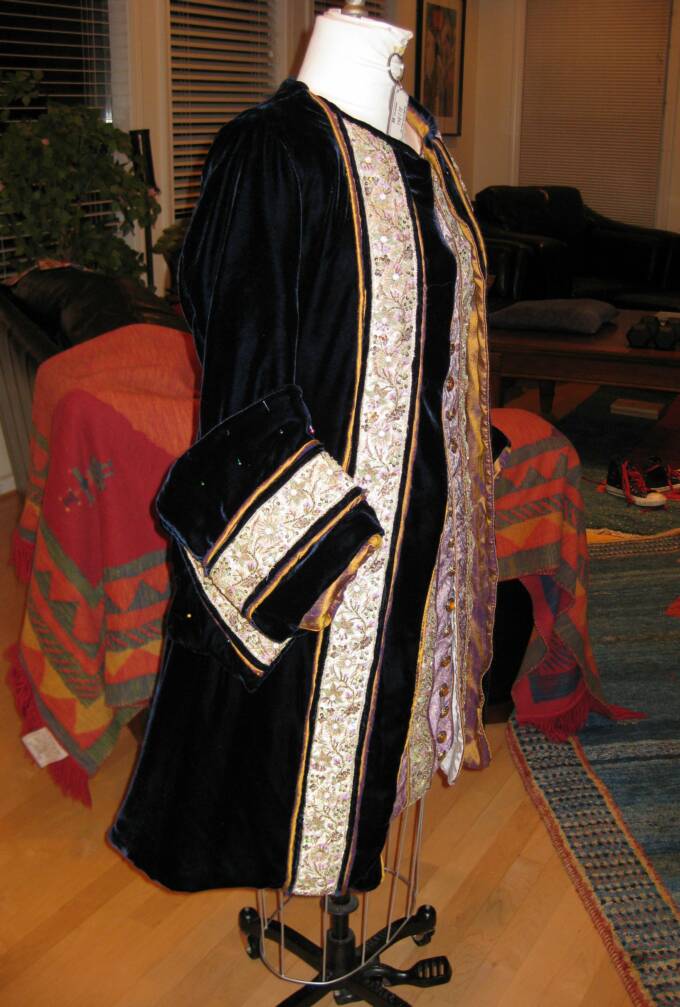
As I have come to expect, I've run into a problem. I'm not sure I like the wide gold border, and the fabric is not cooperating... So, it's come to a choice. Here are the choices, as I see them... Wide gold border, velvet covered buttons, and a struggle with the fabric. Or. Narrow gold border on either side, gold buttons, and perhaps easier going with the fabric, but I don't know that yet because I haven't sewn the lining into the outer layer. Here's a look:
July 17, 2009:
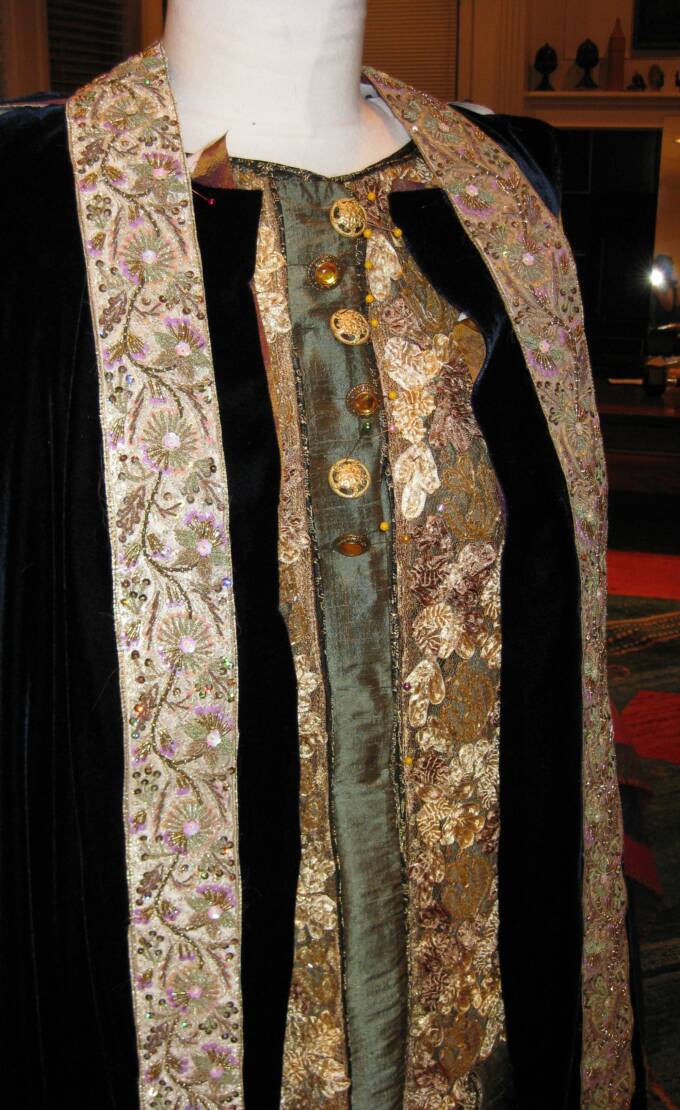
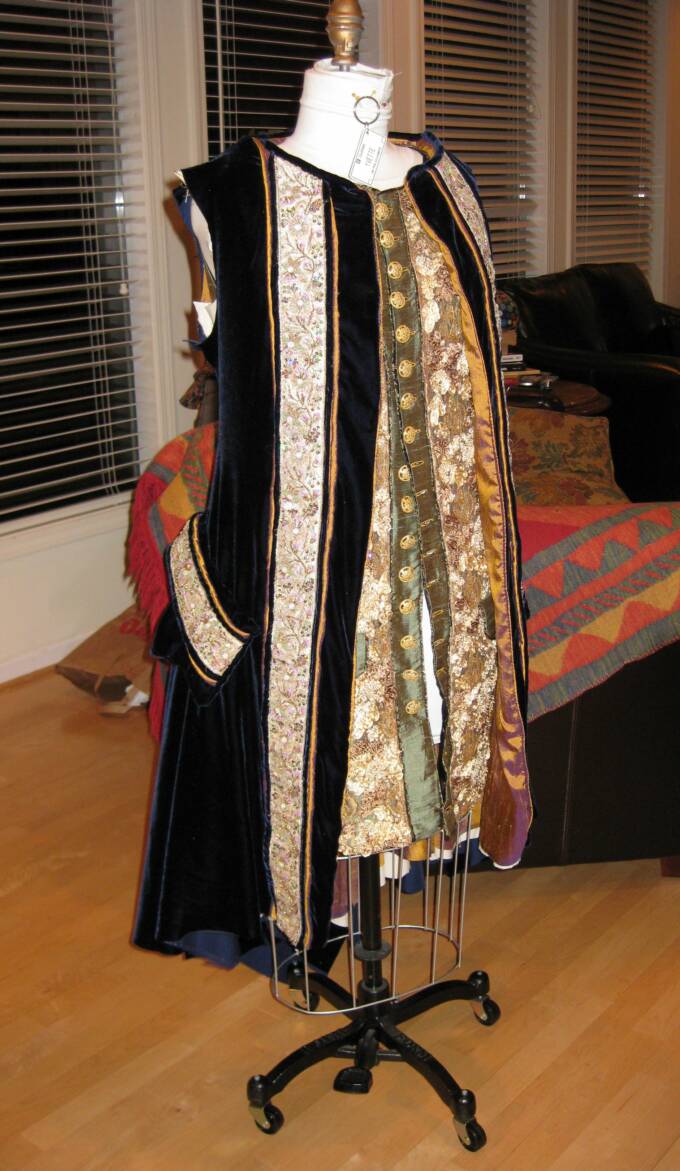
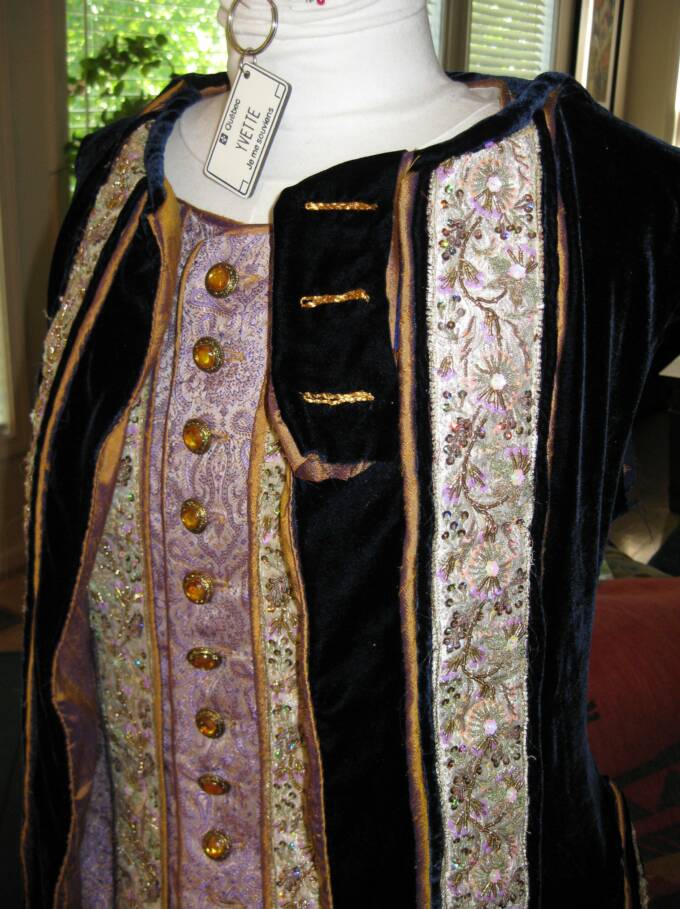
I tended to favor the gold buttons on the velvet. It brought back the focus, as far as I'm concerned, because I love the velvet so much. Add to that, it simplified an already difficult outfit. I am becoming all too familiar with the seam ripper on this one. I thought the gold at the border made it look off balance. Did a survey at home, when we had a friend over, and everyone but my husband favored the gold buttons over the velvet. Did the same survey on my journal, and the result was overwhelmingly in favor of the gold buttons over the velvet, 92.1% to 7.9%.
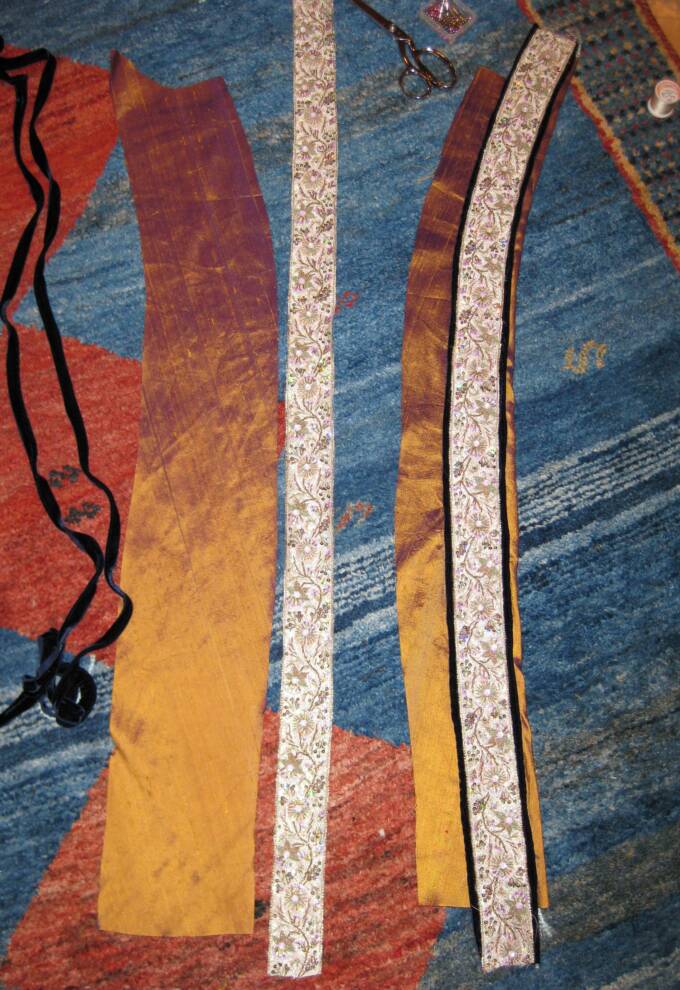
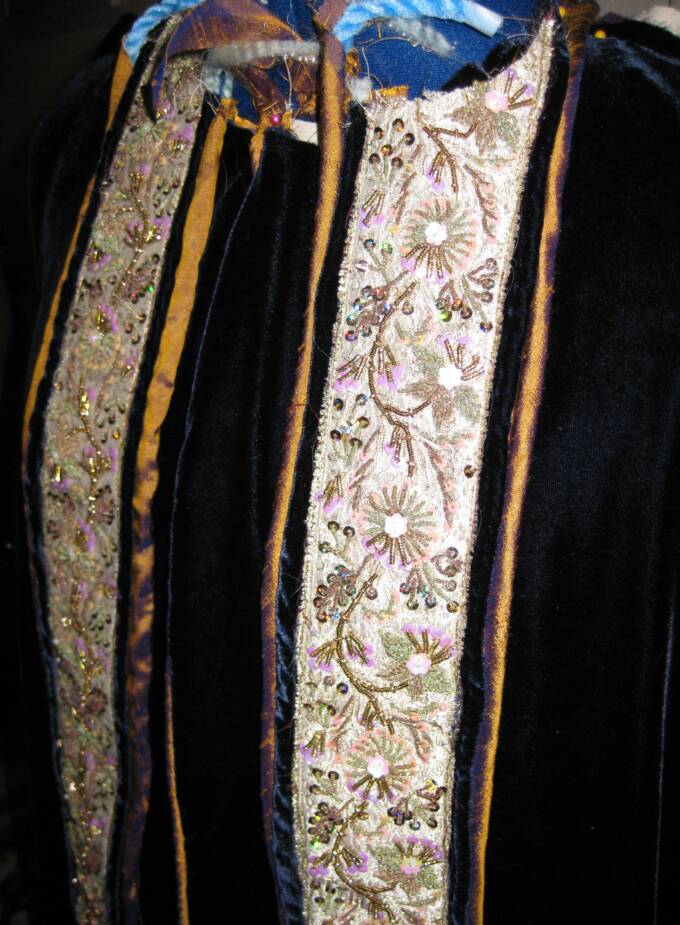
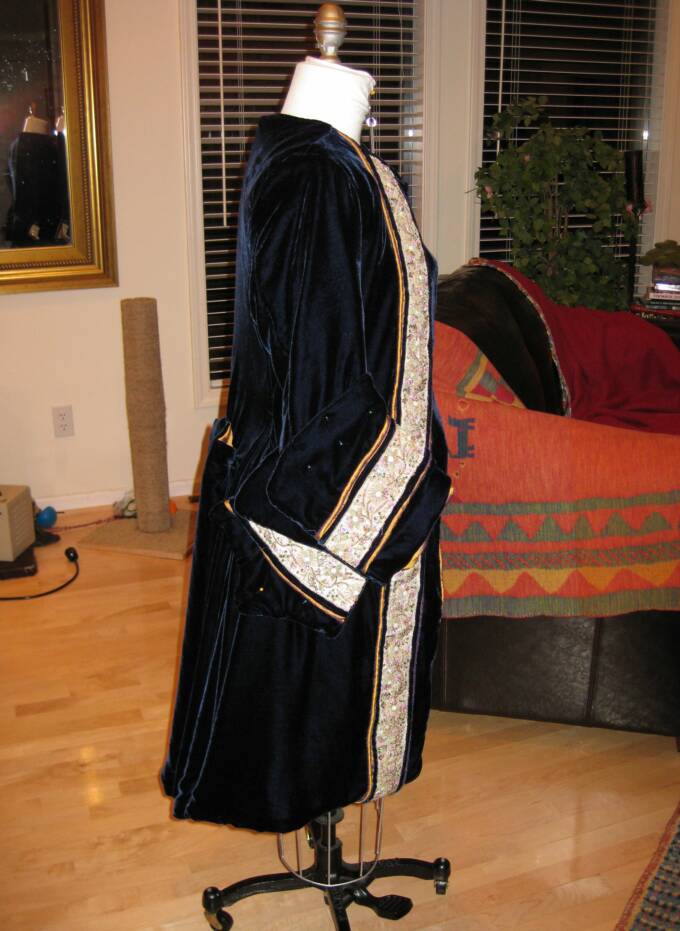
With this, I set to work re-building the trim. First, I looked at how things were going if I just folded the gold over. It worked, but looked sloppy to me. So, I added a strip of the macrame cord used in Ringo's Sgt Pepper coat. We can all stand to use a little help from our friends, right? In the photos below, the gold is folded over with the cord. I still didn't think it looked smooth enough.
I decided to make more piping, this time with the thick cord. Thank you Ringo! Then, I sewed this piping onto the gold, and folded it over. It was a much better result. But sewing it down so things came out straight was a struggle. Finally, I had the trim made for one side, shown here on the right in these photos. The trim on the left still needs the thick gold piping.
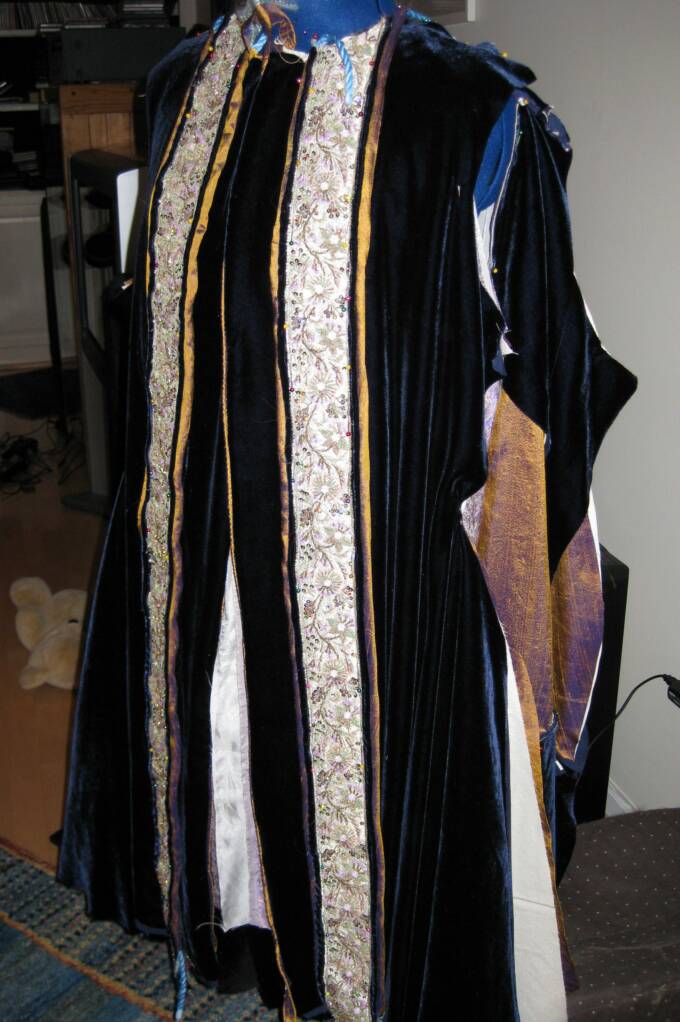
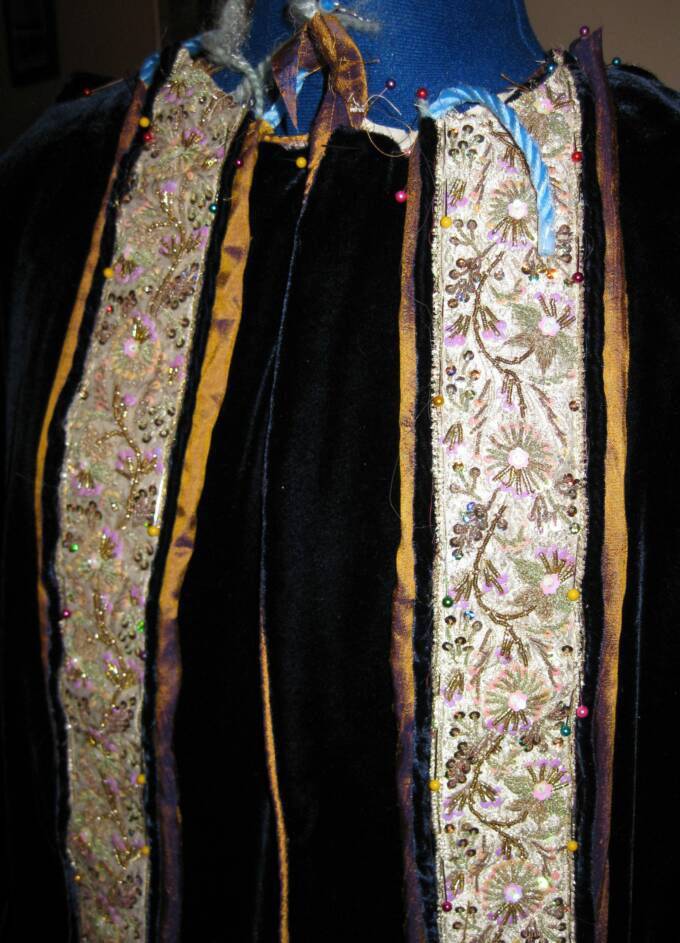
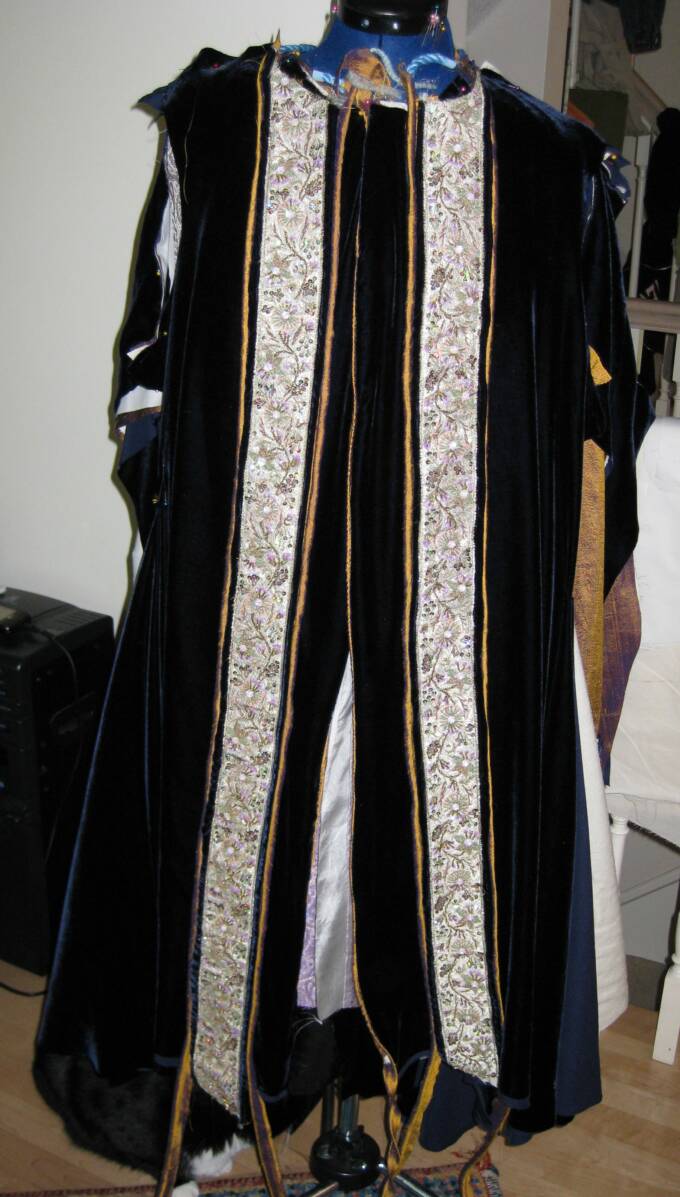
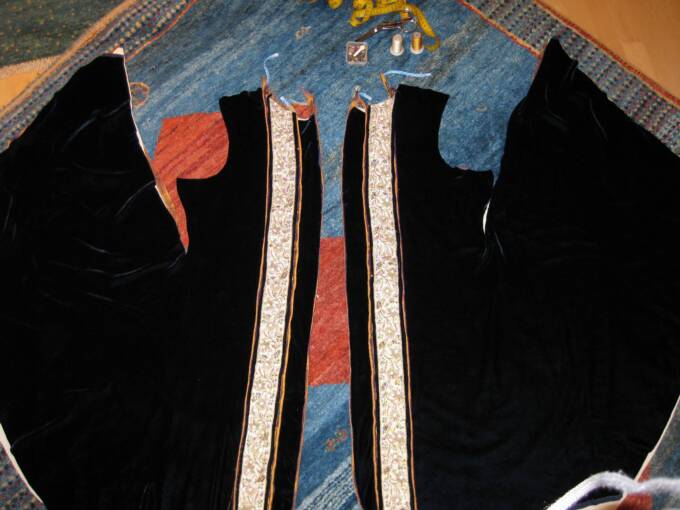
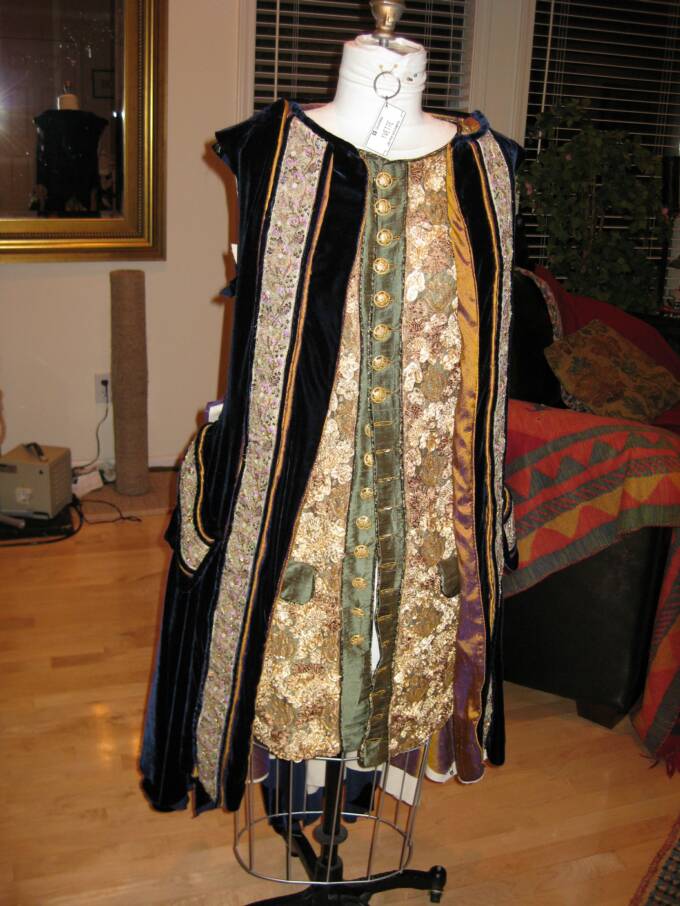
After much struggling and too much contact with a seam ripper, I had the left side done as well. Next, I sewed the lining later of the front of the coat to the velvet, with the more narrow piping at the edge. Here, the trim is laying over the front, waiting for me to pin it down and hand stitch it to the coat. No way I'll do that on the machine... It will be hand sewn on.
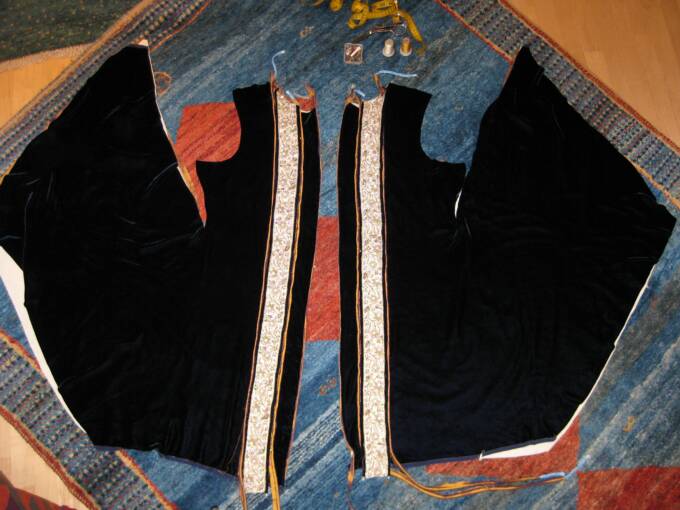
In the photos below, I have the trim pinned to the velvet of the coat at the edges closest to the opening. I'll sew these down first, then pin the other side, and sew, by hand.
I put the buttons on top after I had it so nicely laid out. I do believe I'll want buttons on both sides with this one. I may not add buttonholes at all.
July 18, 2009:
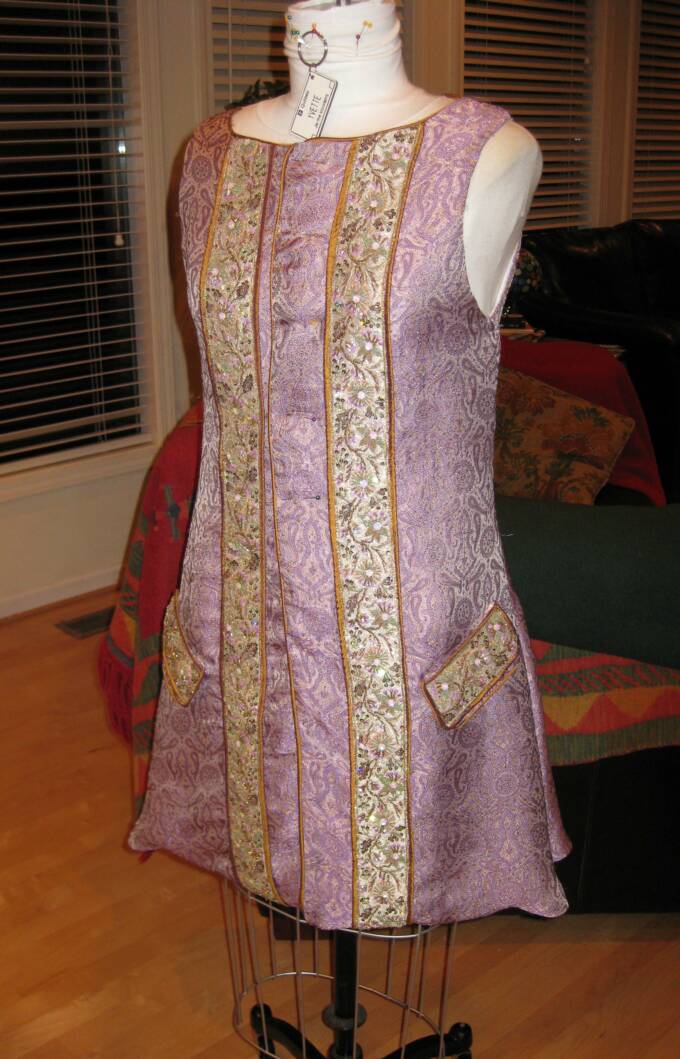
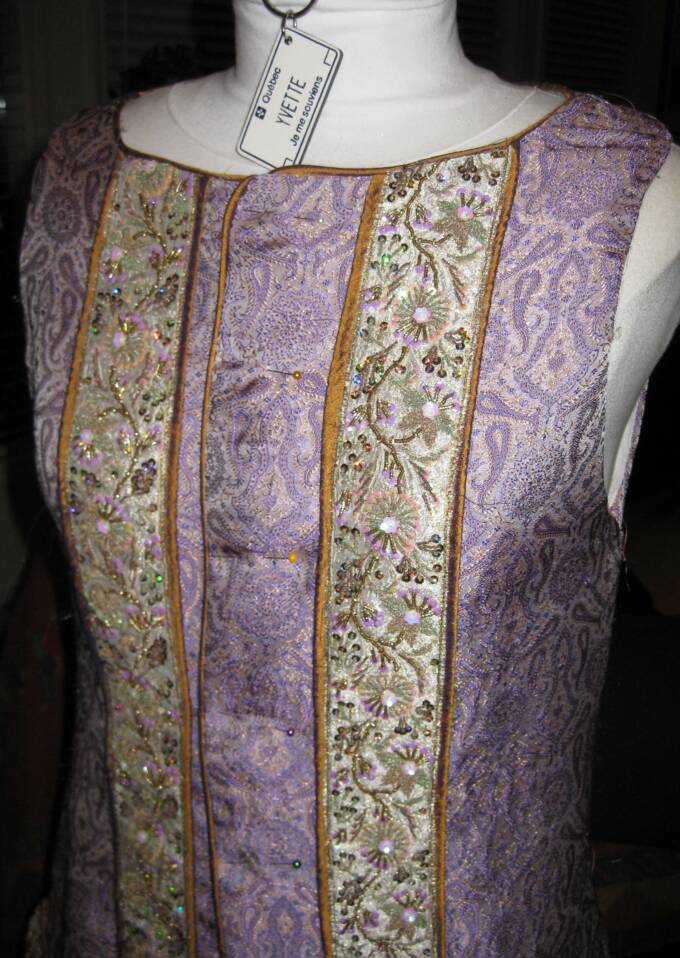
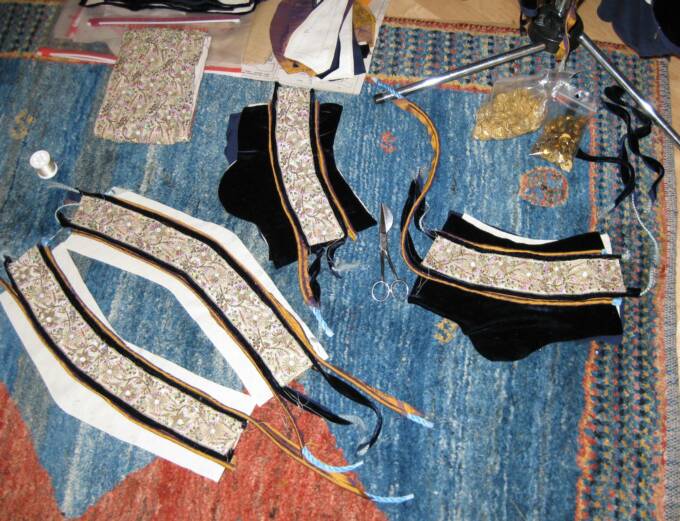
I wanted to take a break from the velvet and the seam ripper, so I pulled the Lavender Waistcoat pieces out from underneath the velvet coat in construction, and began building the waistcoat trim. This one was easier, just a row of thin gold piping on either side.
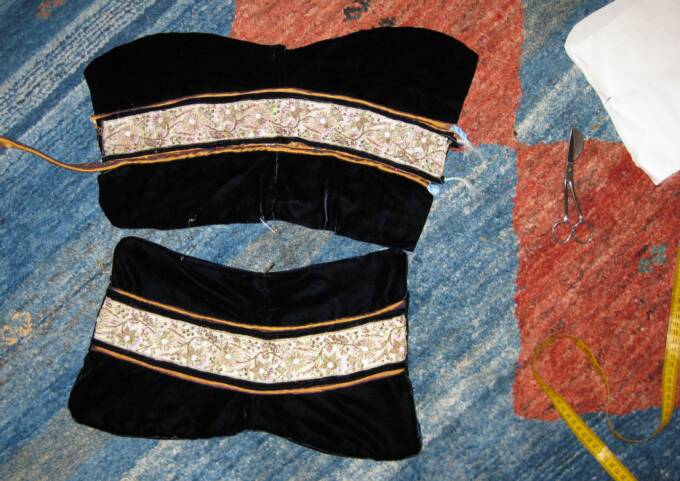
Then I began constructing the waistcoat.
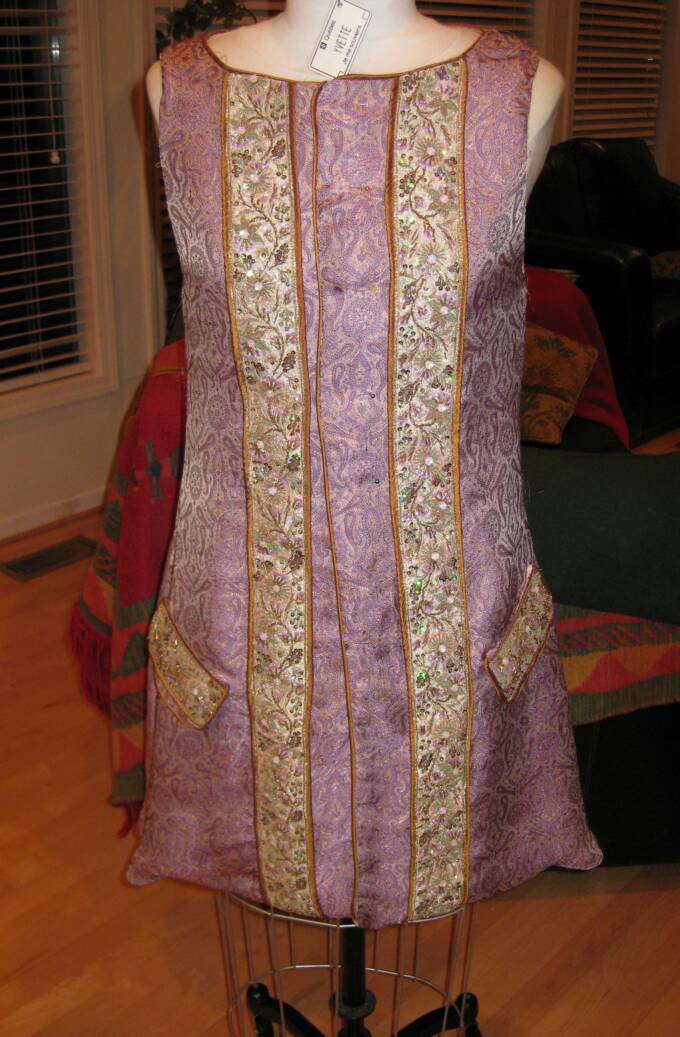
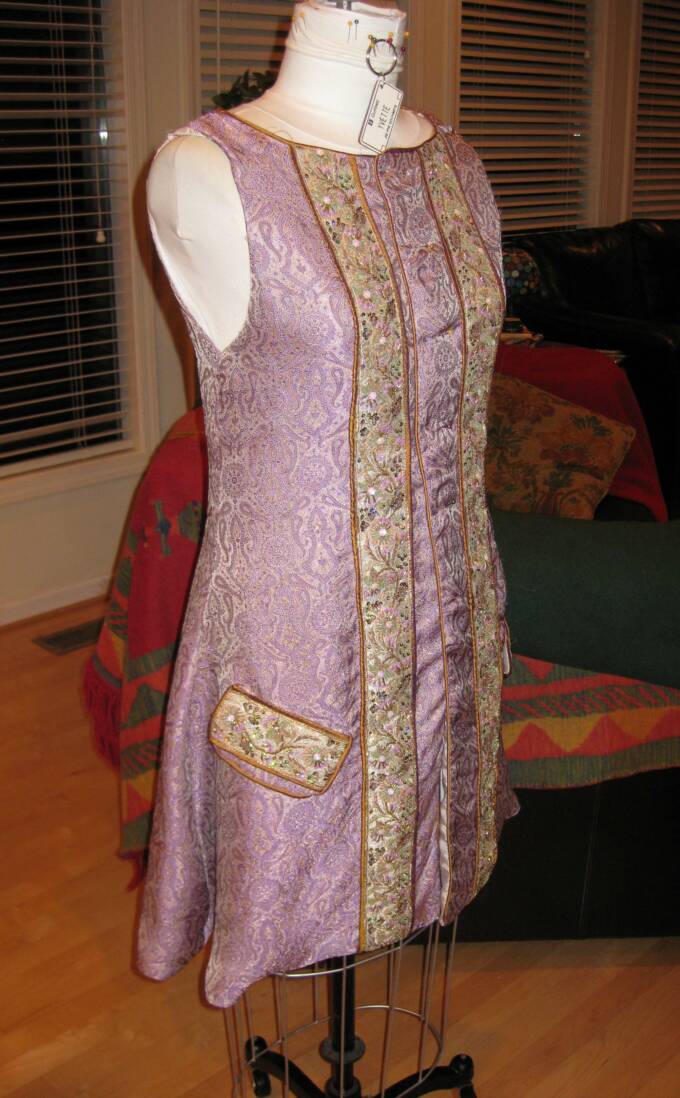
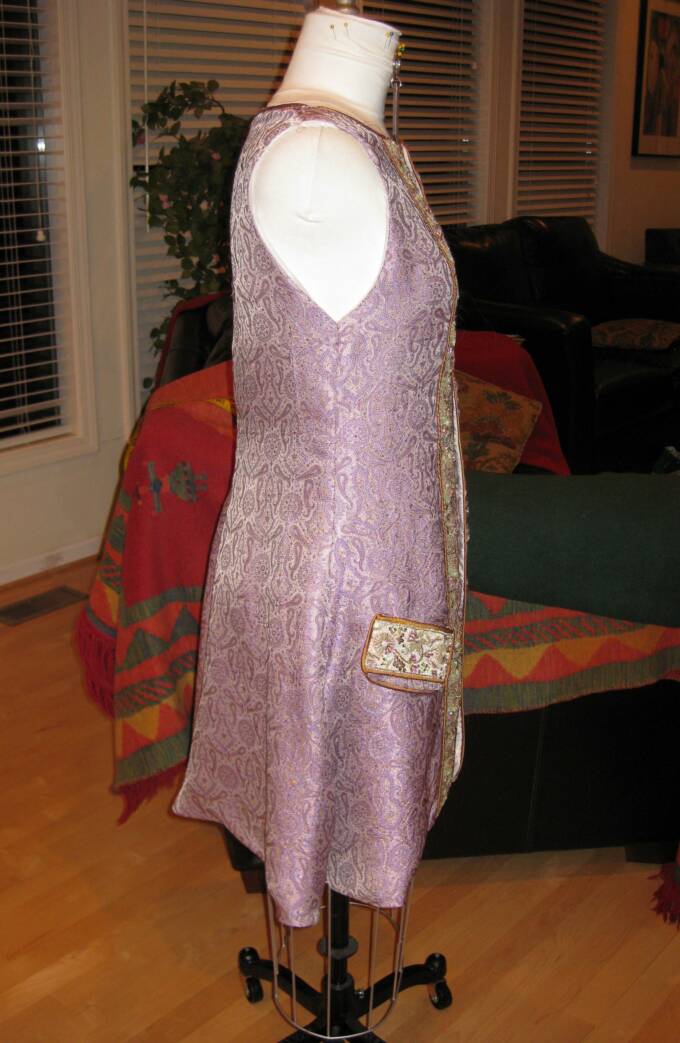
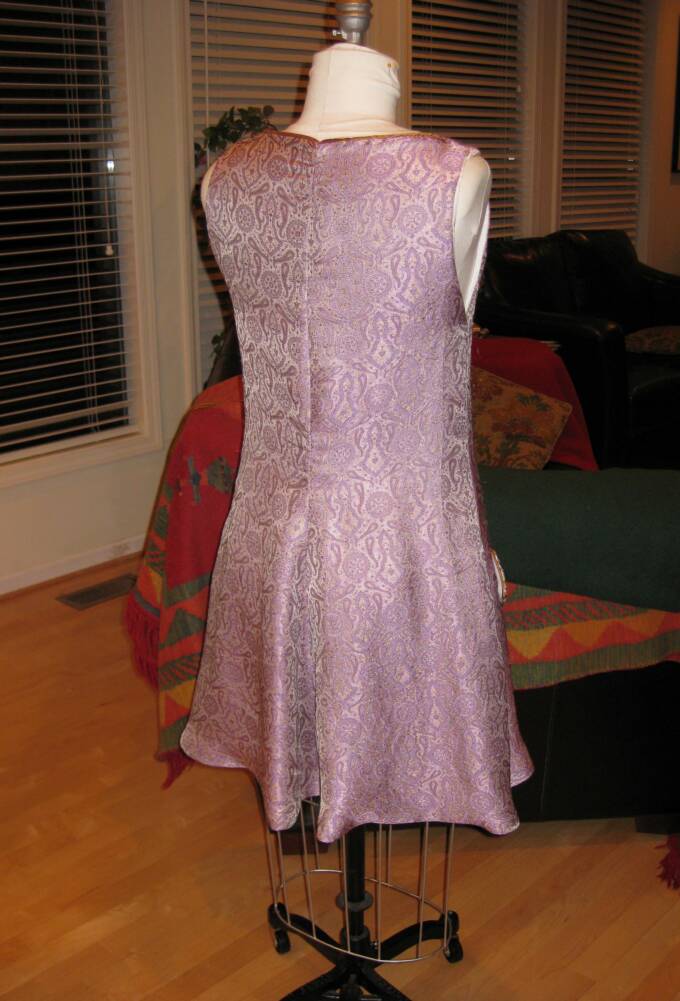
July 20, 2009:
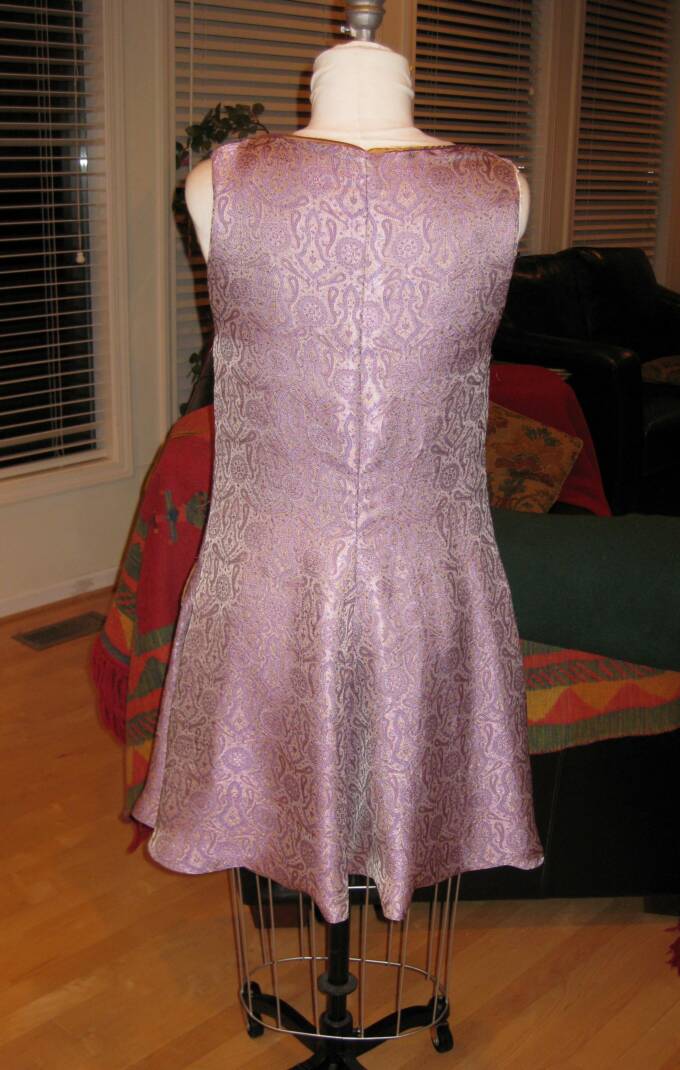
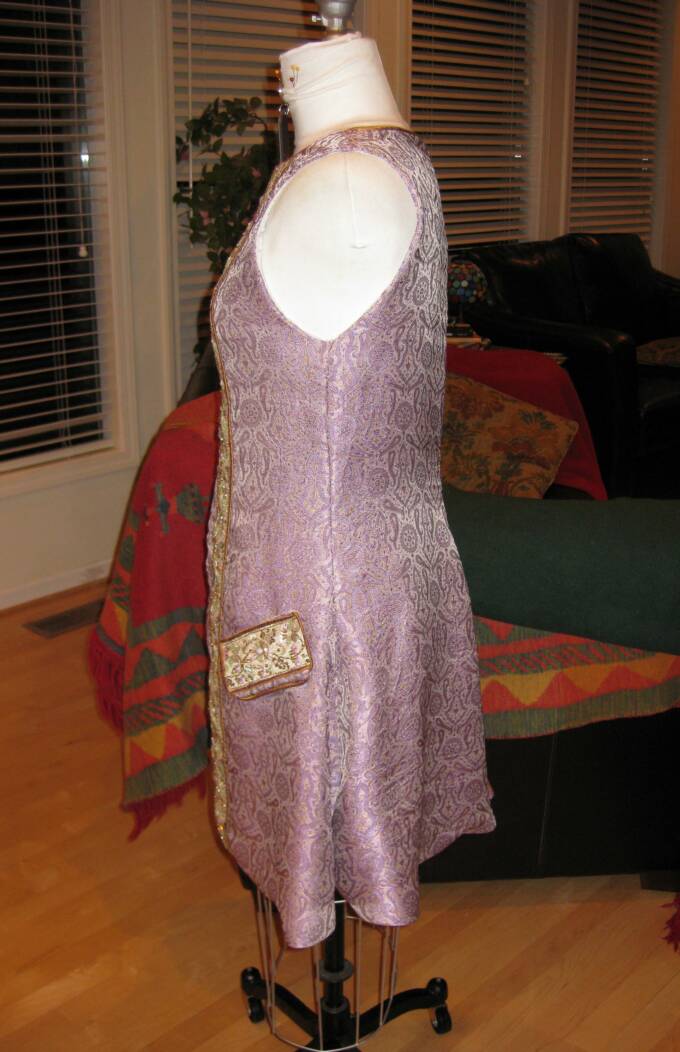
Except for button holes and buttons, the waistcoat is complete. Here are some photos. More to come once the buttons are in. Same with the golden waistcoat, btw.
See the little Québec licence plate with my name on it? My friend Jo broght that back for me on her recent trip to the Province. :)
July 22, 2009:
I finished building the trim for the pocket flaps and the sleeve cuffs.
And started constructing the sleeve cuffs. The velvet is giving me no problems, thankfully, and the walking foot is working like a charm. That's great, because sewing in the piping to the trim gave me all kinds of troubles.
July 31, 2009:
While on a trip to visit family in San Antonio, I got almost all the buttons sewn into the two waistcoats. Still some to go on the Golden one. Photos shall be posted on these once they're finished.
August 5, 2009:
Once home, I continued hand sewing the front border trim onto the coat. Here's photos of me at work, being helped by Seuss.
August 6, 2009:
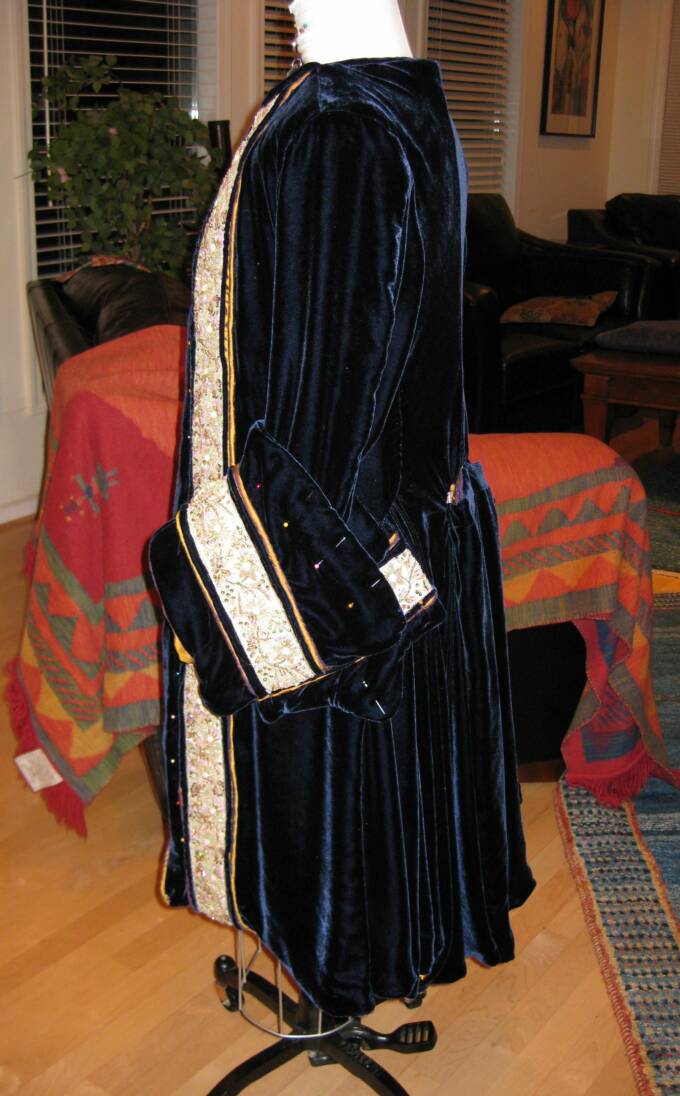
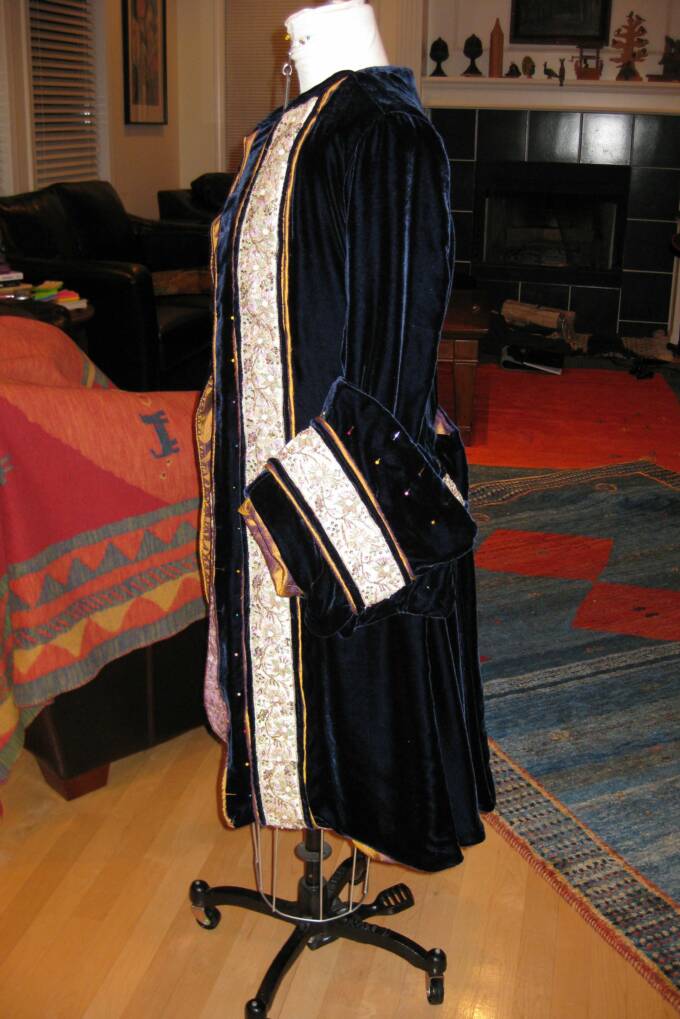
Once the trim was down the fronts, I placed the pockets and sewed the flaps on by hand, and then inserted the actual pockets beneath them, followed by pockets on the lining layer, just below breast level.
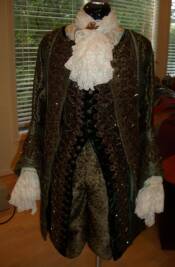
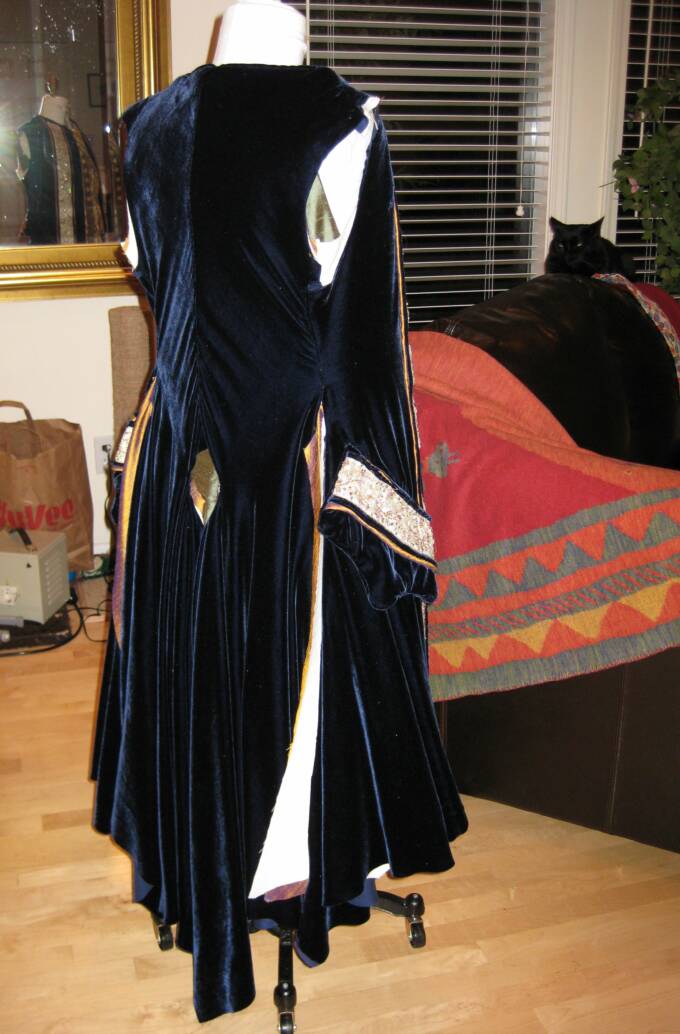
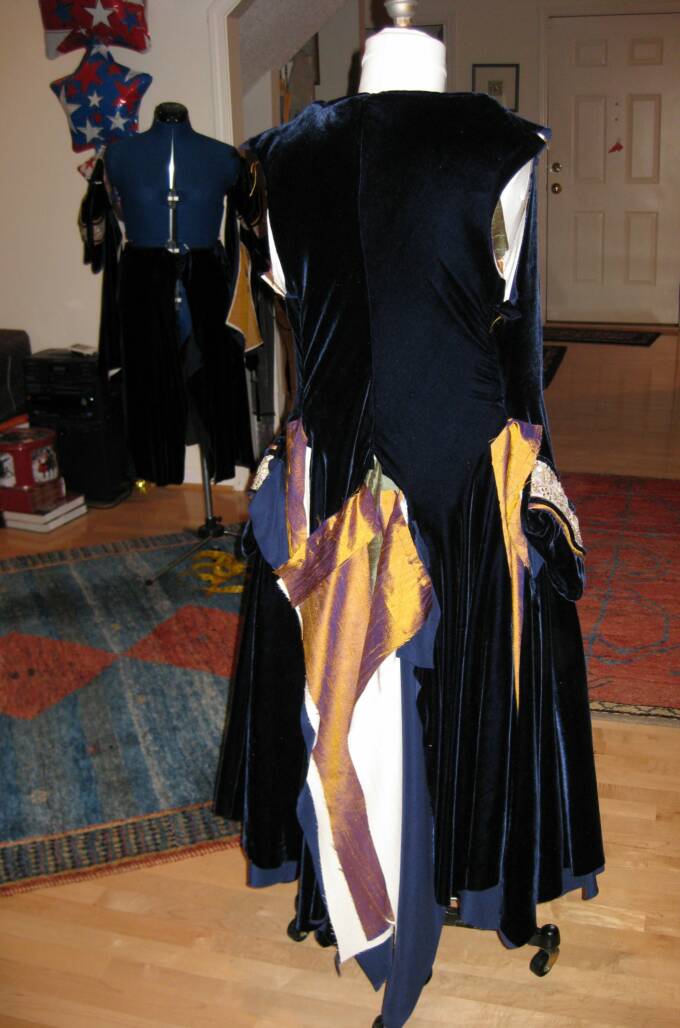
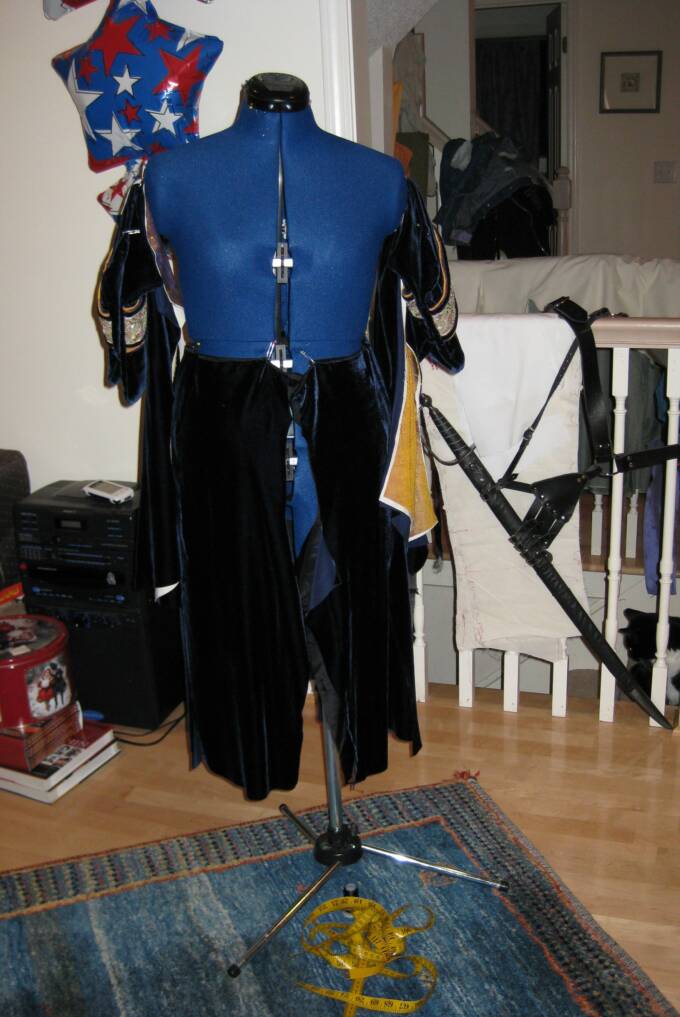
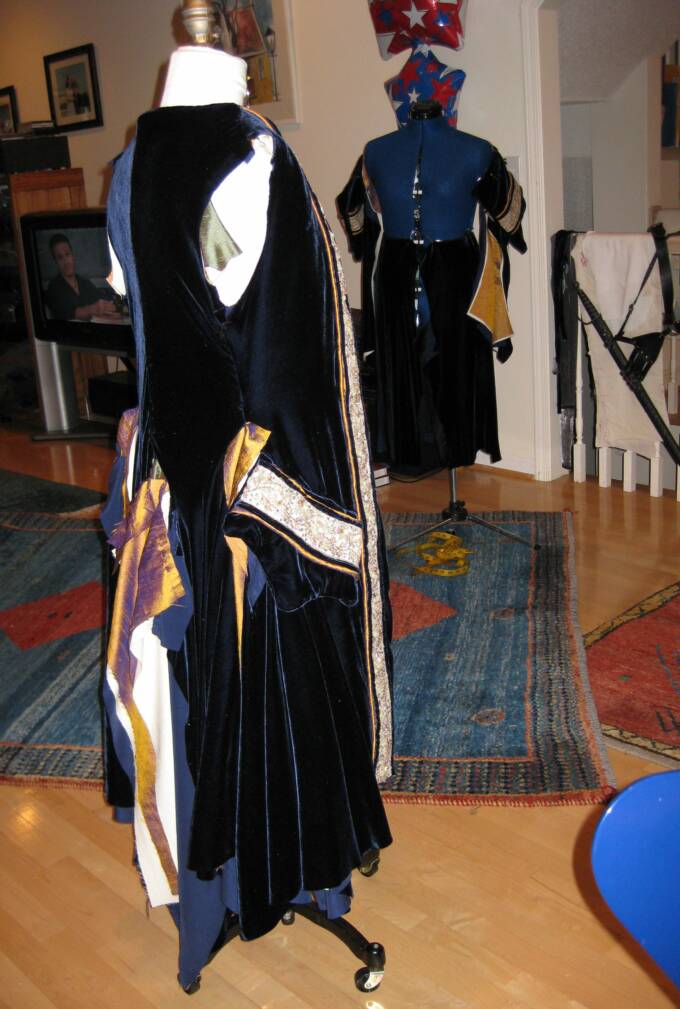
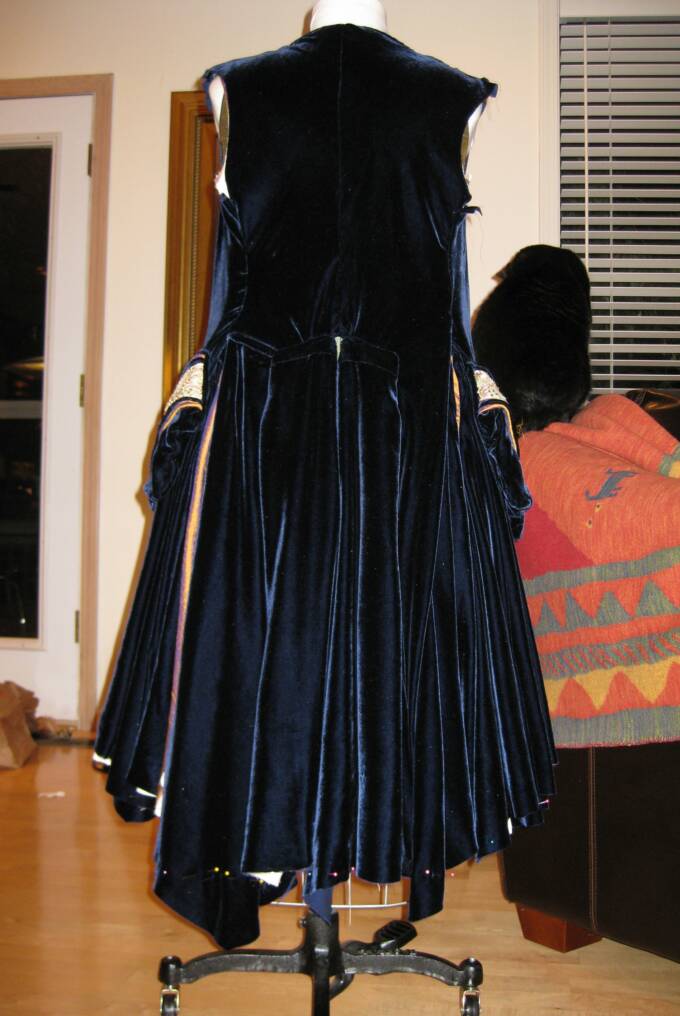
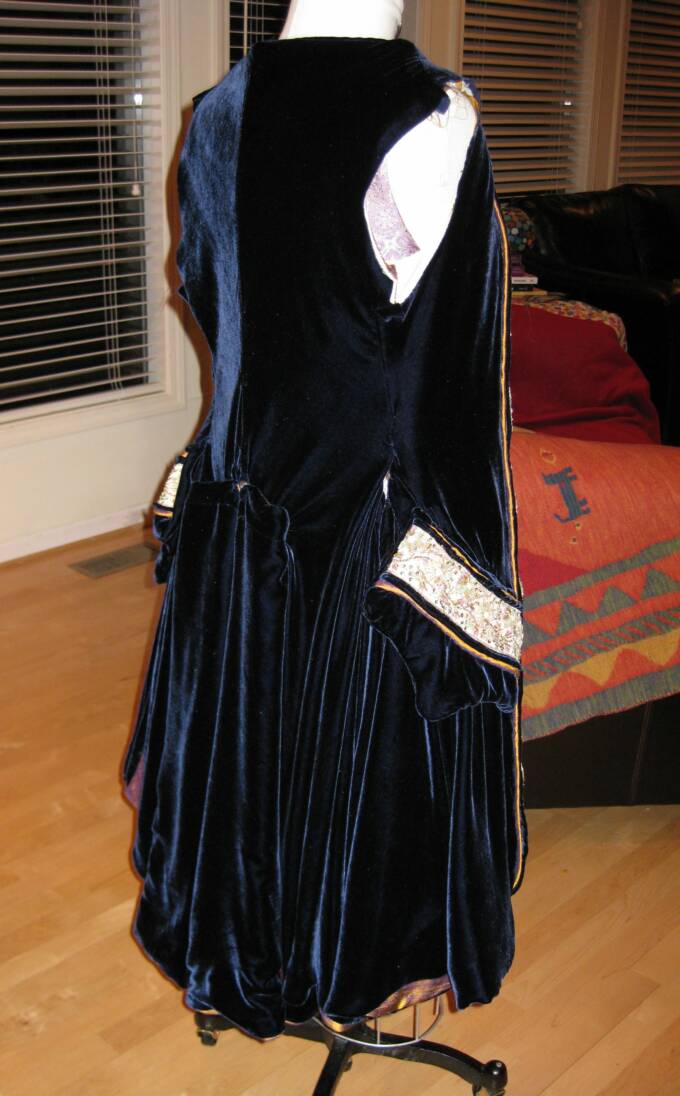
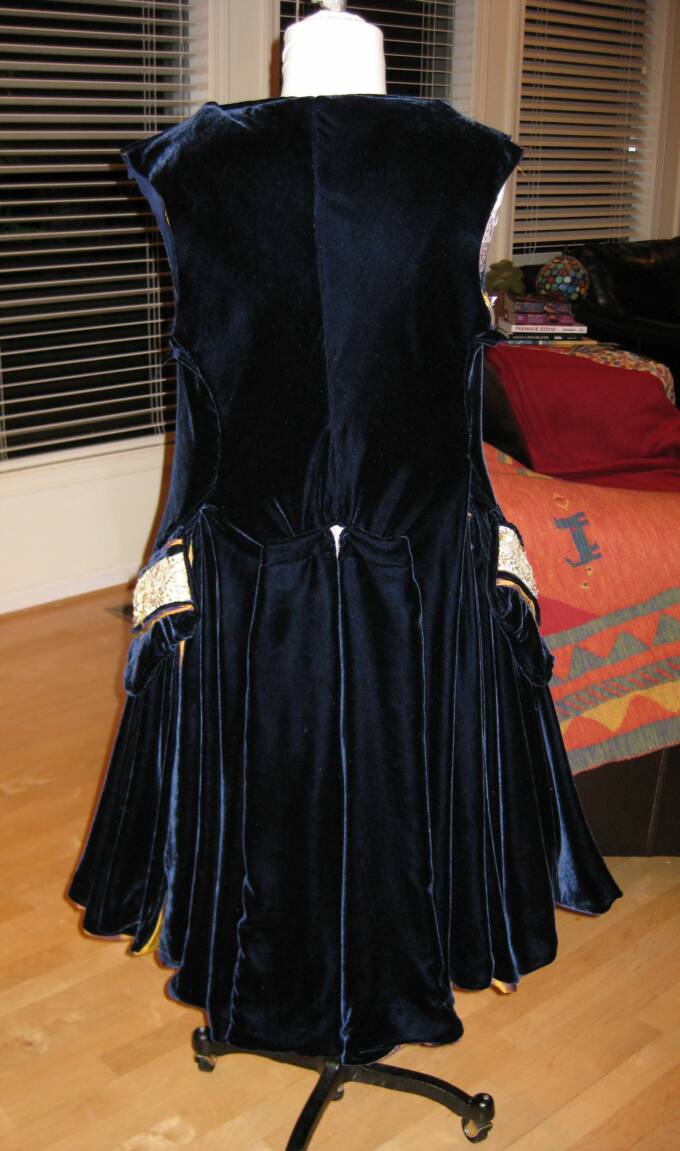
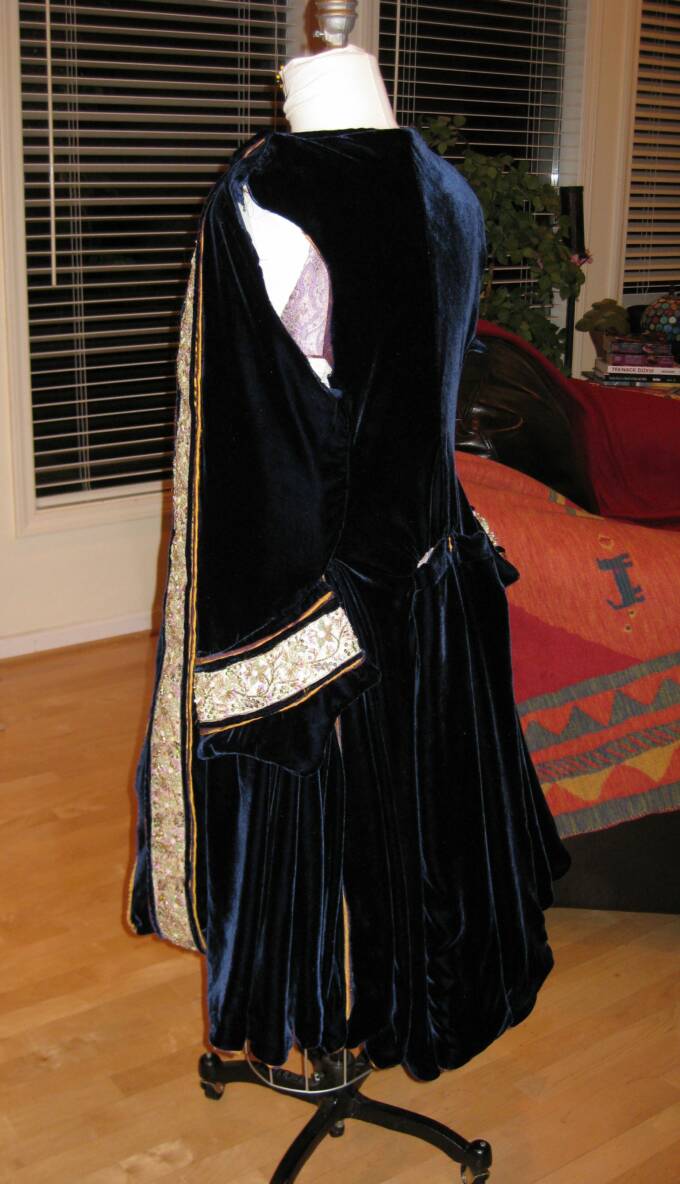
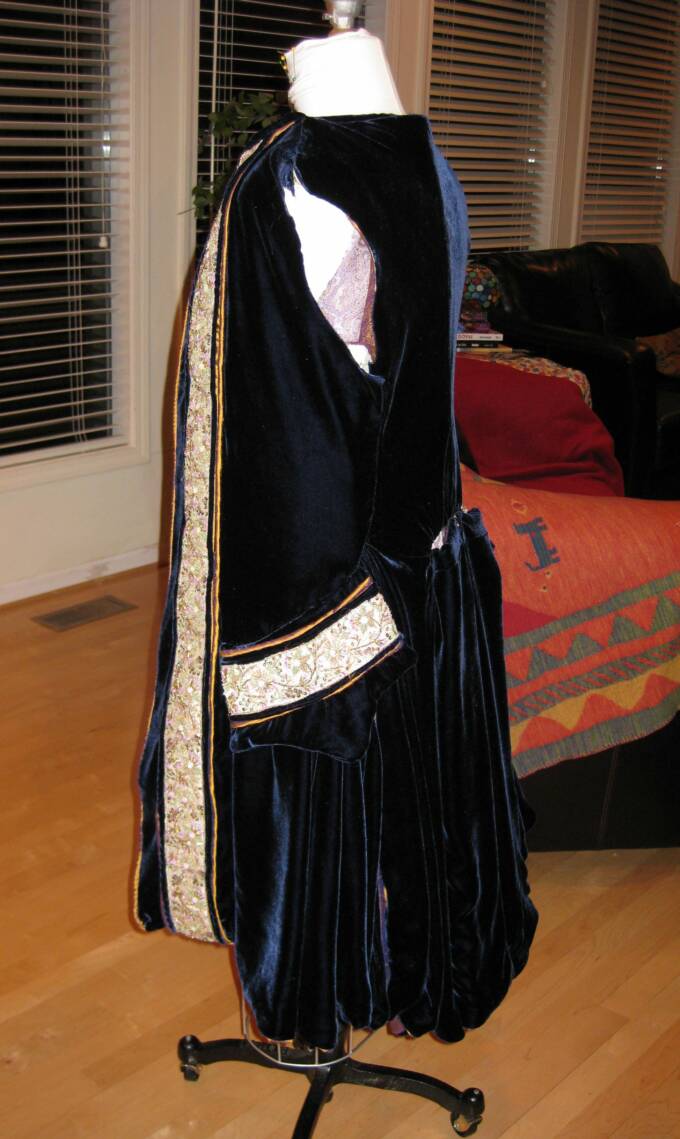
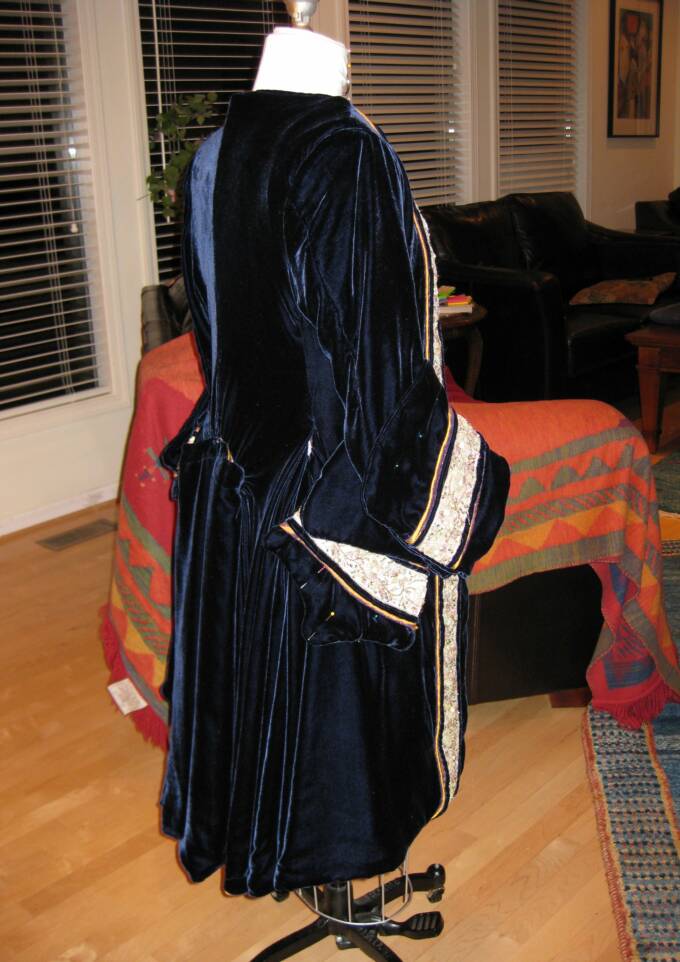
Then I began the coat construction, starting with the piping around the collar, and then sewing the four panels together...
I began work on the breeches, too, sewing the lining layer to the outer fabric at the waist line. You can see Julien's new cutlass behind the dress form on the banister, sheathed & attached by frog to his baldric. I need to "cover" the skull and bones on there with something, a shash maybe. Julien would not have a skull & bones there, as my husband so clearly pointed out. Plus, hey, it could use some color. But what color?
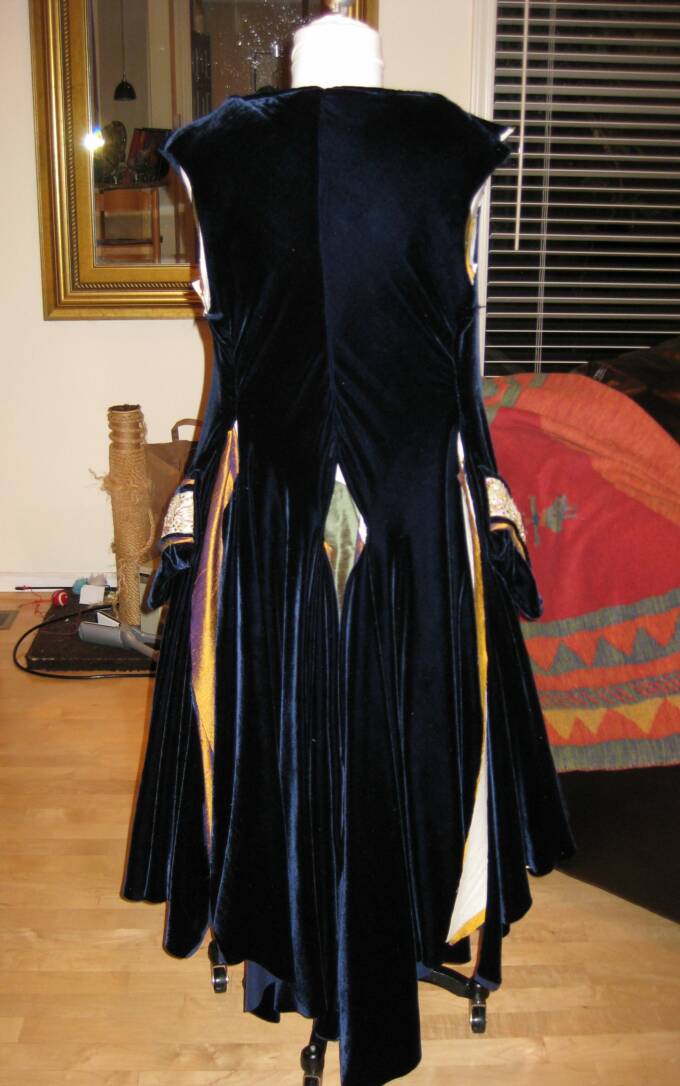
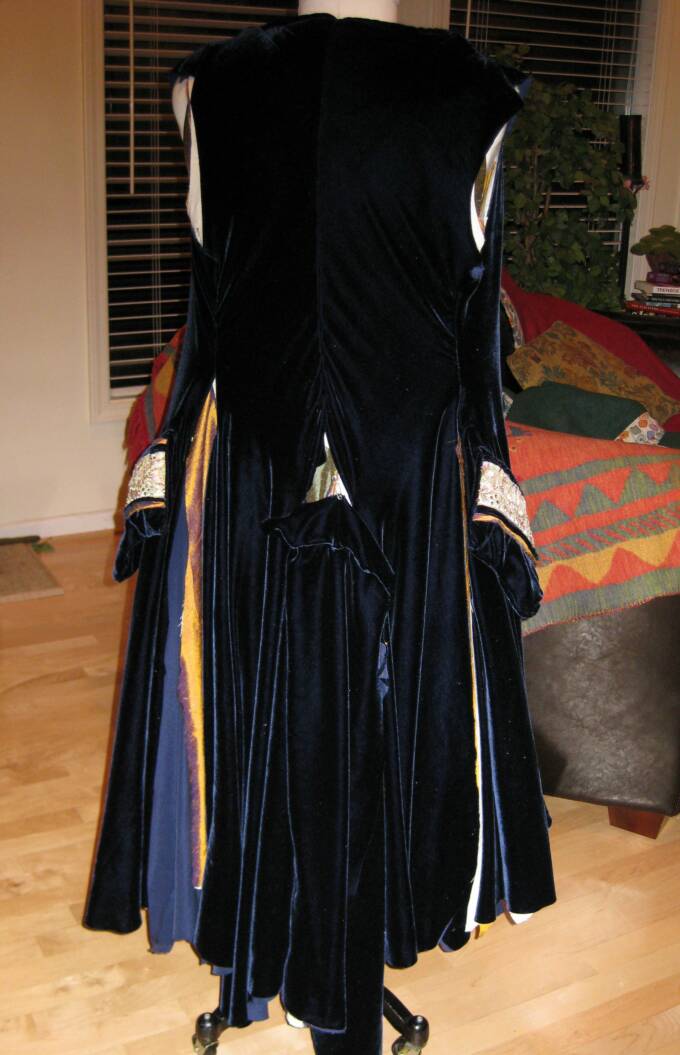
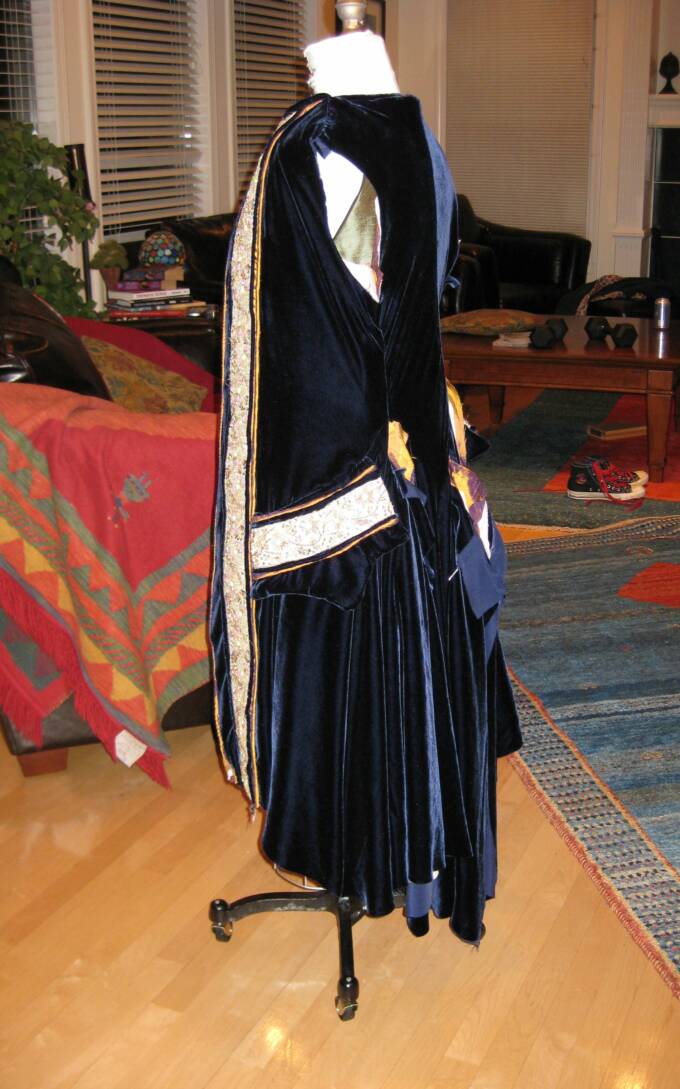
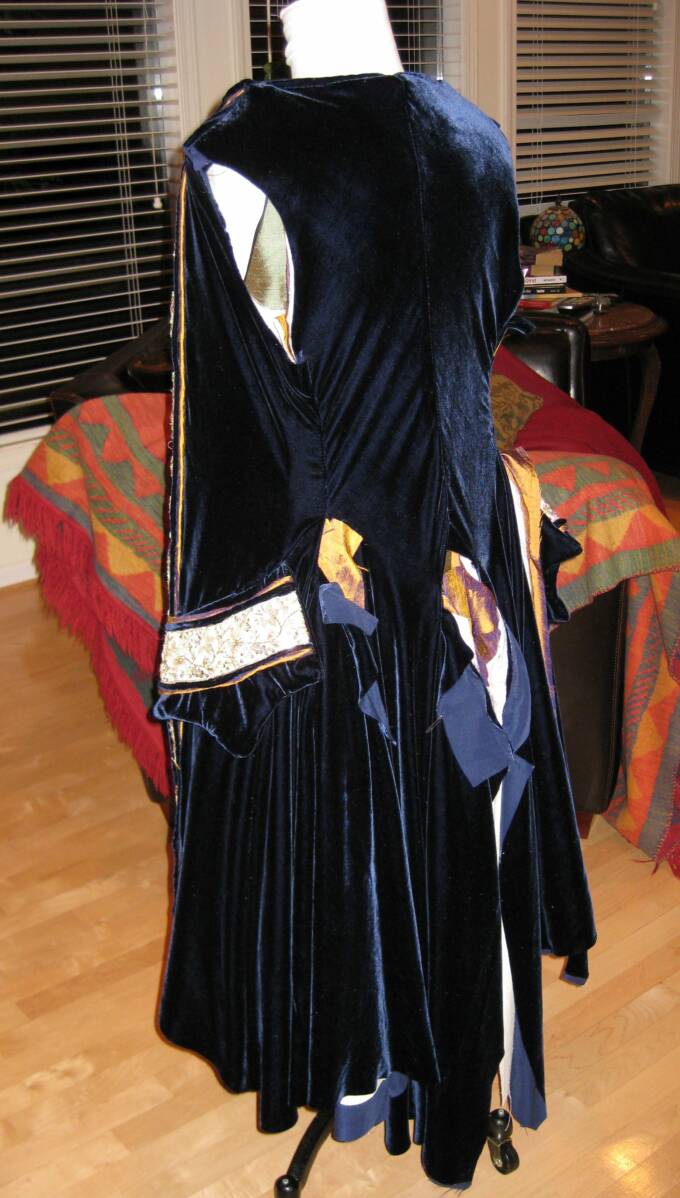
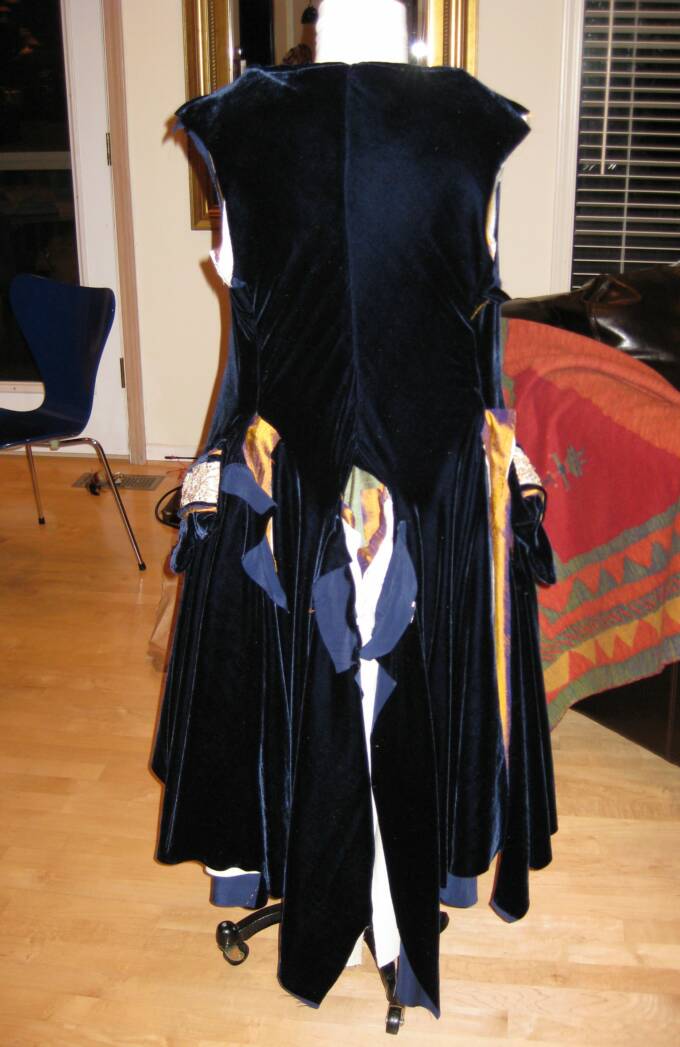
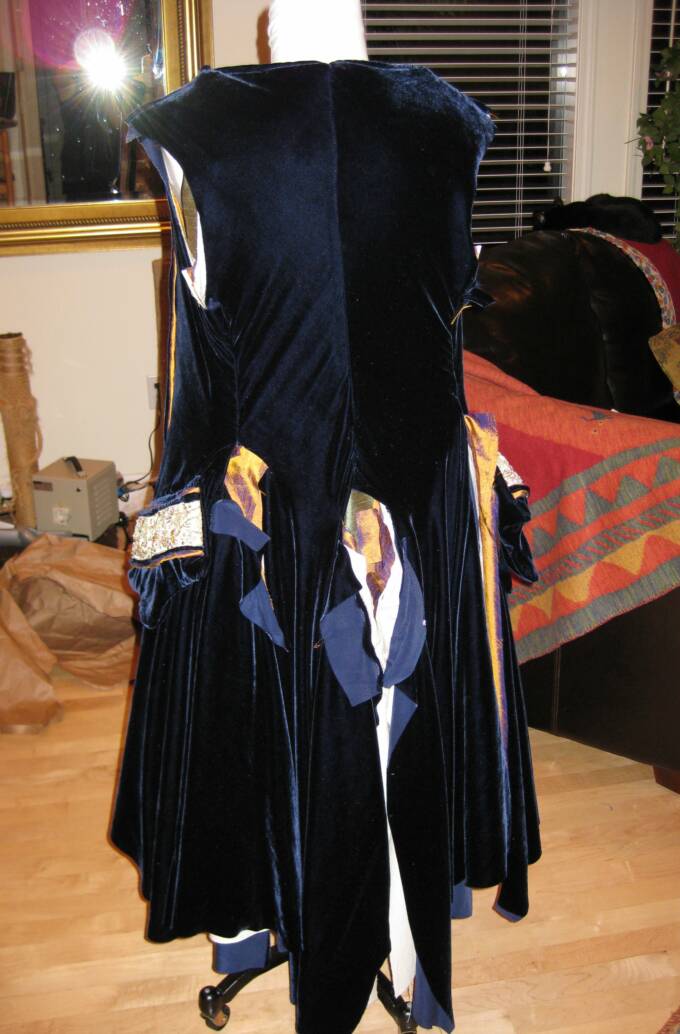
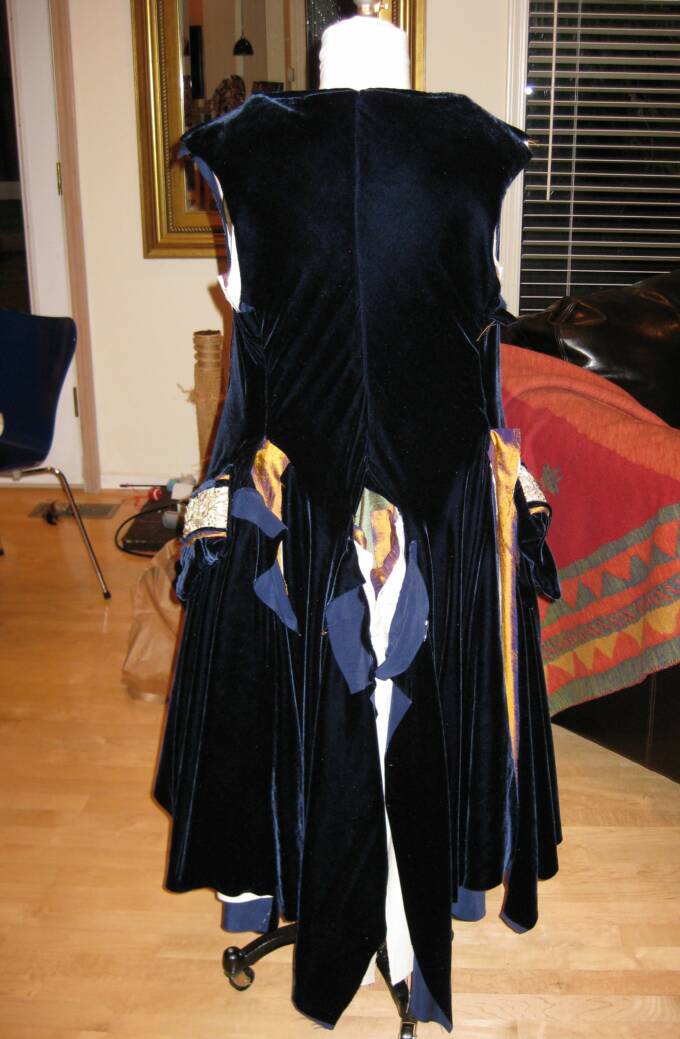
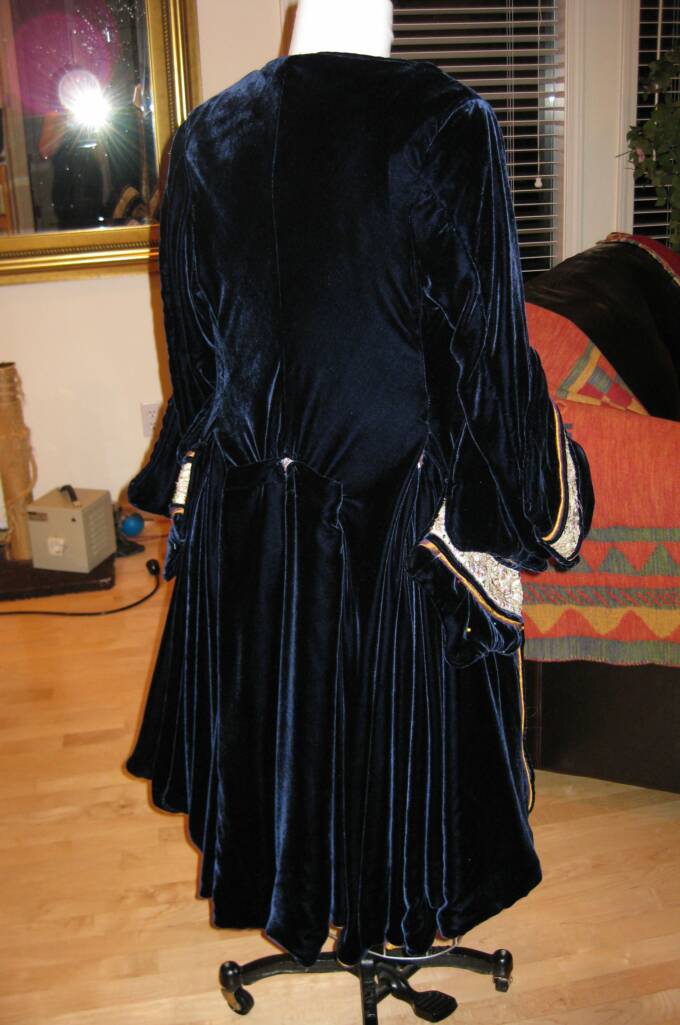
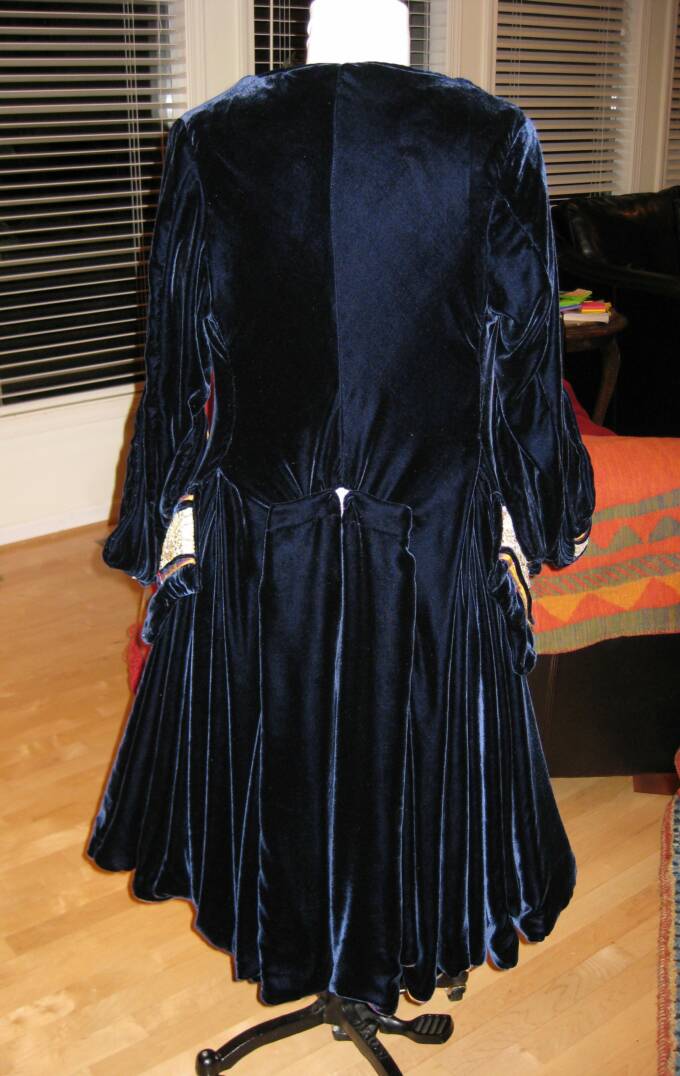
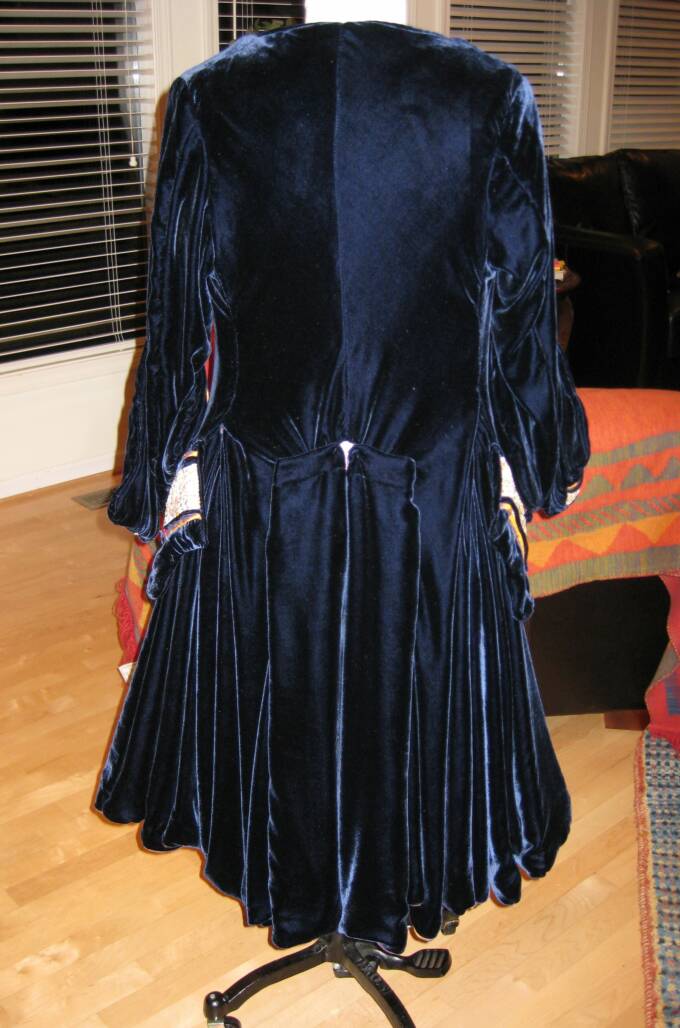
I noticed the bias cut exposes the panels because of the differing directions of the nap, something that isn't visible from a direct shot. At a heavy angle, the fabric appears lighter in the panel farthest away, but at a slight angle the result is the opposite. I don't consider this a flaw; I wanted the bias cut, and this is an inevitable result of velvet cut on the bias.
August 7, 2009:
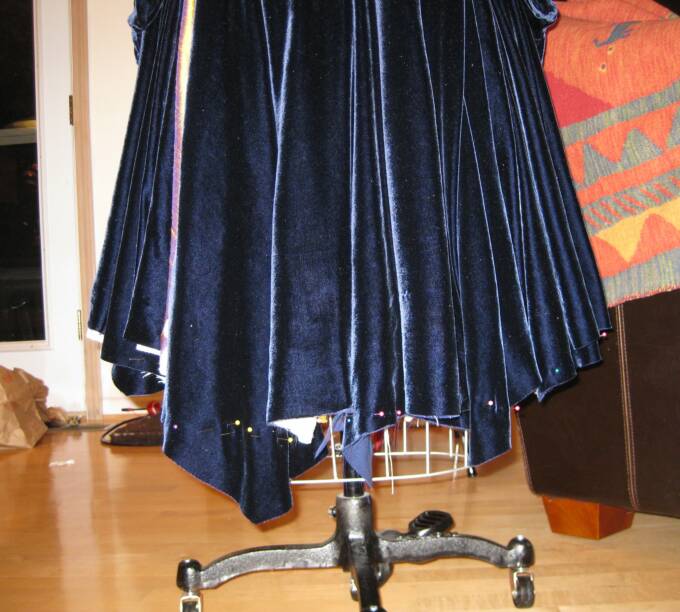
I pinned the fabric at the hem, marking the angle I wanted, so that the drape falls longer in back, like tails. Here are some photos of the pinned marking.
August 8, 2009:
I bag-lined the hem.
August 9, 2009:
I experimented with a few hand stitched non fuctional buttonholes, and I have to say, I'm less than thrilled. I'm also not too excited about any kind of buttonhole on the velvet done in gold thread, no matter how much I bulk it up, etc. I don't think I'll risk it, and will instead stick with the idea of double rows of buttons where there would have been non fuctional buttonholes, and in the few cases where I need actual buttonholes, ie, along the upper sleeve cuffs, I will do them in black thread, so they're practically invisible. I hope I manage to have no difficulites with the buttonholes over the velvet. I've done it before with Julien's Green Waistcoat, but... The velvet always makes me nervous, because it's impossible to pick out a mistake without it being visible afterwards.
Here are two shots of the experimental hand stitched button holes, where I used gold rattail chord. I'm unable to make them uniform, although I've done about a dozen practicing. The buttonholes are sewn onto a strip of velvet sewn to the dupioni & then laid over the coat. As you can see, it works from a distance, with theatrical perspective, but close up, I'm not buying it.
This page was last updated: March 21, 2013
As I considered these possibilities, I began sewing in the sleeves. Here are progress photos of that.
August 10, 2009:
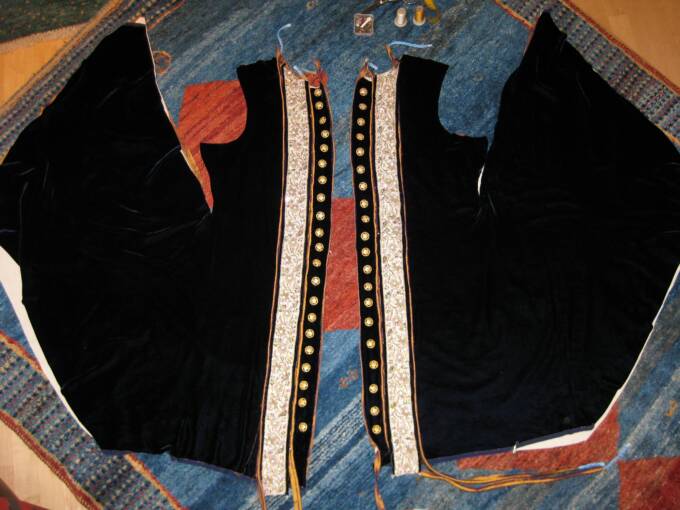
The sleeves are set in. I've marked where the buttonholes should go, but decided against them except for where I need the functional kind. Buttons will go where you see the pins. I have not put the pins in to the left yet.
Still to do: Press the hem, tack the pleats & sew on buttons, & sew ten functional buttonholes in the sleeve cuffs. Add to that, the finishing touches to the waistcoats. And the breeches.
August 14, 2009:
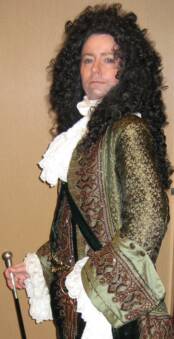
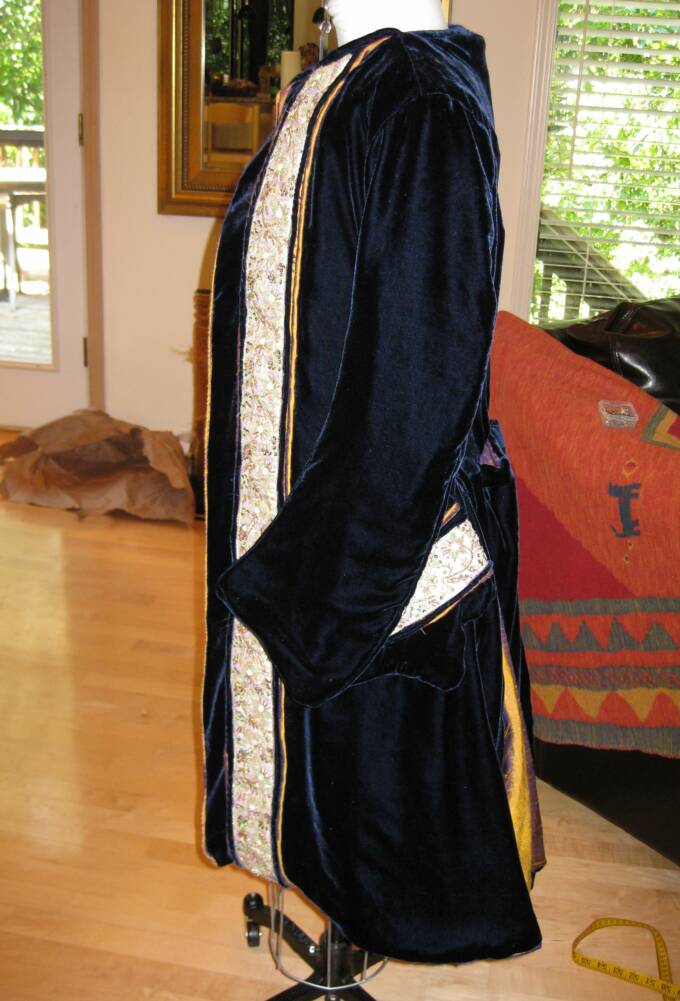
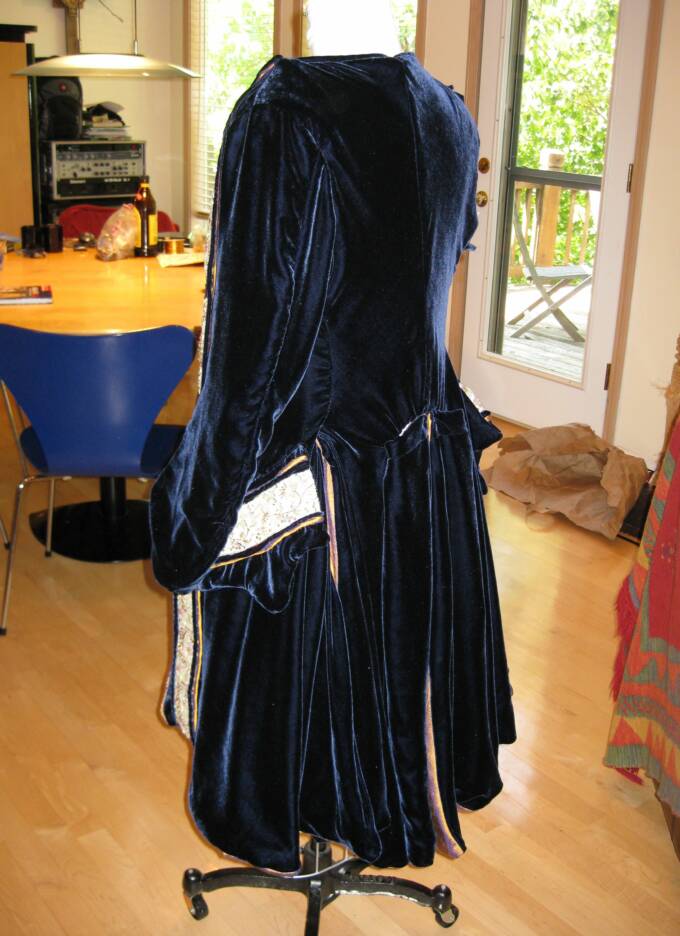
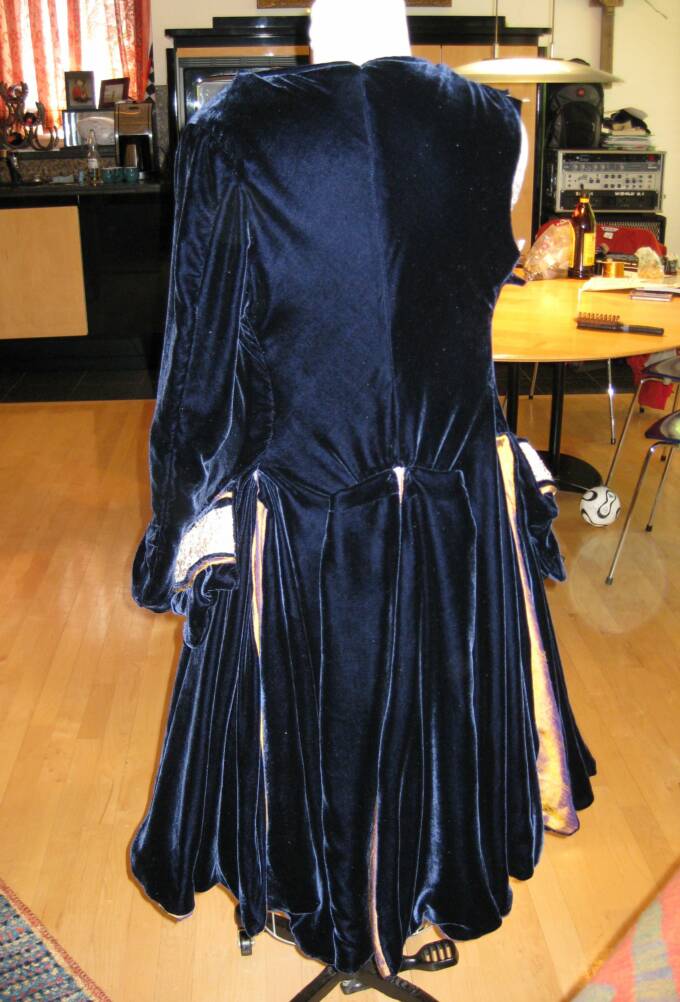
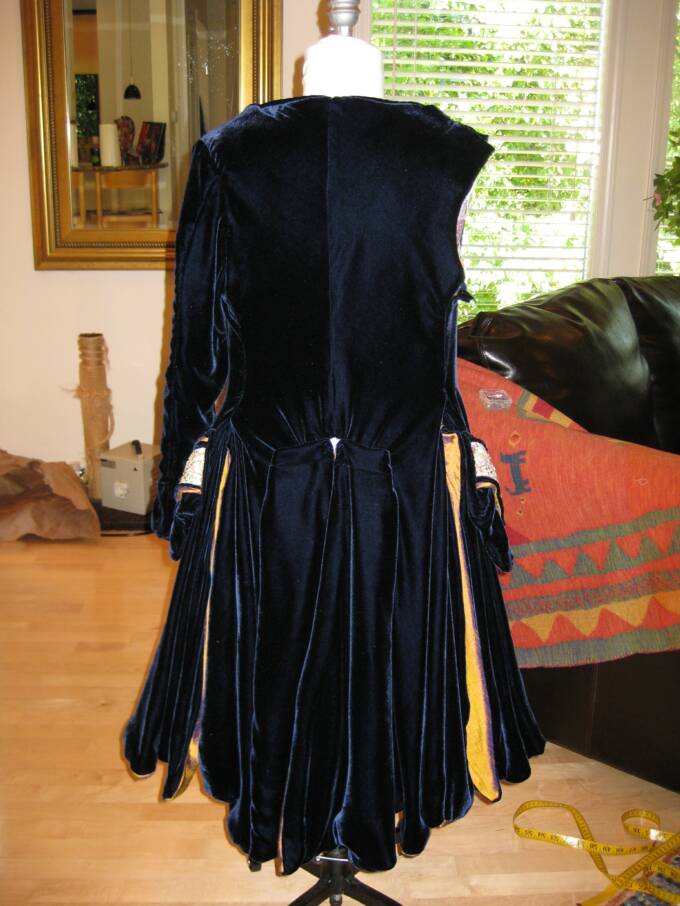
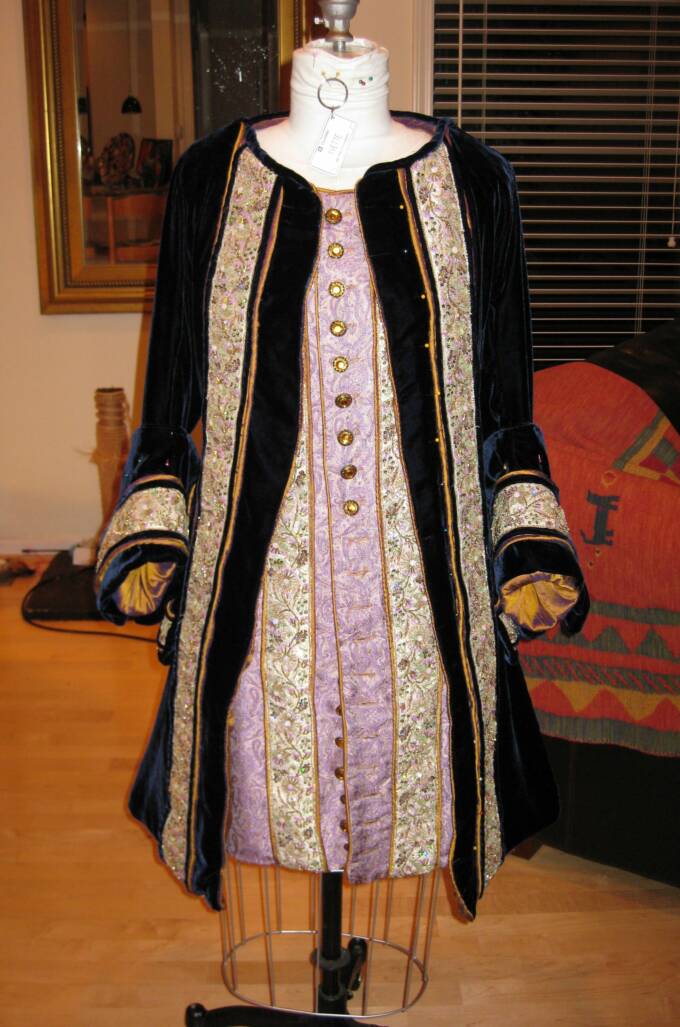
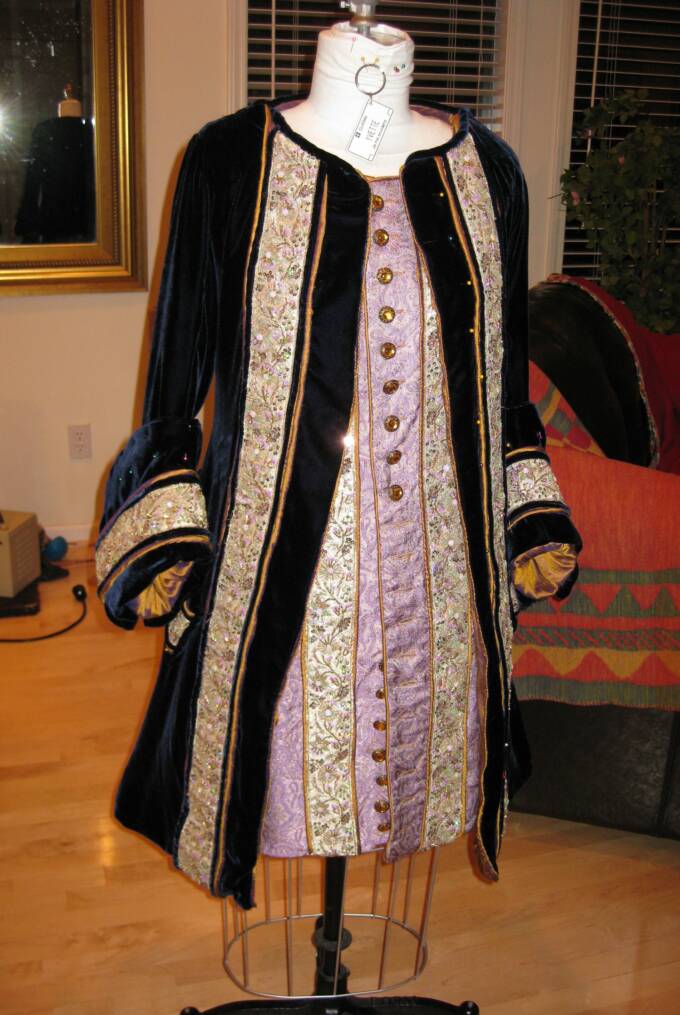
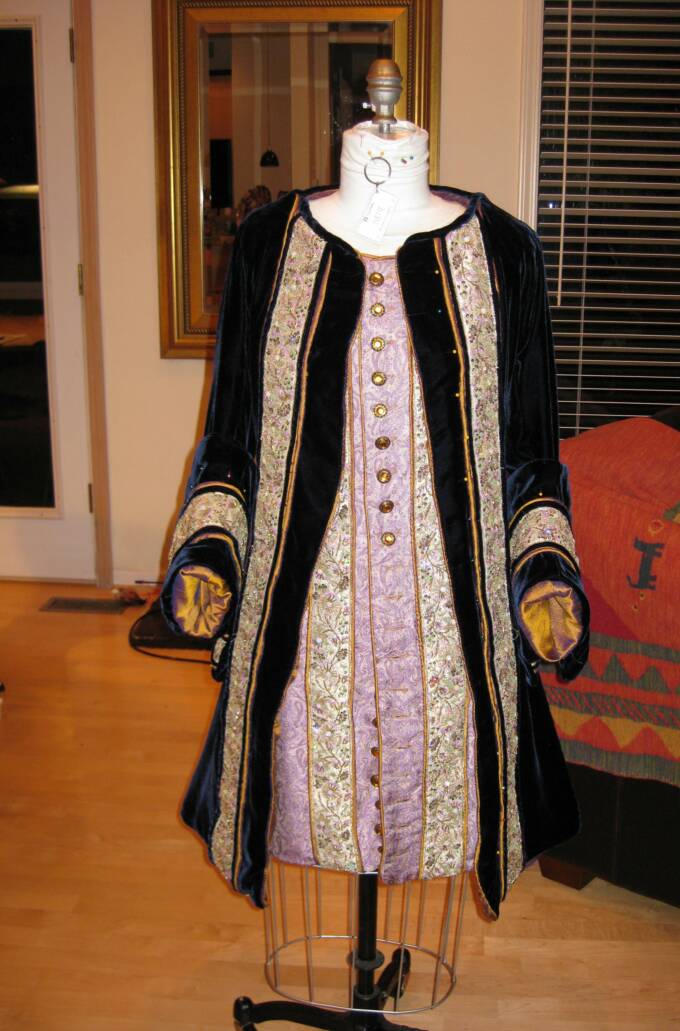
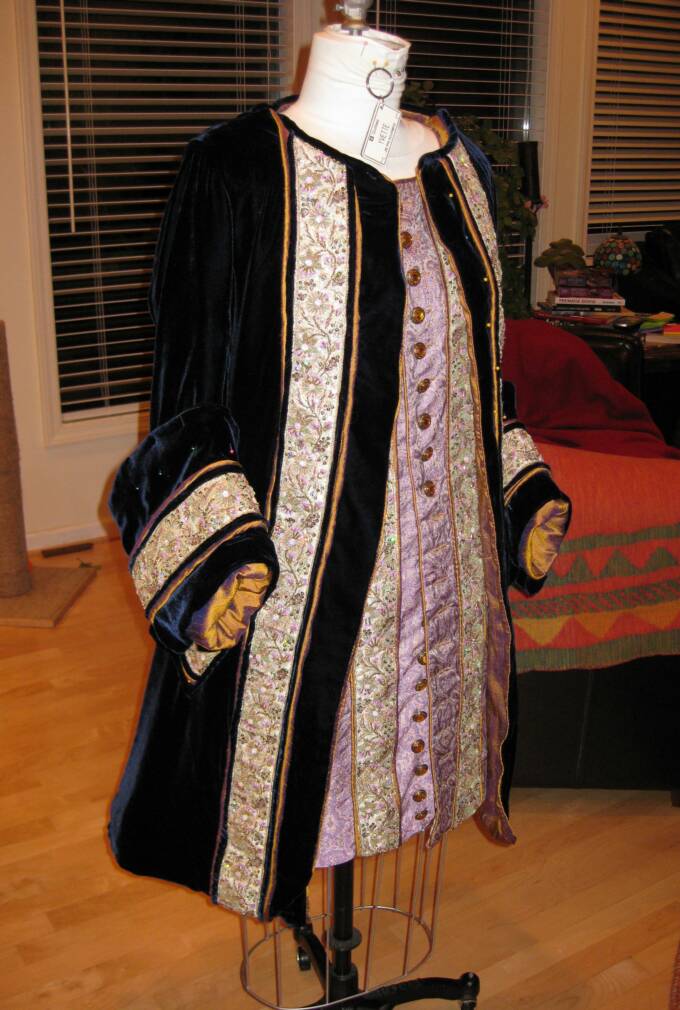
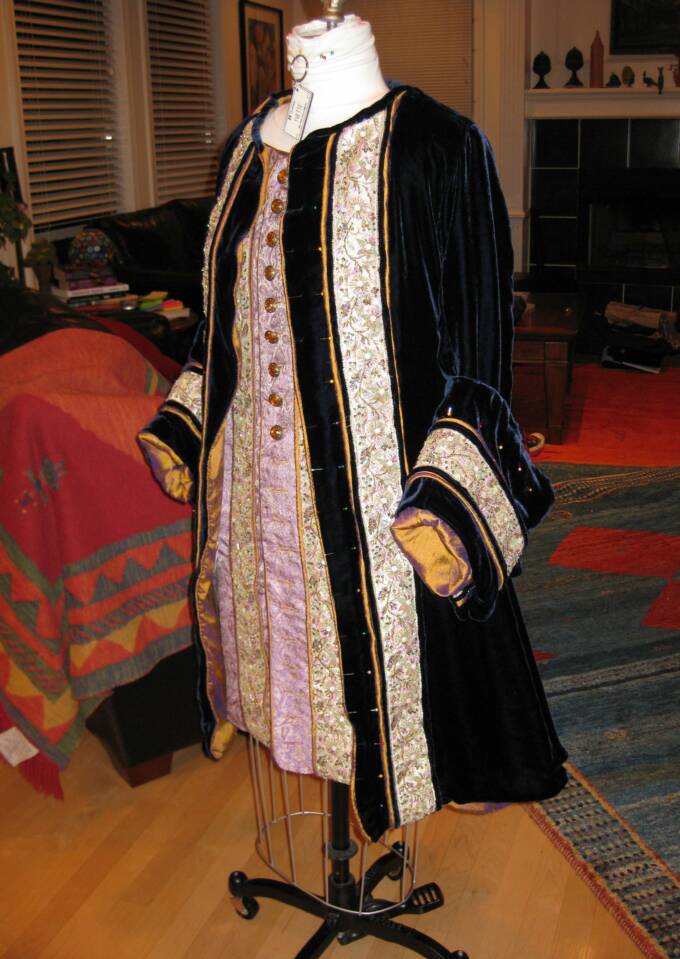
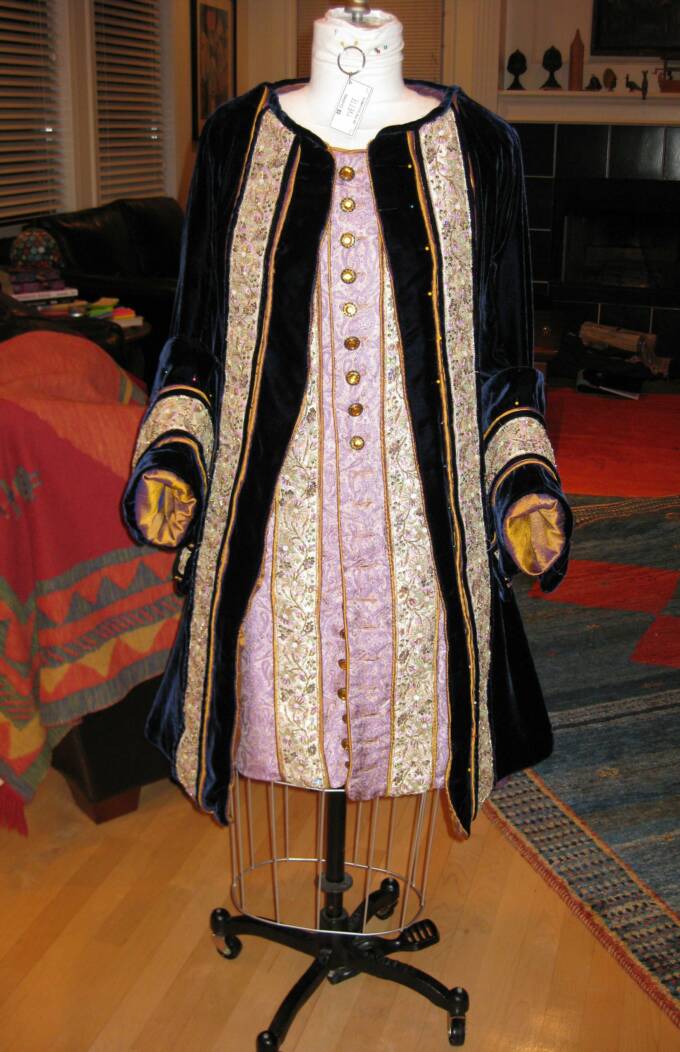
So, on the Justaucorps... I did all those things noted above, and it is finished. Yay. I will take photos of it very soon, and post them.
Still to do: The finishing touches on the golden waistcoat, which includes adding some buttons, a minor adjustment to the hem, and sewing shut the lining inside. The breeches have a bit more to go... I am hoping they can be finished within a day, once I get on them.
Since September 2007, I've been writing, working on a time travel epic inspired by Captain Julien's 18th Century costumes. I'm currently editing my first two completed novel drafts, and hope to have them published soon. Please like my Facebook Page and visit my Website and stay posted on my progress!
Several years back I began writing my first novel, the first in a time travel series inspired by Captain Julien's 18th Century costumes. I'm currently editing two completed novel drafts, planning my third, and working to get published soon.
Please visit and stay posted on my progress.
y
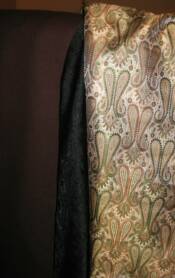
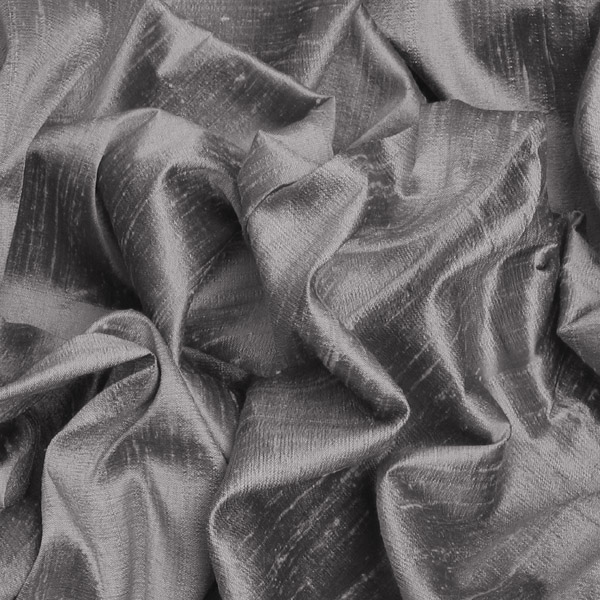
A bit of fabric inspired all that follows.
This page and its links reflect my best efforts in costuming.
Projects linking to their own pages are featured here. Click the images to visit their individual pages.
y
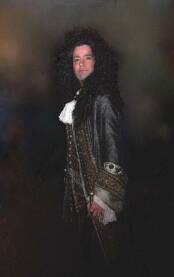
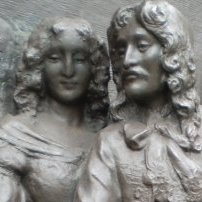
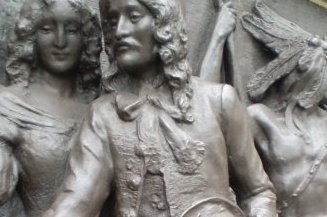
Captain Julien Bel's
Blue Justaucorps Construction
Welcome to Yvette's
The navigation on my site is under construction. I'll be getting the links set up page by page. In the meantime, please bear with me.