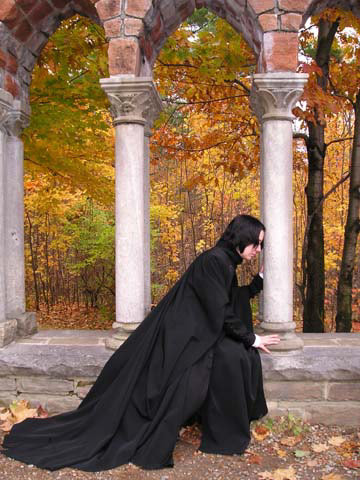
She has requested my services in creating for her a set of Academic Robes and Jacket, recreated after the ones worn by Severus Snape in the Harry Potter movies; robes she will wear in her service to the Lord, where she shares His love for us in our utmost need of His redemption.
For God so loved the world that he gave his only Son, that whoever believes in him should not perish but have eternal life. John 3:16
She has been gifted with an eloquence and grace to share His love, and she has told me the combination of her words and the robes has a profound effect upon the people who hear her.
I am overjoyed to oblige and share my gift, the most unlikely gift, of tranforming bolts of one dimensional fabric into garments of praise.
May it all be for His glory.
I was introduced to Logospilgrim by Jess, a very good costuming friend of mine, as I started researching the Severus Snape costume in early June of this year, in order to get started on my own version of these robes. You can find the beginnings of this project here. I was looking for picture stills of the actual costume, and Jess offered a few links to other recreations, her site among them. I was immediately drawn to her, and discovering she has a live journal like I do, I "friended" her. And so it began.
Her mission touches my heart, and I am honored beyond words that my robes will assist her in that service.
August 14, 2006:
I have ordered Mountains of very Beautiful Black Silk Fabric... :D
I will be using black silk noil for the outer layers, and black silk habotai, or china silk, for the lining layers.
August 15, 2006:
I have opened this page. I'm not very eloquent, so please excuse the ramblings... You can watch the coming together of this project, as I perform it with great joy, and I will try to constrain my words, but share the pictures with abundance. ;D
Her robes shall be very similar to the ones I am currently making for myself, and you can see how those are coming together on my own Construction Page, and continuing on my Construction Page Two.
I will keep you posted as things develop.
August 16, 2006:
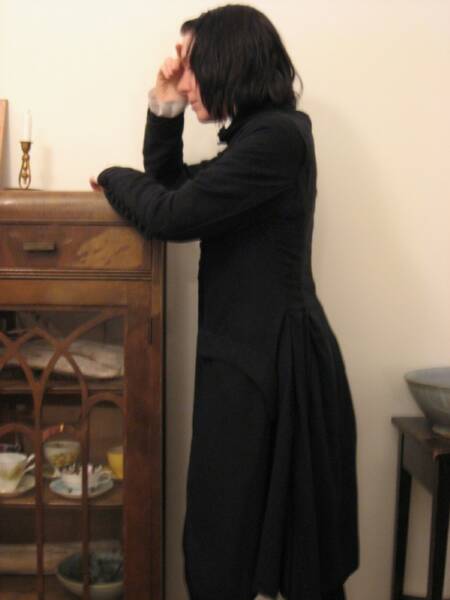
Logospilgrim has provided me with some preliminary sizing information, and we discover we are very close in size. Based upon her preliminary information, I re-scaled one of my dress forms, and threw my robe on it... Just for fun. :D
I can't help it; I'm excited.
Here's a photo:
August 17, 2006:
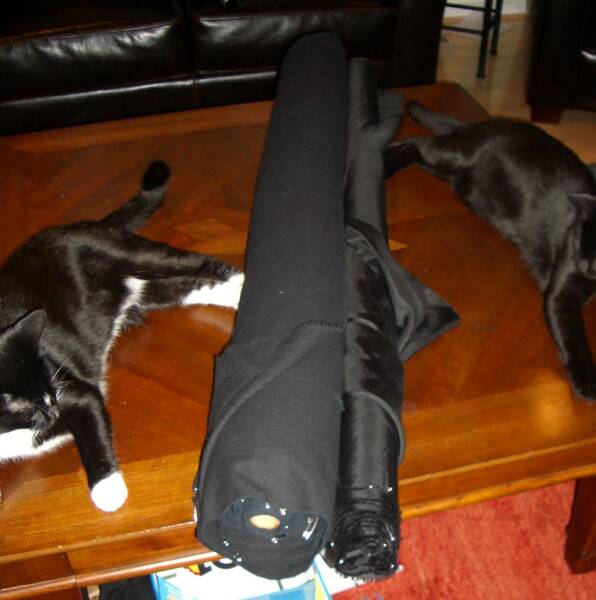
One part of the fabric order arrived today, the lining, 8mm china silk, or silk habotai. Seuss, one of our cats, watched rather impatiently as I unpacked it. You can see his leg to the right on the third picture
August 23, 2006:
The silk noil came yesterday, but as I've been running around like a crazy woman trying to get the kids in school, I did not get the open the package until this afternoon. Here are some photos opening the package... :D
The fabric is beautiful, as I expected.
The first task at hand will be the pre-washing and the ironing of the fabrics.
:D
August 24, 2006:
I unfolded the fabrics, creating a mountain of black silk habotai, and a mountain of black silk noil, and the habotai is in the wash.
The habotai, with no flash... The habotai, with flash.
The noil, with no flash... The noil, with flash. You may have noticed, the cats approve. Jojo's fur is as luxurious as the noil. :D
The noil will go in the wash later today.
August 25, 2006:
Yesterday I finished the pre-wash and most of the ironing. I finished the last little bit of ironing this morning. Here follow a few photos of the ironing process.
Above is the habotai laying out as I was ironing, and below is the noil. That first shot shows Jojo in the bin on the noil.
And so, now the fabric is ironed and rolled up. The cats are pleased with my work. On the left, you can see Jojo challenging Seuss.. ;D And on the right, they are relaxing luxurious.
At the bottom of the bolts, you may notice the saftey pins. I used those to mark off each yard, so I can keep track of the yardage I'll be using. :D
The first cut will be the yoke, and I hope to get to this later today. As it is already noon, I am not sure how far I will get.
As of 3:12pm, the yoke is cut!
Words of Jesus:
"Come to me, all you who are weary and burdened, and I will give you rest. Take my yoke upon you and learn from me, for I am gentle and humble in heart, and you will find rest for your souls. For my yoke is easy and my burden is light."
Matthew 11:28-30
August 27, 2006:
I put the first stitches into the robes, starting with the embroidery I'm hiding on the inside of the yoke. The embroidery stitches are less perfect than what I would have liked, but still, I hope they please.
Here are some photos of what I've hidden there:
Next, I sewed the yoke to the front panel border... and pressed the seams.
August 28, 2006:
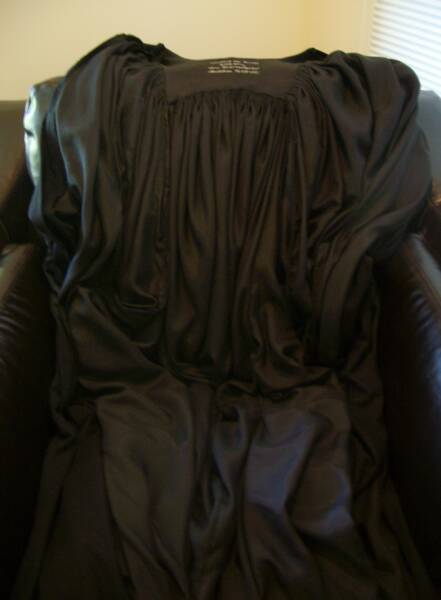
Yesterday I began cutting out the panels of the robes. I have cut the two front panels, and have them sewn into the front borders. And, I have cut the two back panels, and they are hanging out for a while. :D
Still to cut: The two side gores, and the two sleeves. I hope to have this done by tomorrow afternoon. We shall see. I would like for all the panels to be hanging for a week before I continue construction.
Here are a few photos of some yummy yummy black fabric, hanging out. These panels shall be hard at work in the next few days, you know; The bias cuts have to relax before I can do anything with them. :D
September 10, 2006:
The panels have been cut and hanging for a week. I prepared the panels for cartridge pleating the other day... This involves sewing the lining to the outer fabric, flipping it over, like bag-lining, and ironing it flat.
Yesterday I put the cartridge pleating threads in the two back panels, and started stitching them in. I finished this today.
Next, I'll start putting in the cartridge pleating threads into the sleeves...
Here are a few photos showing a little of how it looks to sew the pleated panels into the yoke...
September 16, 2006:
I've put the panels of the body of the robes partially together, and am currently working on the sleeves.
Here are some photos of the robes without the sleeves...
September 19, 2006:
I have the sleeves pinned in, and am ready to get started hand stitching the cartridge pleats into the yoke... Here are photos of the sleeves pinned in...
September 21, 2006:
Today I have sewn the cartridge pleats in the sleeves into the yoke... and here are a few photos. Sorry that the black is a bit hard to photograph. I did not use a flash, because the flash just washed everything out and made it look shiney gray. Next, I want to sew the rest of the sleeves in; the unpleated portions are still just pinned in.
This photo above is linked to a high resolution image...
September 26, 2006:
The sleeves are in, the facing is inside the yoke, and the yoke is sewn shut. Here are a few photos showing how things look.
Here's a peek on the inside...
These robes are almost finished... Left to do are pockets and hemming... And then, it's on to the jacket... ;)
October 4, 2006:
It's possible to say the jacket has been started, because...
I've finished covering the buttons... A whole slew of them. I had planned on putting 33 in my jacket, but wound up adding an extra button in each sleeve. So... My plan is similar here... I'm going to see how it goes together. But... I do think the number 33 is a very interesting number. :D I covered 13 in the larger size for down the front of the jacket, and 10 for each sleeve, plus three extra of each size. Here they are:
October 9, 2006:
I spent the day truing up the hemline, and bag-lining the hem on the Academic Robes There are a few internal finishings left to do on the inside, plus I want to re-work the yoke interfacing. Otherwise, I'm there. I took a few photos in the evening, although it was a little too dark. I will take more once the other small details are finished.
October 10, 2006:
I took the yoke apart this morning, and re-did the interfacing, solving a problem that has been bothering me since I put the interfacing in... It wasn't smooth enough. Problem solved. :D
Then, I put it all back together, and took more photos. Here they are:
Here's a view of the inside pocket...
Dear Professor... When the robes arrive, please be sure and check the contents... Yes, there is something special for you inside there... :D
I have yet a few minor finishings on the inside of the robes... Otherwise, they are ready, and I plan to get them shipped out to my dear Professor later this week. :D
Next? The jacket. :D
The buttons, as pictured above, have already been covered...
October 12, 2006:
I shipped the robes out early this morning...
And, cut out the lining and outer layers of the jacket...
October 16, 2006:
I began sewing the exposed seams together... This is before ironing them...
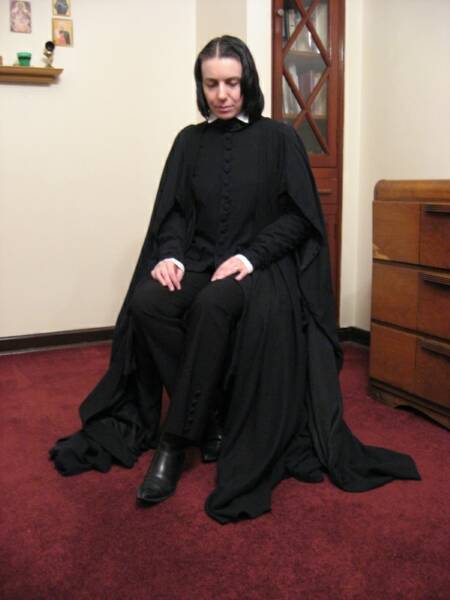
Photos of the finished robes...
October 18, 2006:
The Dear Professor recieved her robes today!
I continued construction on the jacket, and have made good progress. Here are some more photos of how things look now. At the moment, the center back seam is sewn, but needs to be ironed... The other back seams and the collar are pinned in, and ready to be sewn... After these seams are sewn in and ironed, I will adjust the side seams for a better fit. The sleeves are hanging on my other dress form, also ready to be ironed. :D
The jacket is hanging over my White Shirt Experiment... More photos of the White Shirt are towards the bottom of my own Snape 2 Construction Page...
October 21, 2006:
The pockets are in, and the side seams are pinned... Time for more photos. :D
Next, I'll be sewing in the side seams, and setting in the sleeves. Then come button holes and buttons... and finally, the hem.
October 25, 2006:
Sleeves are set in, and the button holes finished. I've possitioned where the buttons will go with safety pins, and have two buttons in up at the collar.
October 29, 2006:
The buttons are in, the sleeves are adjusted, and sewn in, as opposed to pinned... Now, there is the hem, and internal finishings... I'm currently truing up the hem line.
October 31, 2006:
Happy Halloween!
I've sewn the hem, and added three vents in the back pleated sections... Finishing details still remain...
November 4, 2006: My dear Severus mails Professor Logospilgrim her new robes... ;D
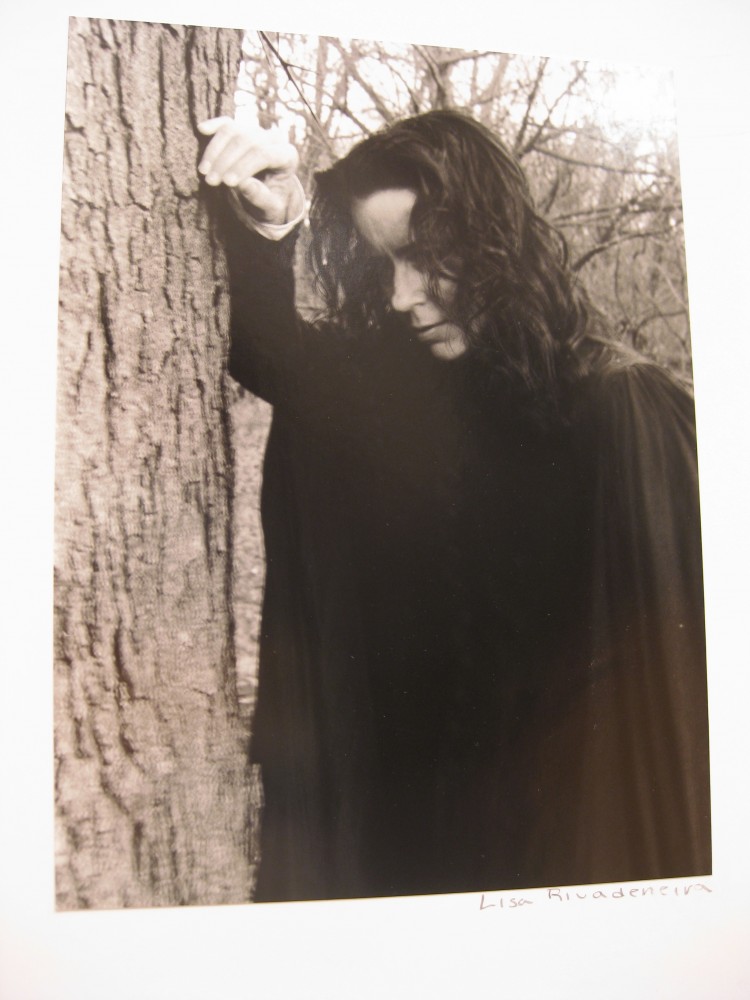
February 18, 2007: My dear Logospilgrim has a first set of photos taken in the robes, taken by Cheryl and Matthew... Cheryl is the blessed one being embraced by Logospilgrim. Thank you Cheryl, and Matthew, for taking the photos...
In the Spring 2007, Logospilgrim will be having more photos taken by her friend Diane... These will appear in a new second gallery she has name Belluthien, in my honor... Thank you so much, my friend.
I will update here when she has updated her gallery.
Thank you for visiting!
Alan Rickman drew me in.
This page and its links reflect my best efforts in costuming.
Projects linking to their own pages are featured here. Click the images to visit their individual pages.
y
Logospilgrim's Robes Construction
Projects and Portraits
As of March 2013, Nearly ten years ago I set out to teach myself to sew so that I could create inspired costumes such as those featured on my site.
I created this site to share what I've done. It launched August 18, 2004, and has been growing ever-since.
In addition to costume construction pages, there are pages featuring portraits of the costumes being worn.
Costuming is a hobby I love documenting, but I do not do commissions, nor do I sell patterns.
Please visit where your interests lead you, and enjoy.
y
The navigation on my site is under construction. I'll be getting the links set up page by page. In the meantime, please bear with me.
Below is the old page without the navigation links above.