I'd like to make this with silver precious metal clay, but I've never worked with that before. The nice thing is I have a very good bead shop here locally, and they have the kiln I'd need to fire it... We'll see... Also, thanks to Mel, I have found a very good source of information on working with this media, the yahoo Metal Clay group.
Research:
I'm studying the pictures in the Gallery on the EE of The Fellowship of the Ring. Those photos are a wonderful help.
I'm plying my LJ friends who have seen the brooch in person with questions... Thanks Sarah, Mel, Maggie, and Michaela! ;D
I often visit Alleycatscratch, where there is tons of valuable information and wonderful close-up photos of the brooch.
On the use of precious metal clay, I have been visiting the Metal Clay group and learning from all their wonderful advice and tips.
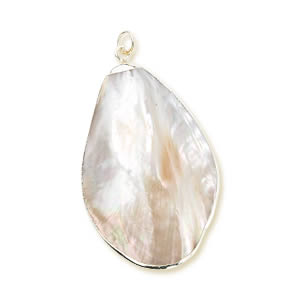
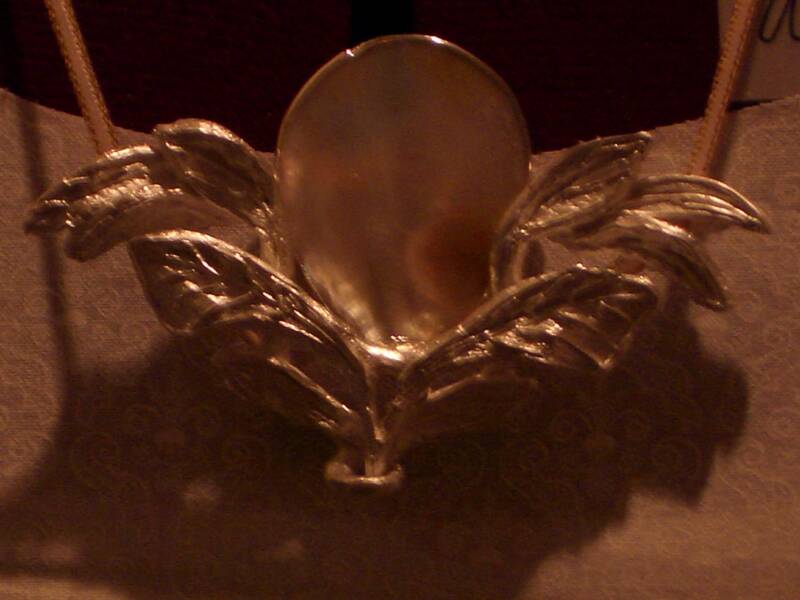
This is abalone shell with a gold plated silver rim that I'll use to make the brooch...
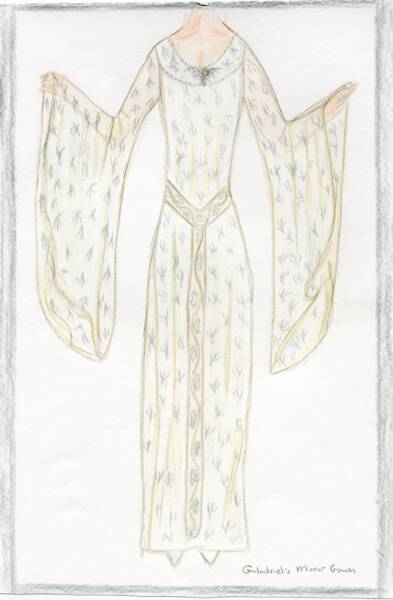
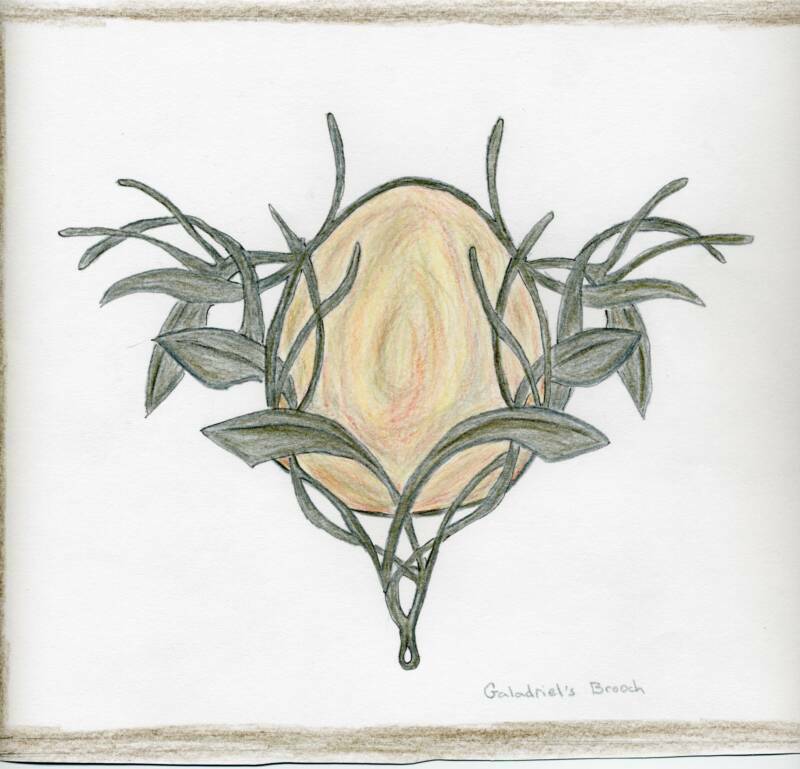
There is a sketch, from ACS's Galadriel Mirror Gown Page, by Abby... I traced it and then I colored it in...
I'm using it as a reference to recreate the brooch, along with the photos of the original brooch...
January 27, 2006...
My order from fire mountain gems with my Art Clay 650, and the butane torch arrived yesterday... I filled the torch with butane from Home Depot, and then, at night I opened one of the packets of art clay and started playing with it...
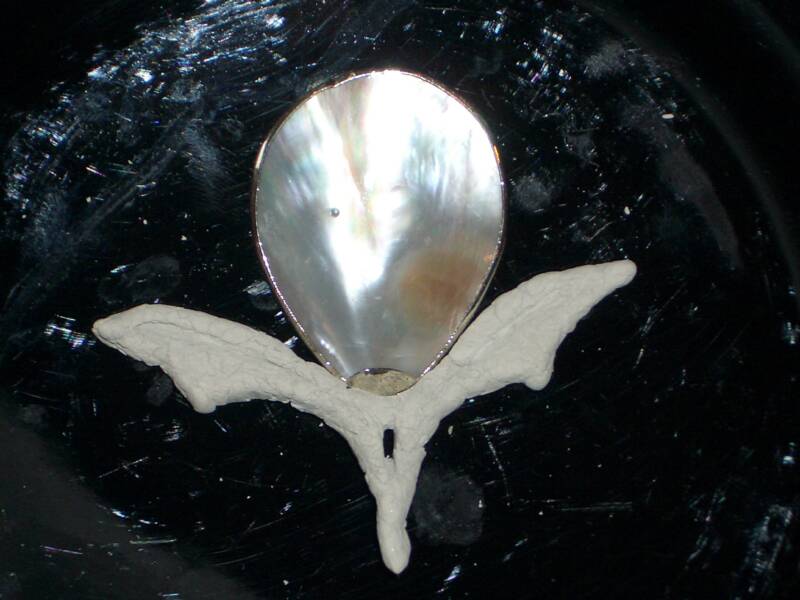
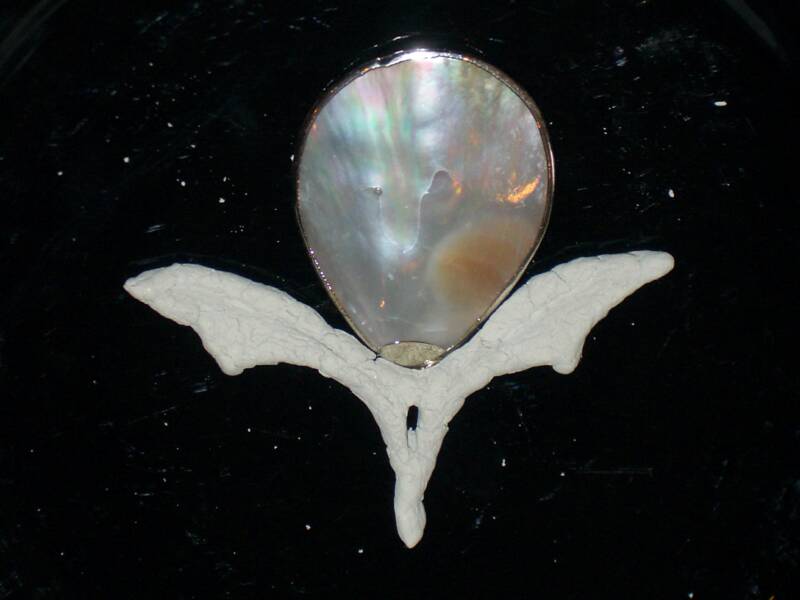
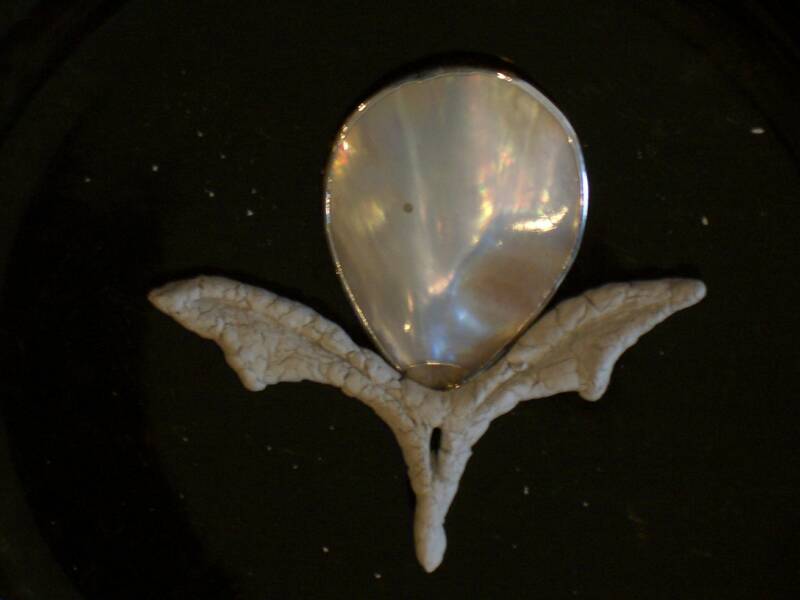
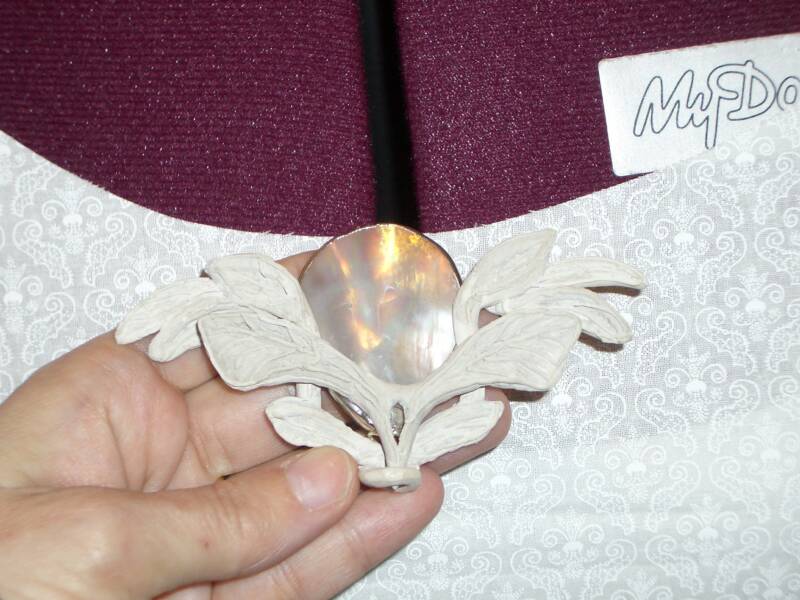
I formed the foremost leaf V that will lay over my abalone shell... It is not yet dry; when it dries, I'll sand and file it... I am not so sure how it's going to turn out, as there are tiny fissures in the clay, and I am concerned it may crumble apart. Maybe firing it will make it more solid. This is my first attempt at art clay. Here's some photos of the leaf V with the abalone shell... with and without flash...
January 28, 2006...
To fix the cracks in the piece, I followed the advice of Mel, and took a little bit of Art Clay, and added drops of distilled water until it had the consistency of paste, along with a drop of glycerine, to help it stay moist, and worked this paste into the cracks on both sides of the piece with a little paint brush, letting it dry between coats. Then, with the paste at hand, I did the second leaf V section. This time, I used Badger Balm on my hands, and also on the parchment paper where I rolled out the V... Both of these V's are going to be fired separately, as will all the separate pieces of vine, etc... After firing, I will either cement or solder them together... (Need more information on the best way to do this... ) So, my idea is to put them together like a puzzle. Right now, I have the second piece drying, and to help it dry in the right shape, I have the shell and the top V situated where I want them... Here is how it's looking tonight...
.
The next piece will center behind the shell, and it will be more like an X, with the top of the X having a set leaves on each side, and the lover part of the X coming very close together, coming to the top through the V vines at the bottom, creating the other side of the *basket* for the shell...
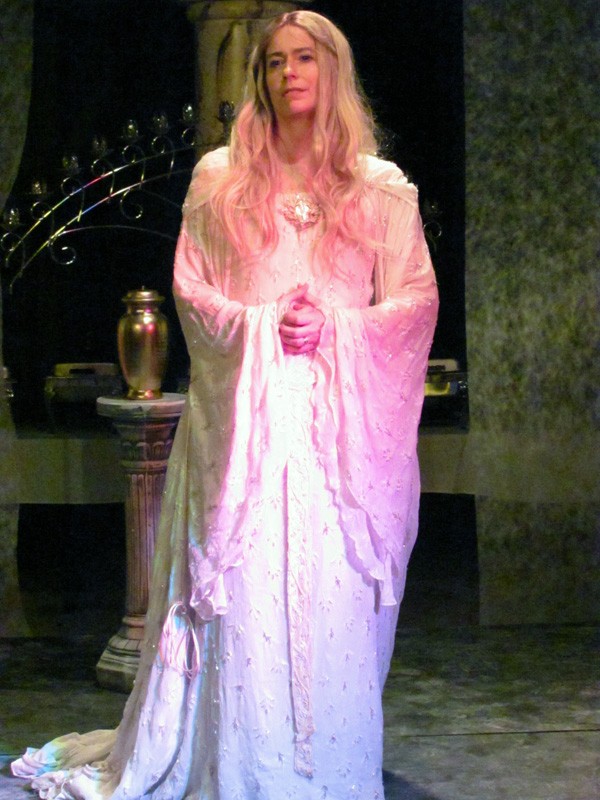
This piece will be so heavy, I think I may modify it into a *necklace* that will lay over the same spot where it is positioned as a brooch... Then, I won't be worried about stress on the neckline of the dress... Never did like sticking my dresses with pins... ;D I would use an organza cording instead of a chain.
Something isn't right about how this is coming along...
January 28, 2006...
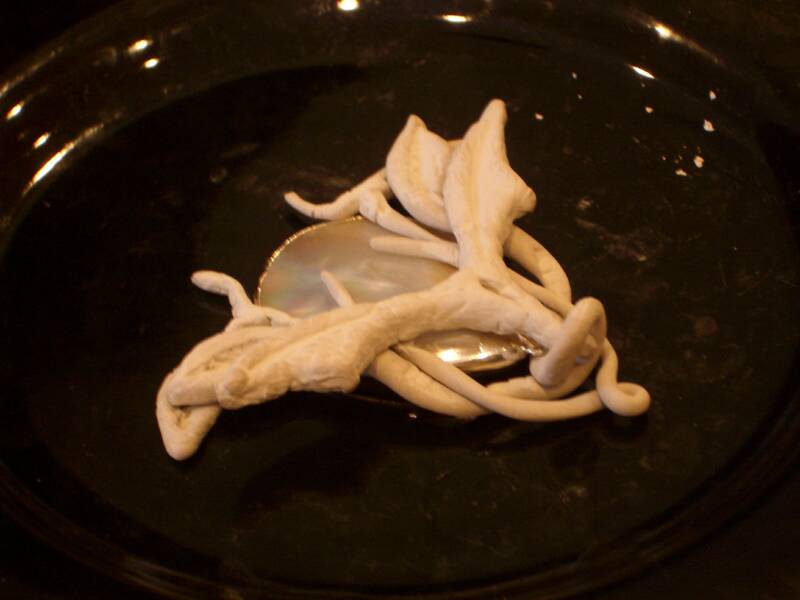
Today, I formed the third piece to the brooch puzzle... The vines and leaves on this one are more slender... The Badger Balm is very helpful in keeping the clay moist, and I really had to roll out a long thread, with two bulging ends, to get this one the way I wanted it. I also pasted two tendrils towards the inside.
I am thinking I may need to take this to a place where they have a kiln to fire all the pieces; not sure if firing with the torch will work on these sized items...
Here are photos of the three pieces so far...
January 30, 2006...
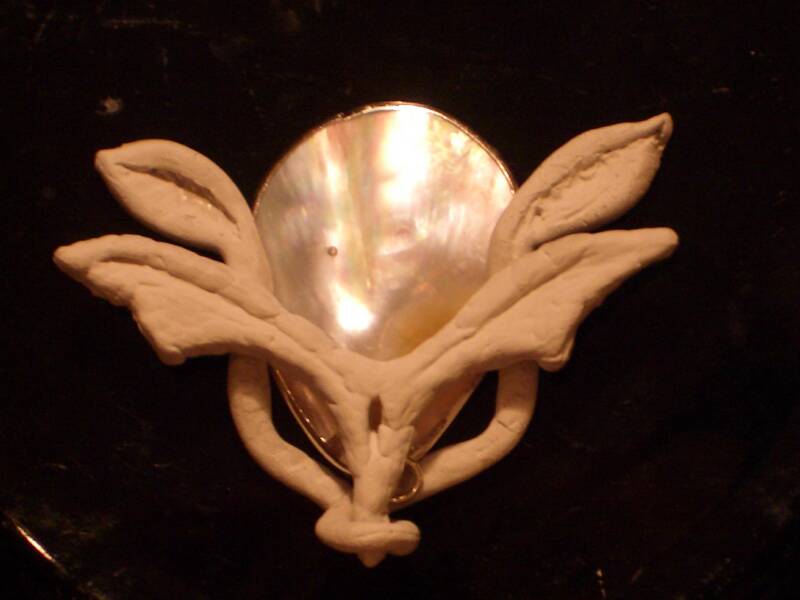
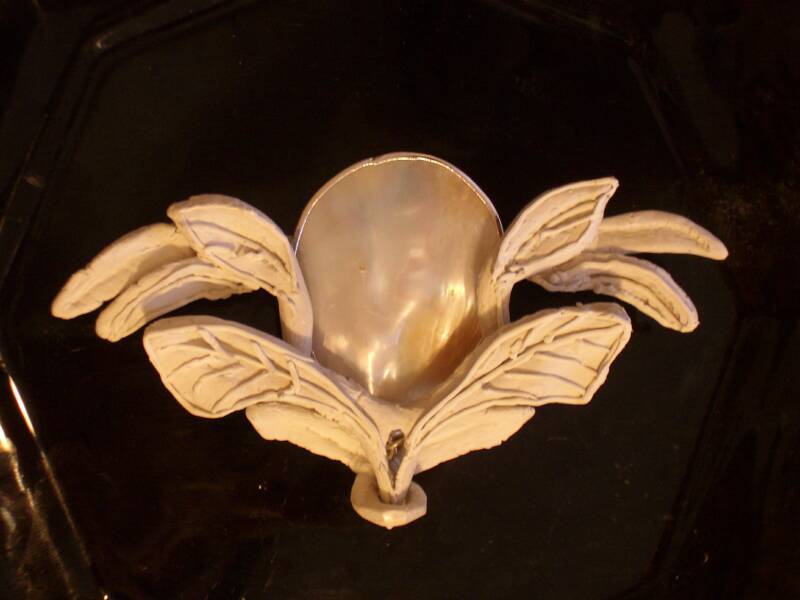
Back to the Brooch, after a few days leaving it alone... Something has been bugging me about how it looks... I came to the conclusion it is the alien look... I wound up taking off the narrow bits of rolled art clay... (I will recycle this into my paste pot...) and opted to change course, and go with precious metal bezel wire, that I can cut in half...
The photo on the left shows how things stood before I changed to the bezel wire. The photo on the left shows the bezel wire being adjusted... The two strips way at the top have not been cut yet, and aren't near ready. I have determined that the shape of my leaves on the first V is off... I need to round the outer edges to an outward curve, as opposed to the inward curve they now have... The leaves underneath are different, and I like the shape better. This is not a problem to fix; I will be adding clay, using paste as an adhesive, and fill it out, brush it smooth, and sand again... I may also take off the center V section, and attach the leaves to bezel wire, but I haven't decided if that's necessary yet in order to do away with the alien look of it... I may also take this V out of the brooch altogether, and incorporate it into a headpiece. ;)
This aspect of the project starts to remind me of the many changes and steps I had to take on the Arch Dress belt. I went through four different versions, until I found what I wanted to go with that gown... It was quite a journey...
One thing I've discovered I like, though, is the hammered look I get with the bezel wire by twisting back and forth... When I get the shapes of the wire where I want them to be, I will paste them together, and brush them with paste (maybe) and tip the edges with clay, so they are not sharp.
Here is a photo of the piece in the process of forming the wire, without the top V leaf shape...
January 31, 2006...
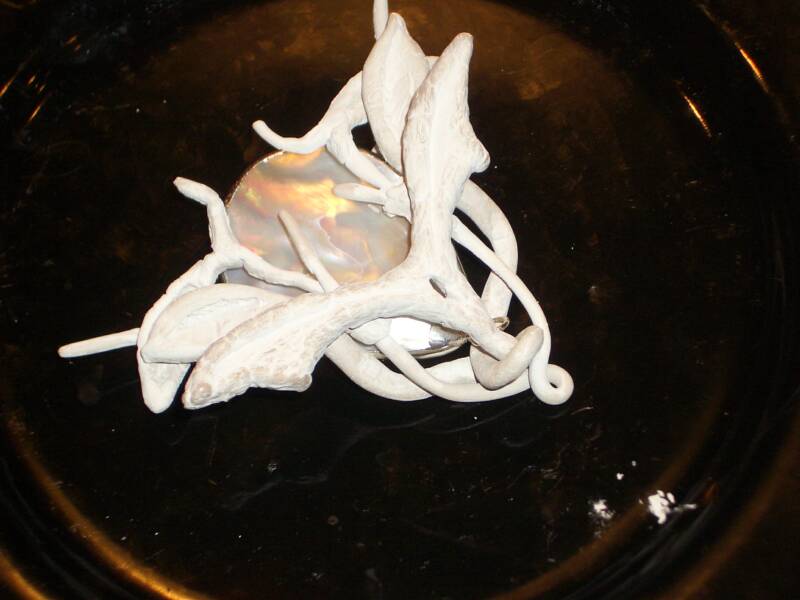
I took the wire away, today, temporarily, while I sanded and reshaped the leaves of that first V leaf set, and added four more leaves to the second, hoping to do away with the alien... I think I may have... I also used paste syringe pmc 3 to add filigree leaf veins... I am not done with that, the four new leaves on the second V have not been done yet. I hope, when I do, they may look less like bananas... ;D
So, next I will add the filigree to that second leaf V section. On the first, I am leaning towards filing away the section above the *window*, to reduce bulk... I filed it more open today, but it may just be better to completely open it up...
Then, I will fix the bezel wire into position, and then, I can get it fired! ;D
February 1, 2006...
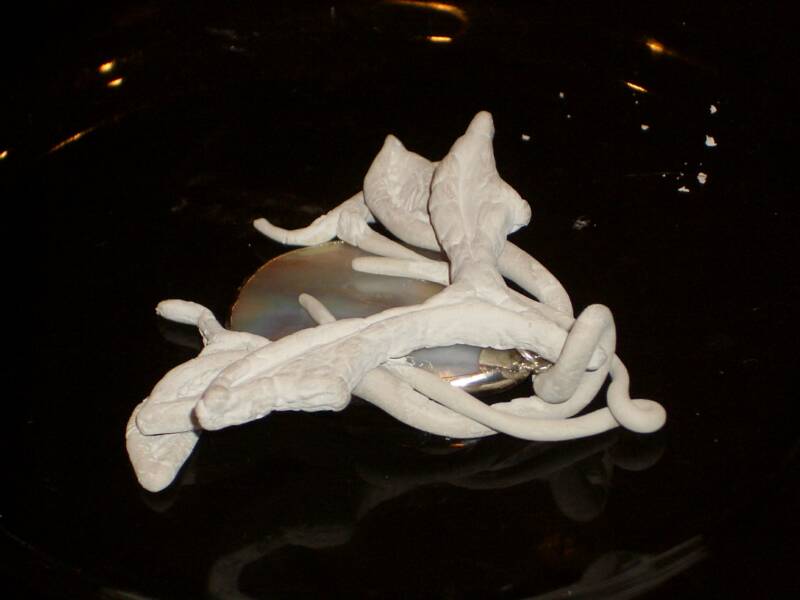
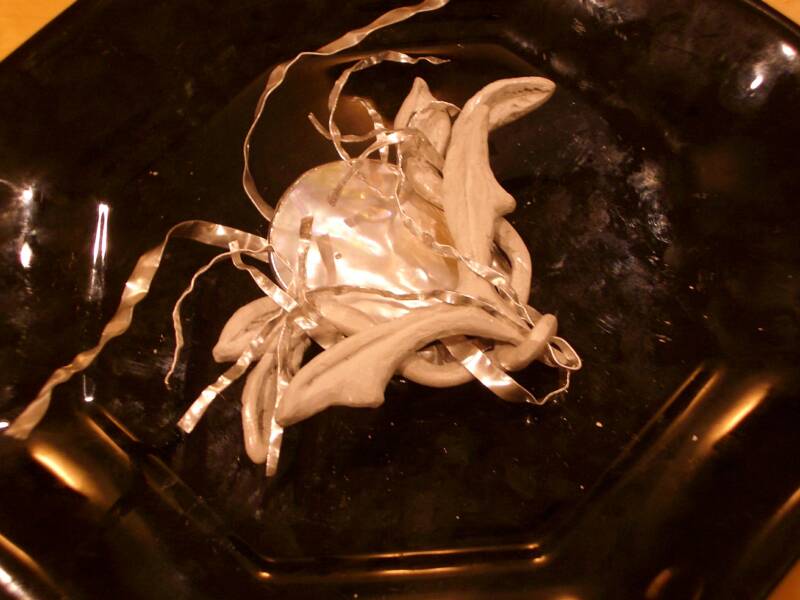
I finished putting in the filigree, and started working with the wire... until I hit a road block... I had the back leaf V fracture in two spots, and a third shortly thereafter. I hope I can learn from my mistakes! Then, I took the wires in, that I was close to having in completely, and started resetting the fractures... Now, one is back in place... I still have to repair the back bridge, and hope I can get that done tomorrow... Then, the lesson I learned, I'll try out... I remembered I can fire this piece more than once. So, after the fractures are repaired, fractures that fortunately don't show to the outside, I will get it fired... Likely on Monday... And THEN I will set in the bezel wire, and fire again... Wish I weren't so impatient sometimes...
Here are a few shots with the finished filigree, just after I started putting in the wires...
February 2, 2006...
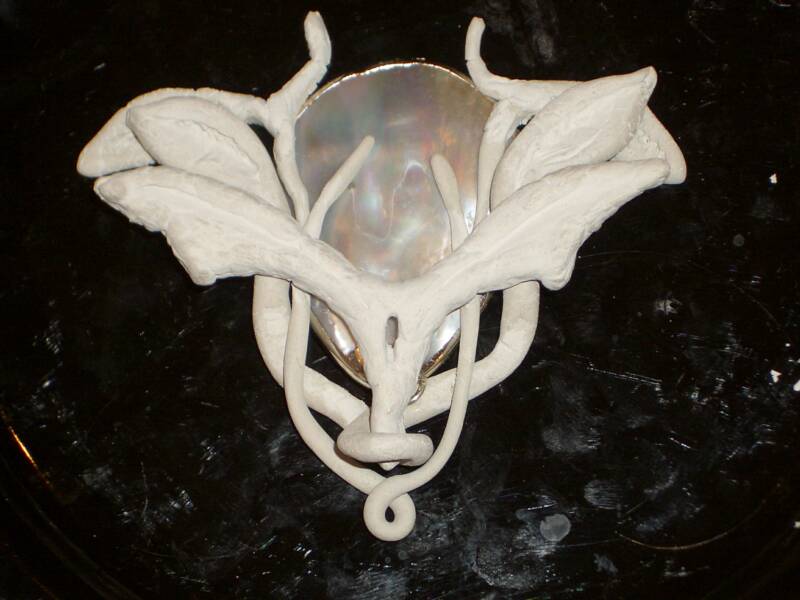
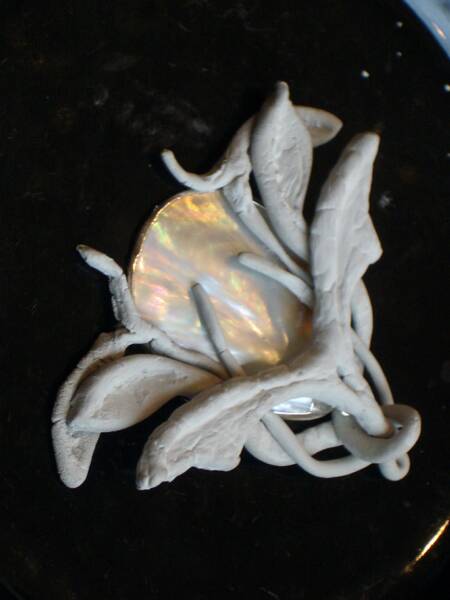
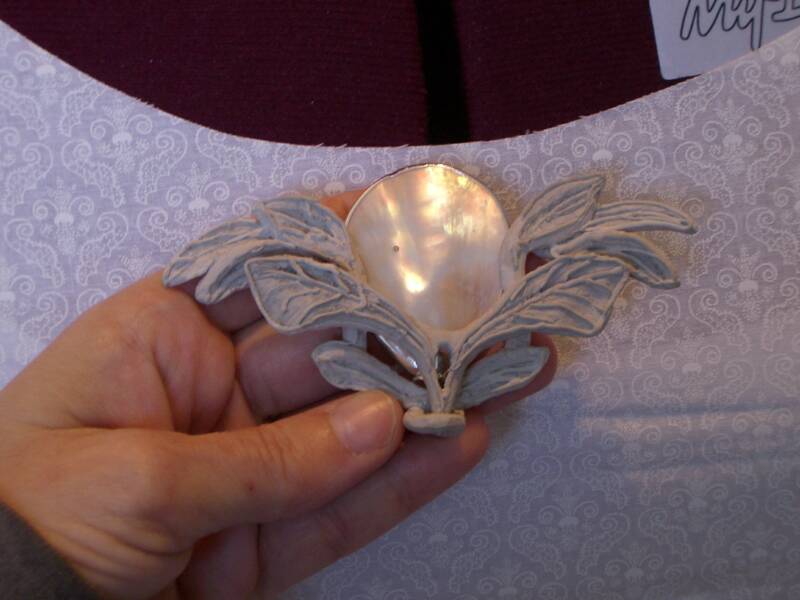
OK, so now all three fractures have been repaired, and it is dry... I need to keep my hands off of it until Monday, February 6, when I hope, barring accidents, I can get it fired in the morning... I have decided to take it to my local bead store; the owner is a certified PMC teacher, and has a kiln. I think torching this would be a mistake; it is too big, and I'm afraid I'd over-fire it...
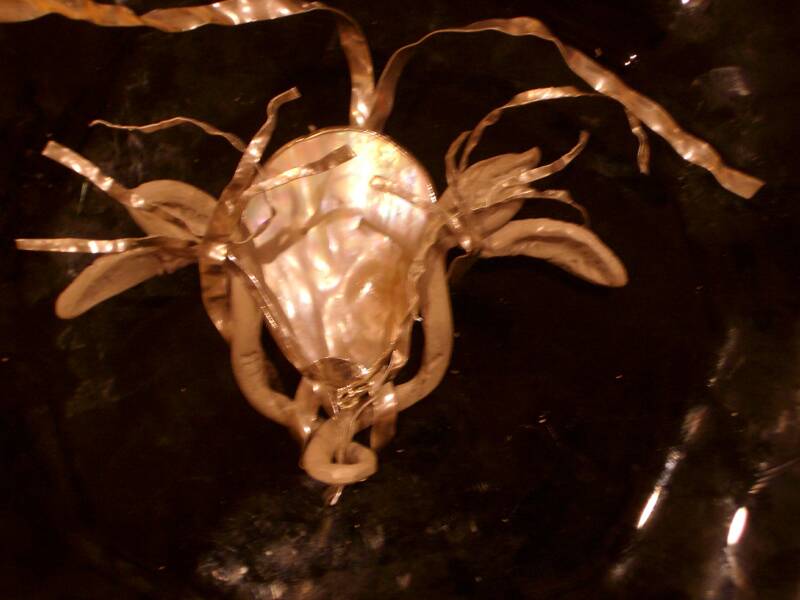
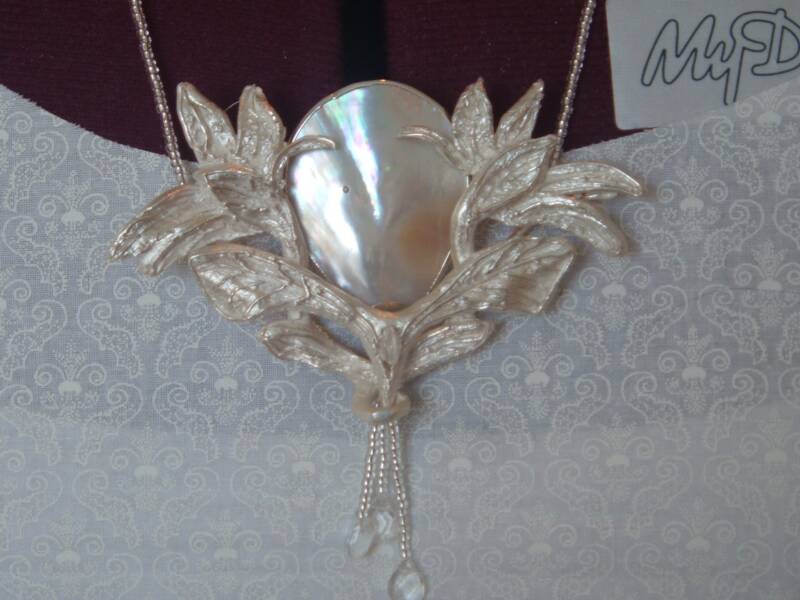
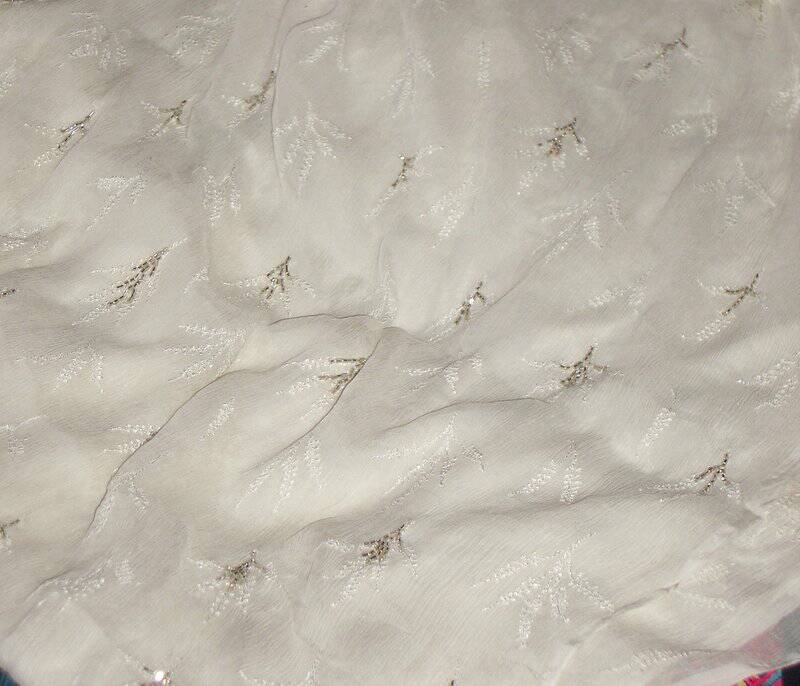
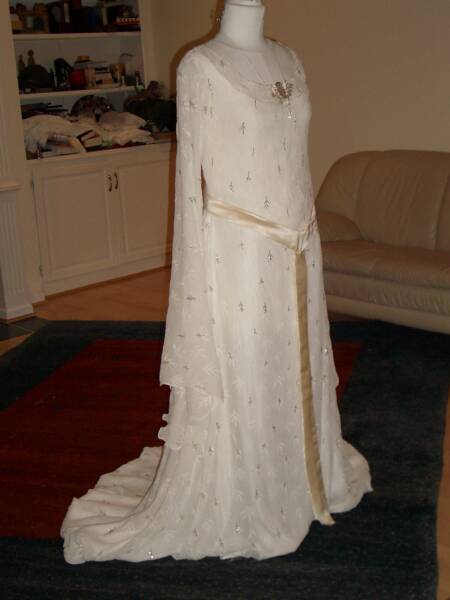
Here is how it looks... First, on the black plate, as I've been doing, and then, how it looks held up agaisnt the gown muslin, so you can get and idea to it's size, against the perspective of the neckline...
The Problem... 0-o ... Is the *Alien Look*
I found it downright *Ugly*; something from Mordor... Not Lorthlorian...
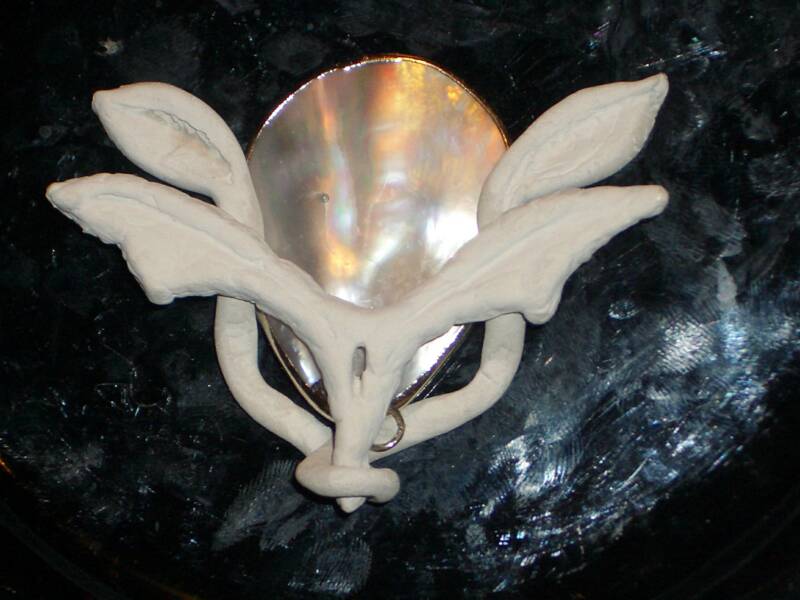
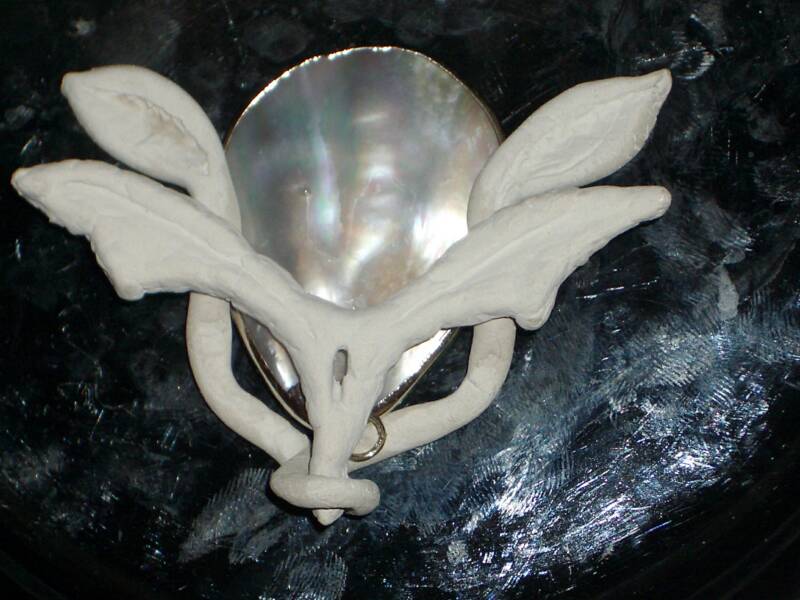
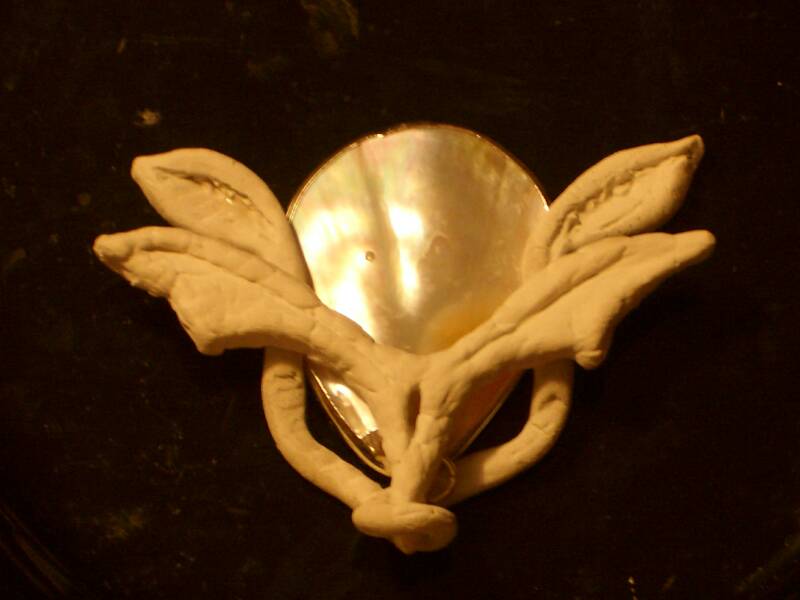
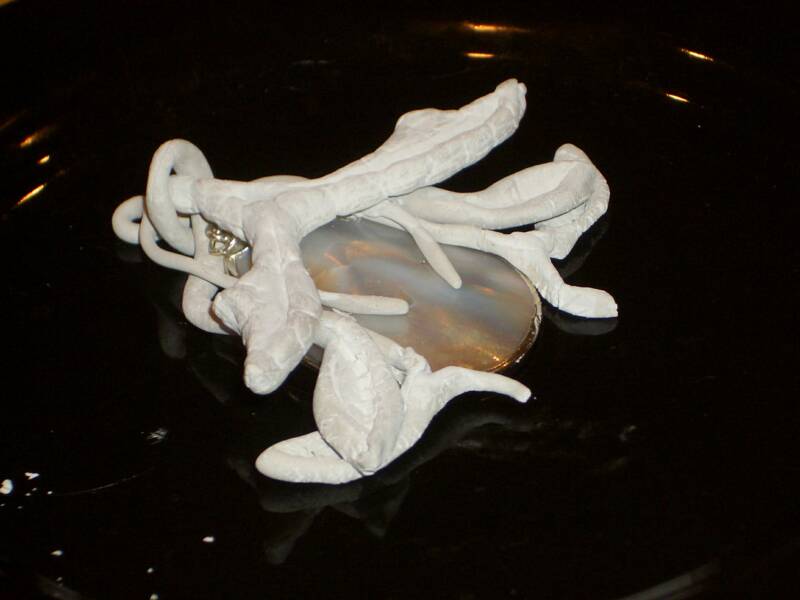
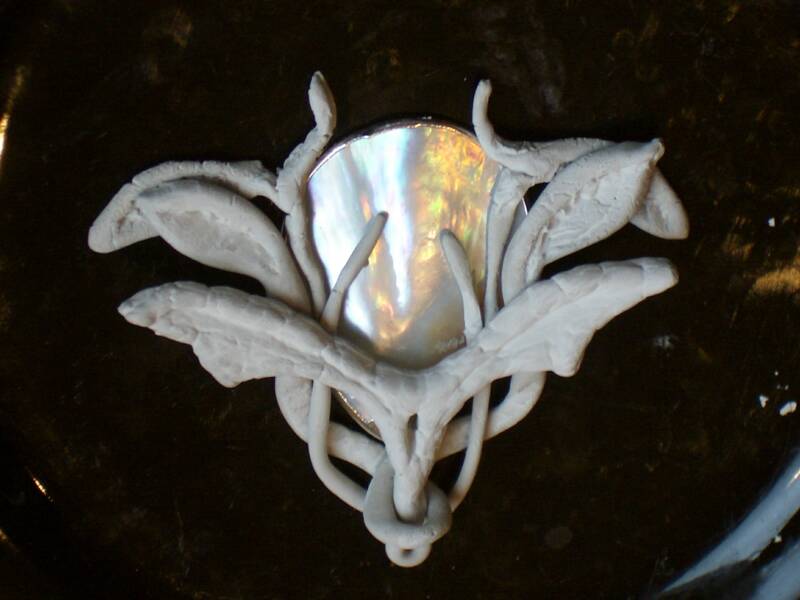
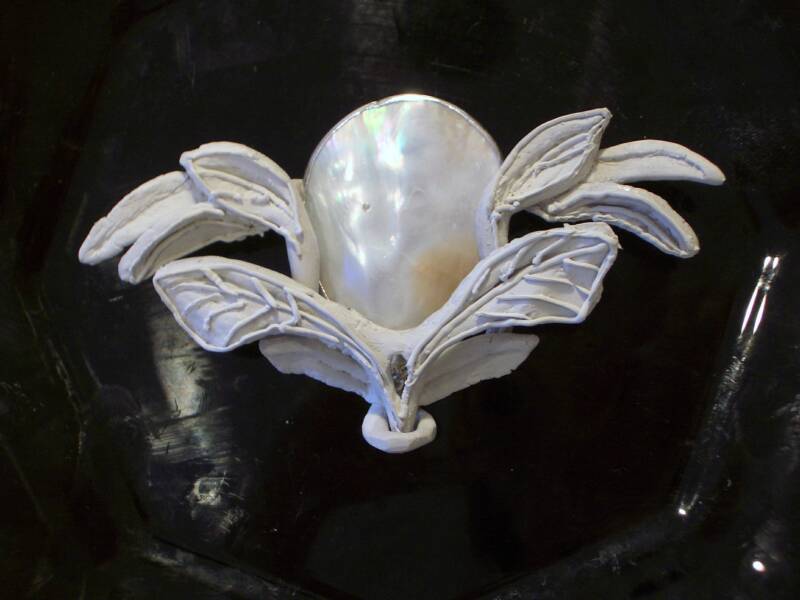
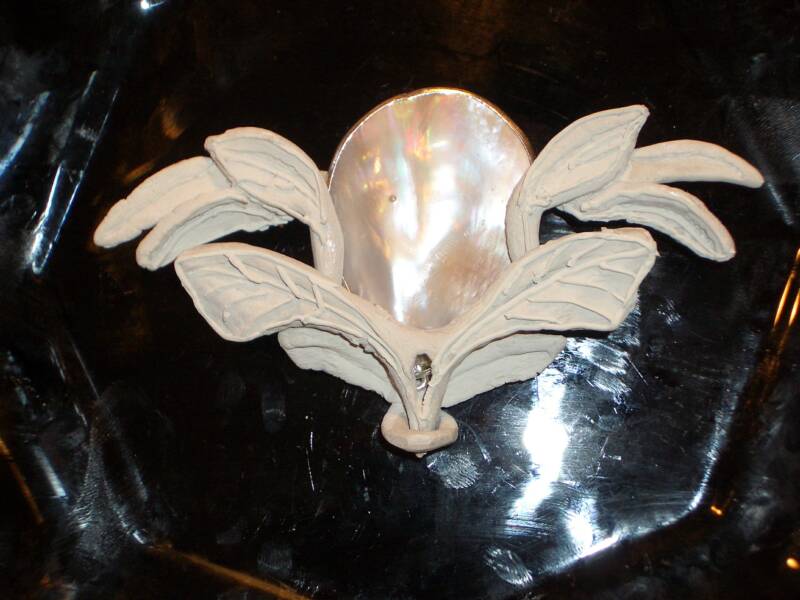
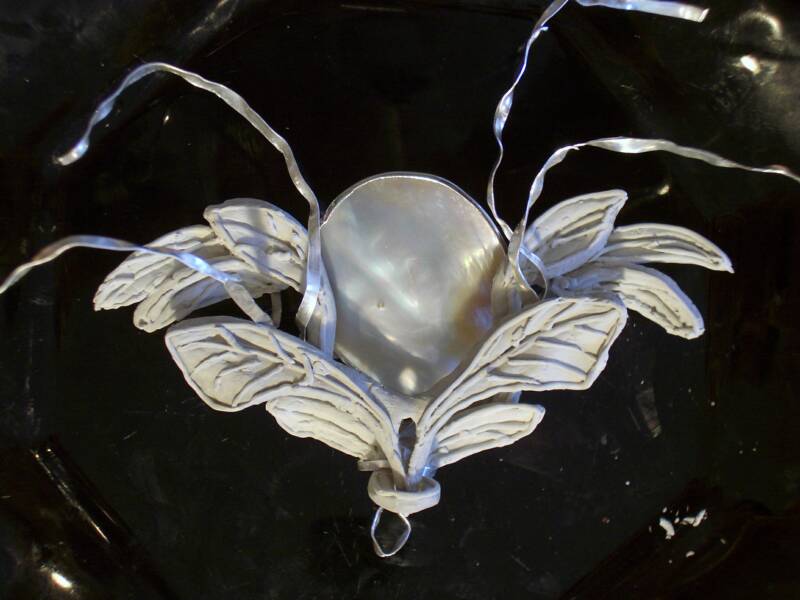
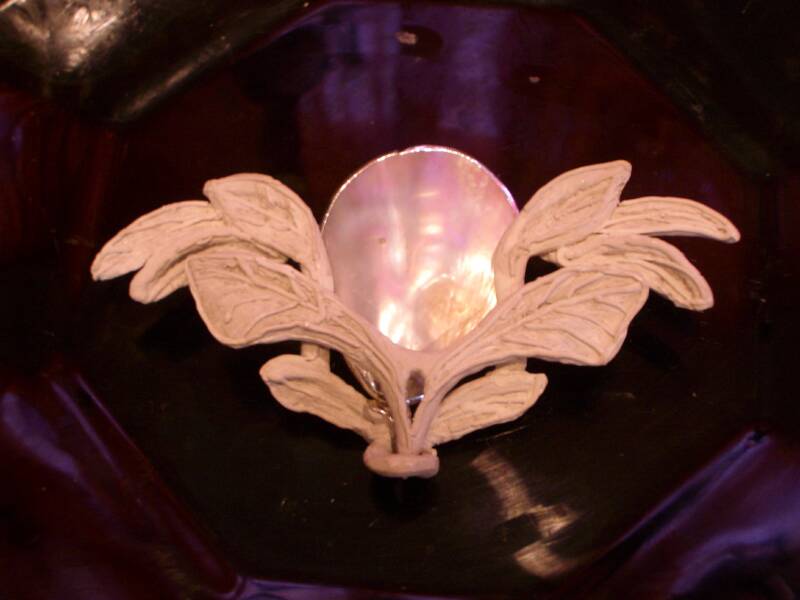
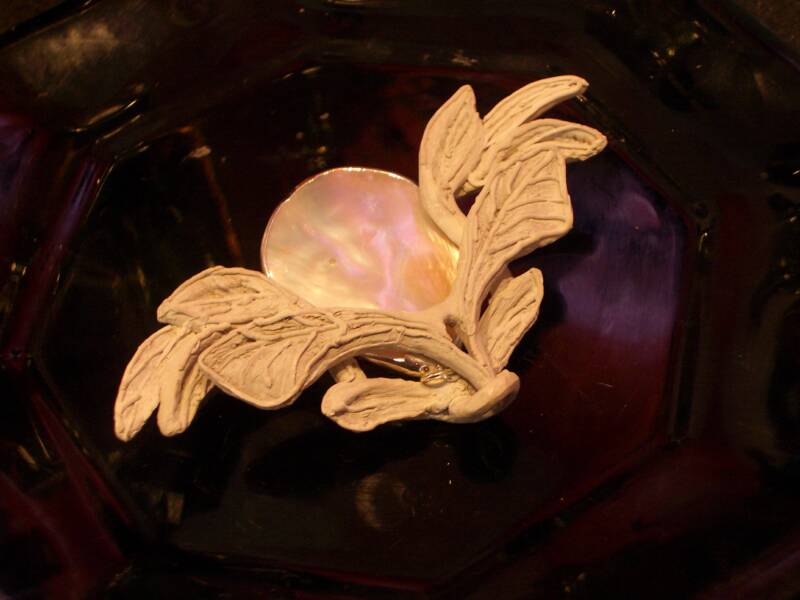
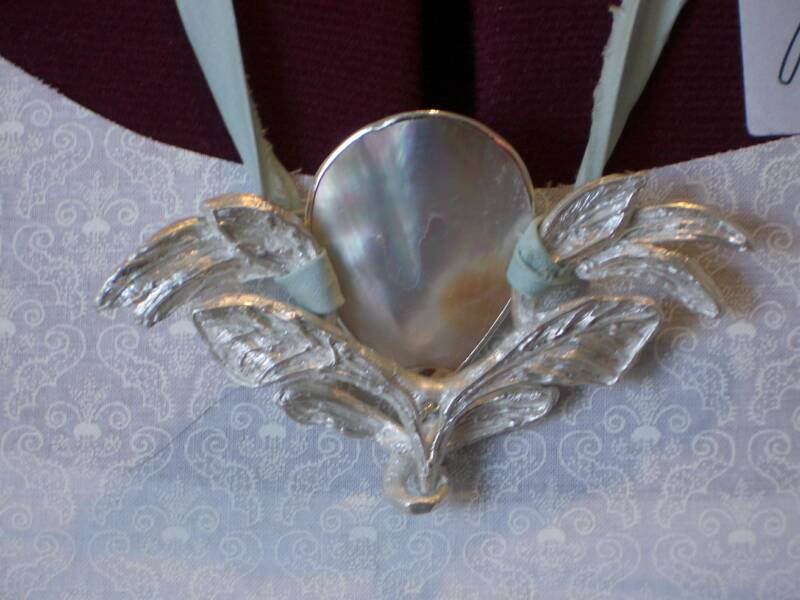
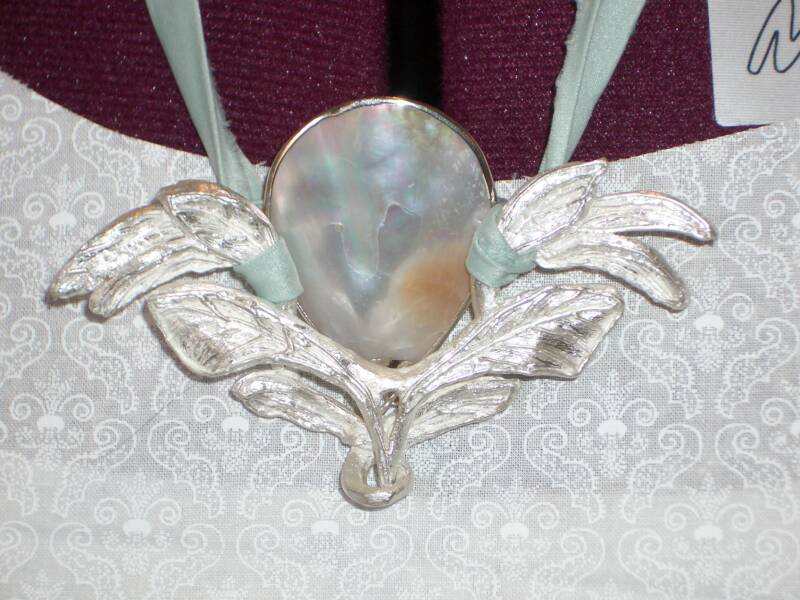
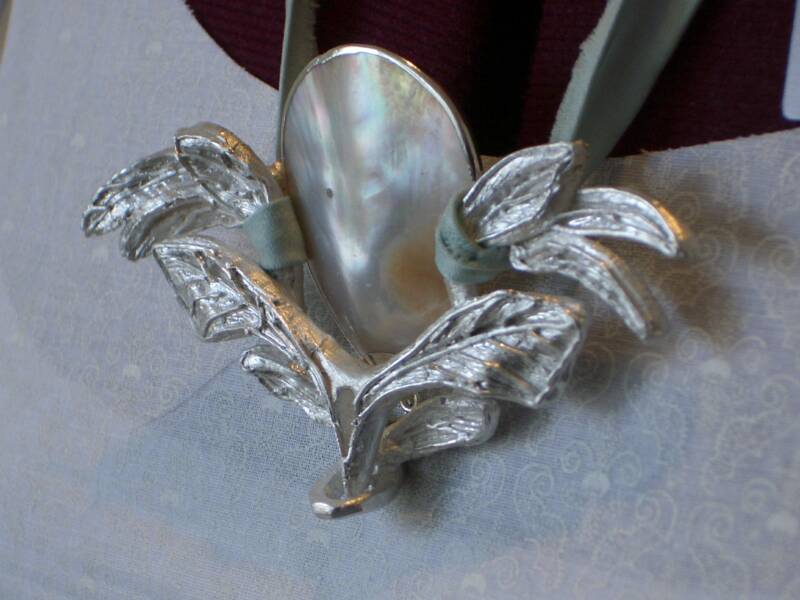
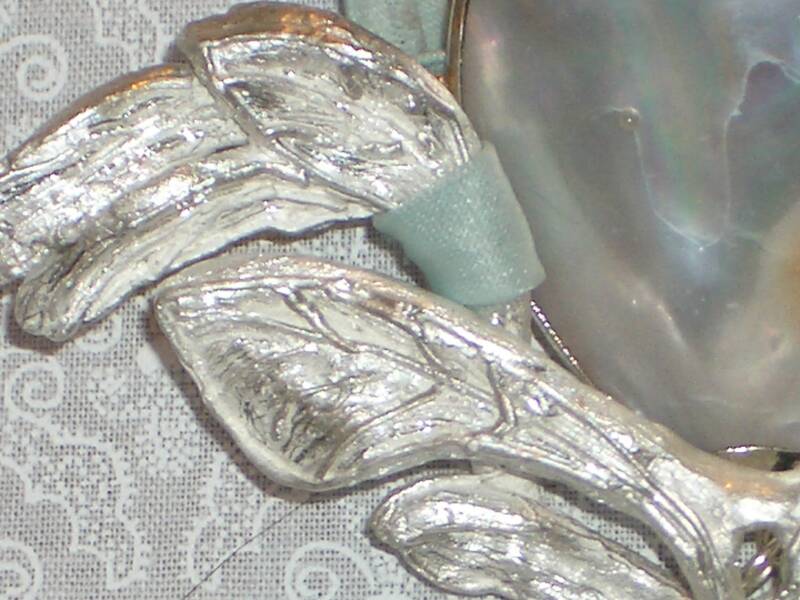
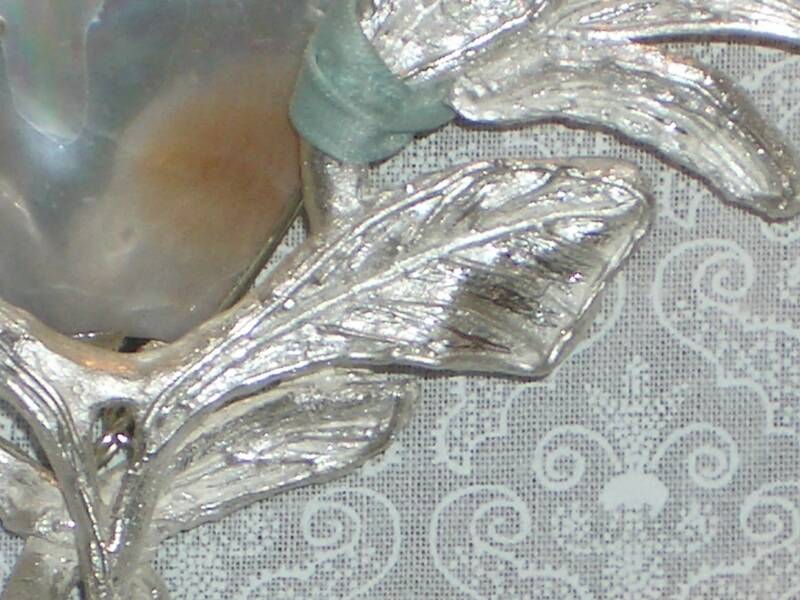
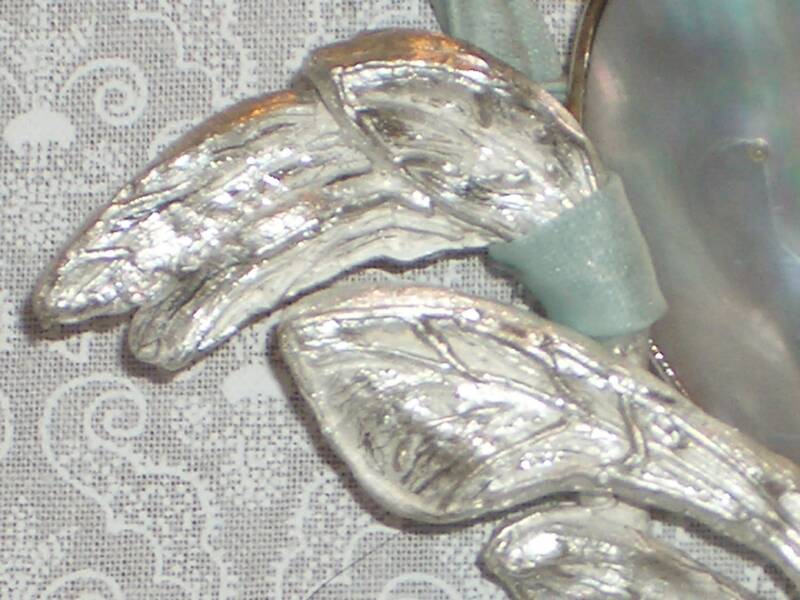
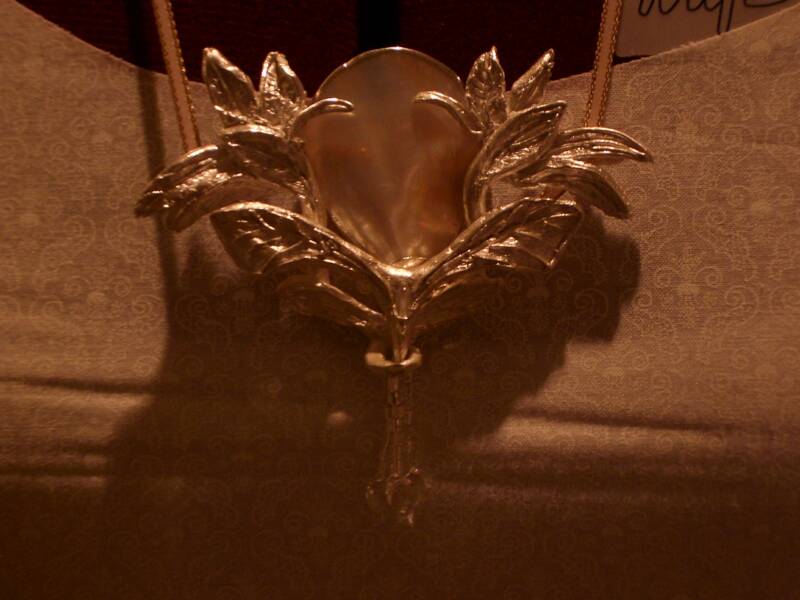
Today, I fired the brooch in a kiln at my local bead store... Then, I brushed it with a wire brush, and now there is a matt finish...
The question I'm considering now, is whether to use the wires or not, for the vine-like effect...
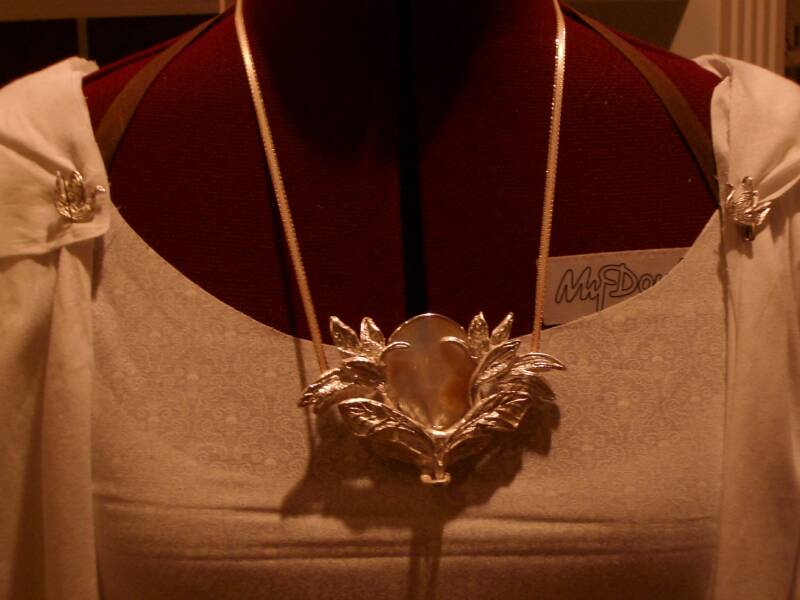
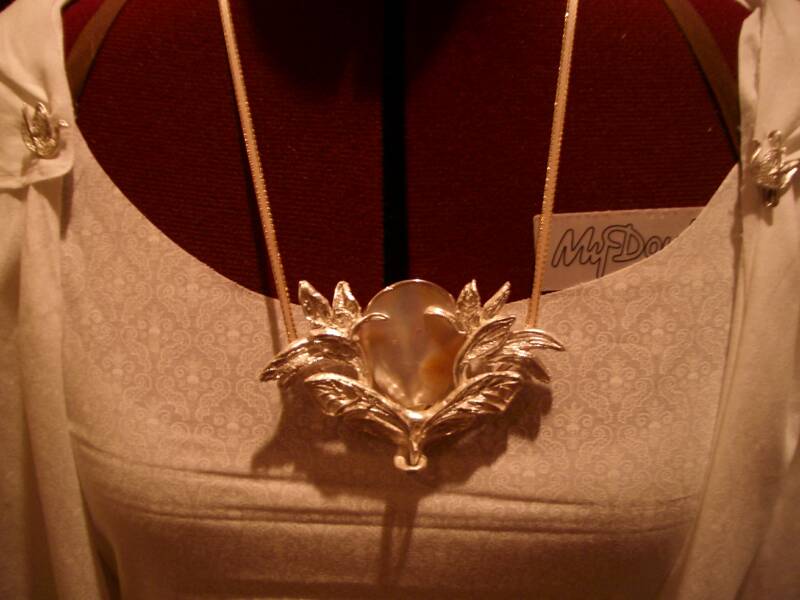
I will be using white silk organza, and my brooch will actually be a necklace, because I don't want to stress my gown with the weight of the brooch... :D
Here are some photos of how it's looking now...
You can see in the close ups, I need to burnish with the wire brush some more, but I stopped at this point, because if I need to fire it again with the wire tendrils, I'll be burnishing the whole piece over again...
As I mentioned above, I'm not sure at this point whether I even want to add the wire tendrils... I like it like it is...
Decision time, again! :D
February 10, 2006:
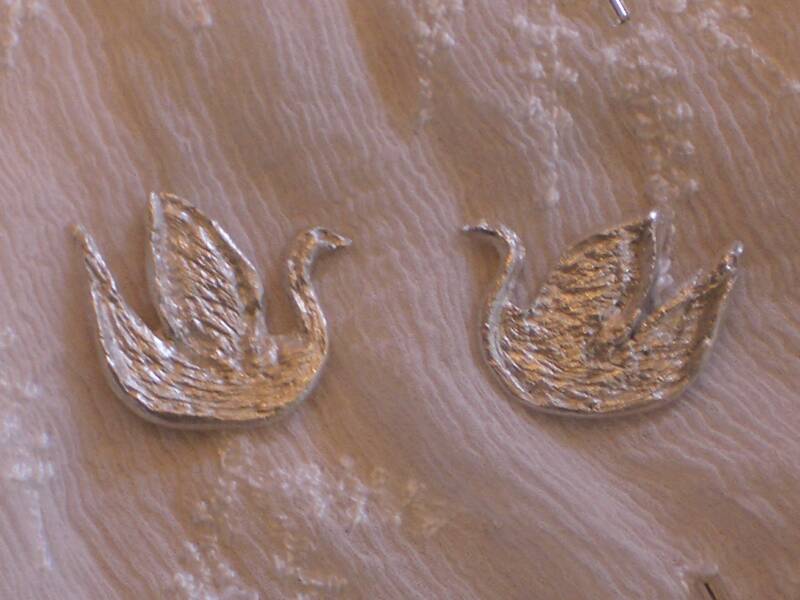
I have more silver going into the gown; as I decided to make two boat swans to go on the drape.
So, I thought I would show the step-by-steps of the pmc process... I used pmc-3 for these, and the torch. Once getting over the *fear* of using the torch, which I now find easier than using a hot glue gun, I have discovered this to be easy and fun... but expensive... ;)
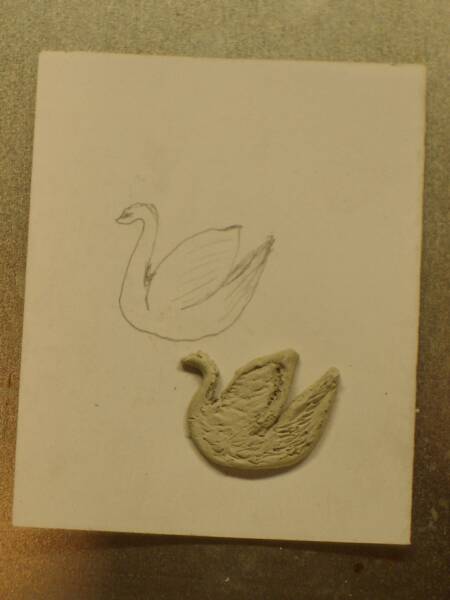
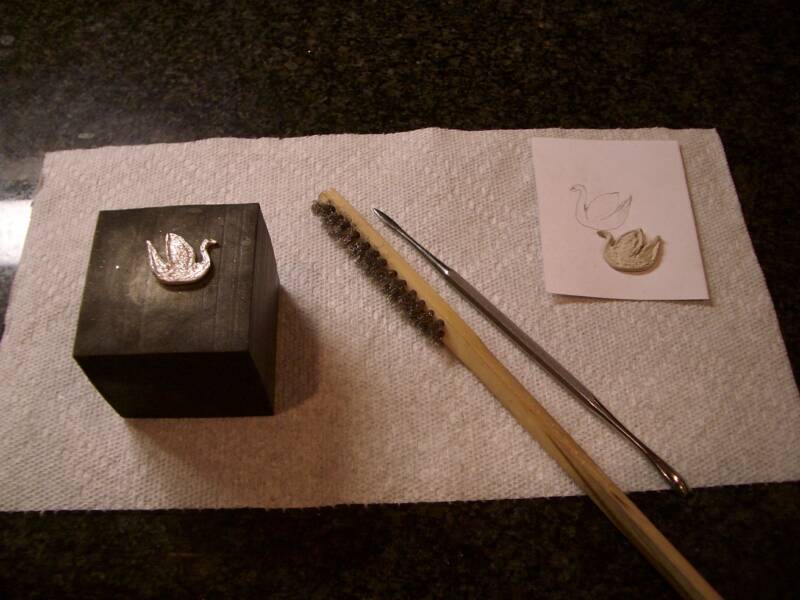
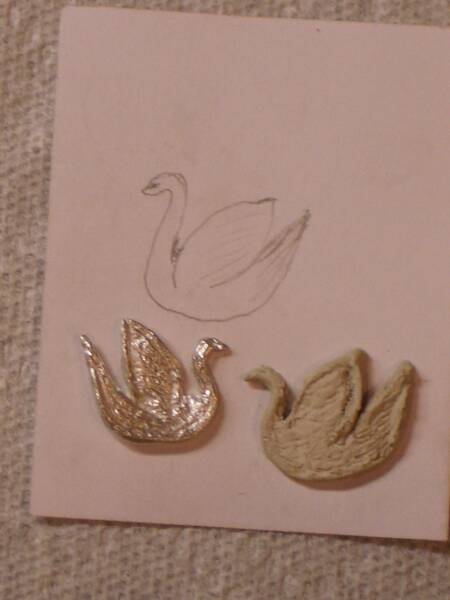
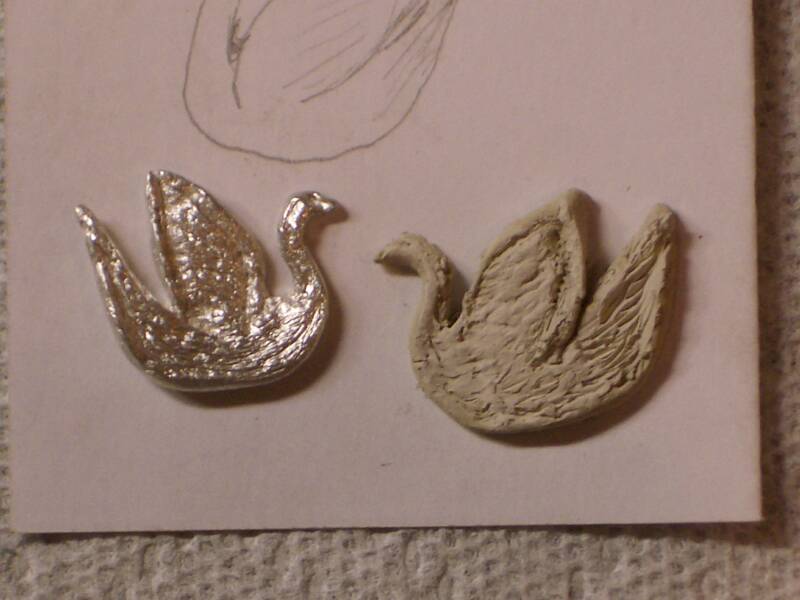
First, I sketched a design of how I wanted the boat swans to look.
Then, I took a 4 gram portion of pmc-3 clay, and shaped it into an oval, and cut two slices at the appropriate spots, and shaped it into the shape of the swans as best I could. I used a file to etch out the details while it was still wet, and then filed it smooth and added more detail when it was dry.
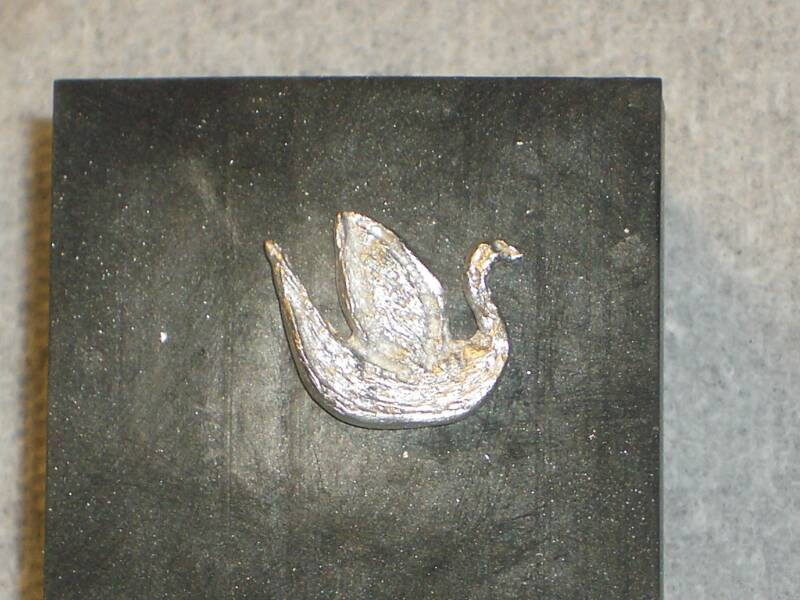
Then I fired it with the torch... In firing, it shrinks about 10%. This brings out more detail... After firing, the piece looks white; this is because the silver pores are opened. Here is a photo of the firing tools, the torch, the heat resistant cookie sheet, the sinder block, tweezers and the fired piece...
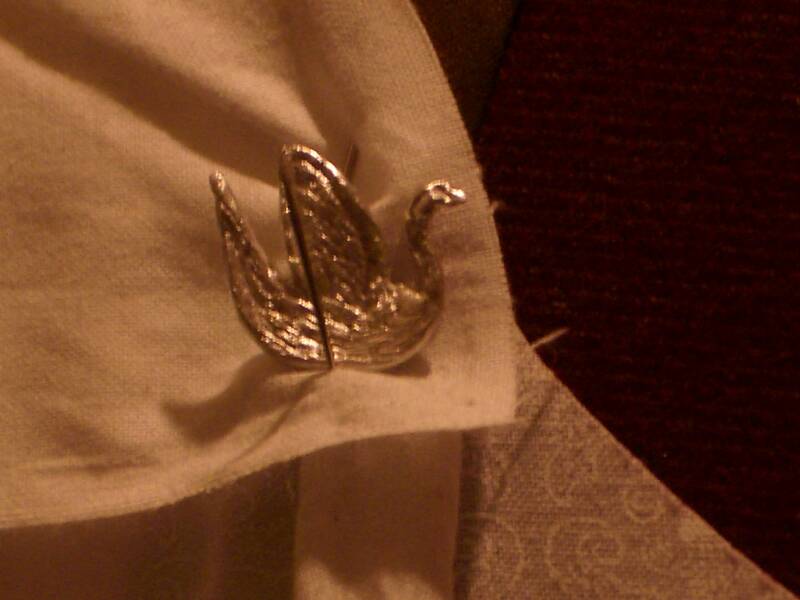
The next step is to close these pores, so that the silver shines... Or, burnishing... I used a wire brush to burnish, this brings out a matt finish to the silver piece... Bellow are photos of a fired boat swan on a rubber block used to *hold* the piece while burnishing, burnishing tools, and my other boat swan, not yet fired.
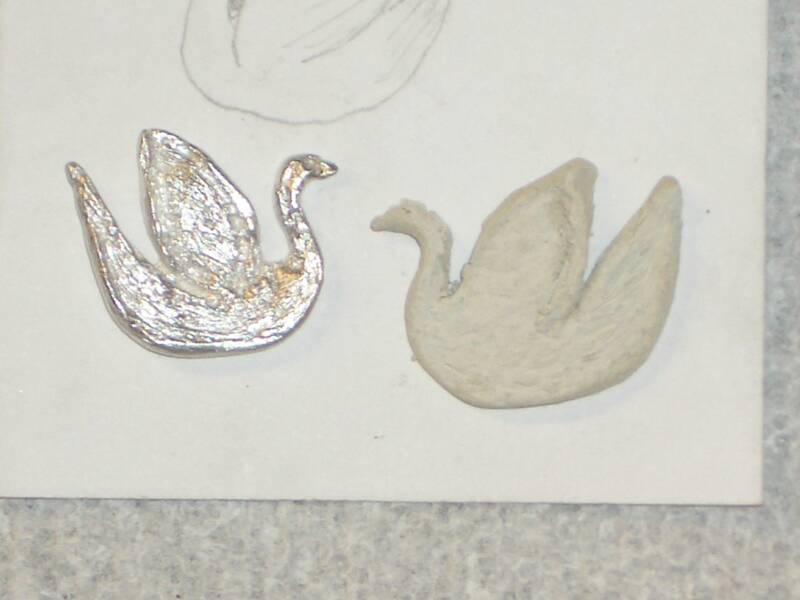
The burnished boat swan...
The burnished boat swan with it's yet-unfired opposite piece and the original design...
The unfired piece has not yet been filed smooth; it is still wet in this pese photos.
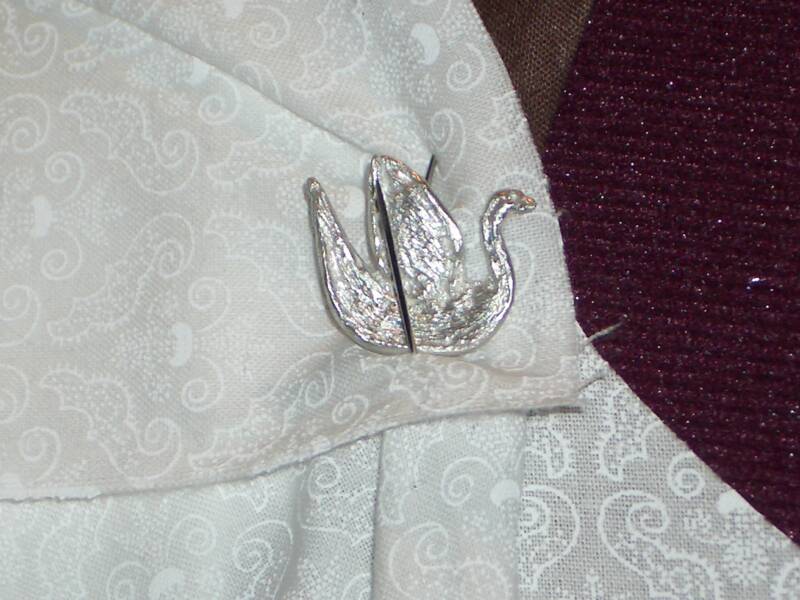
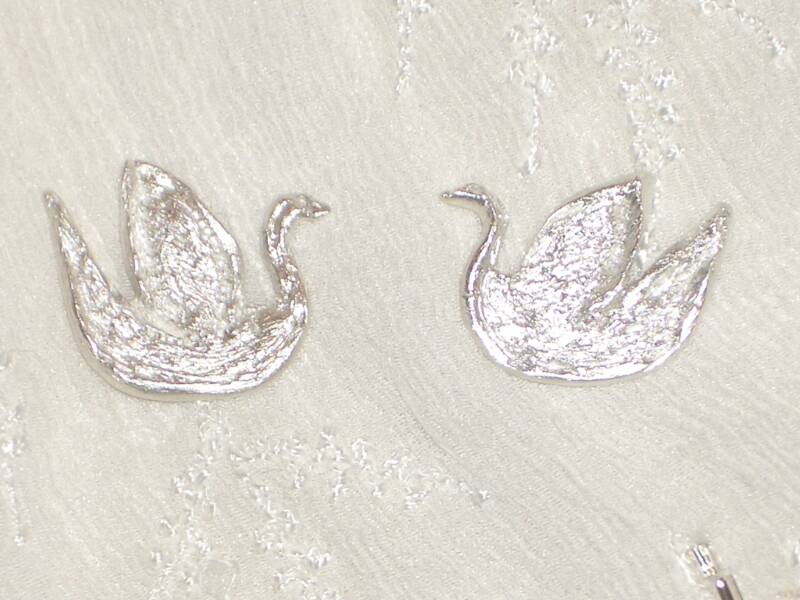
Here are some photos of one boat swan pinned to the muslin, showing where I will sew it into the drape... before I do that, however, I'll need to solder on a back slip...
Here are both boat swans laying on the beaded chiffon fabric I will be using the make the gown and the drape...
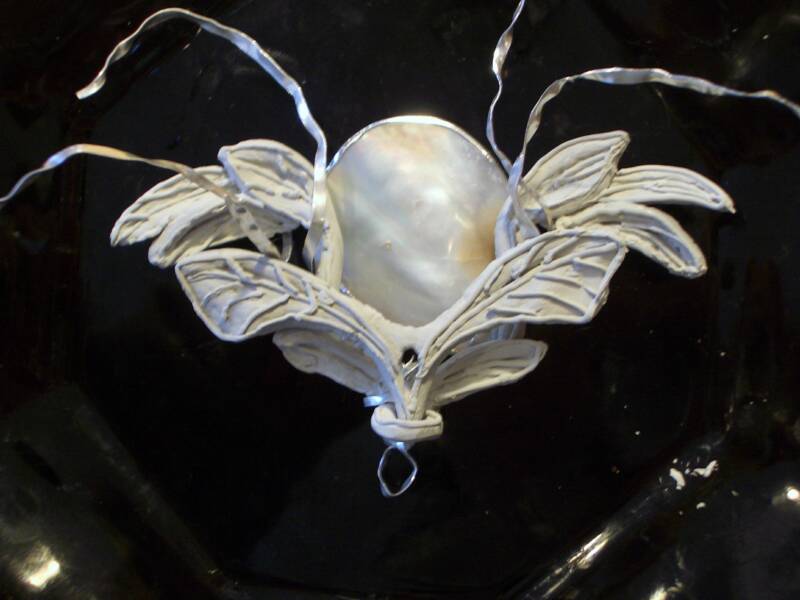
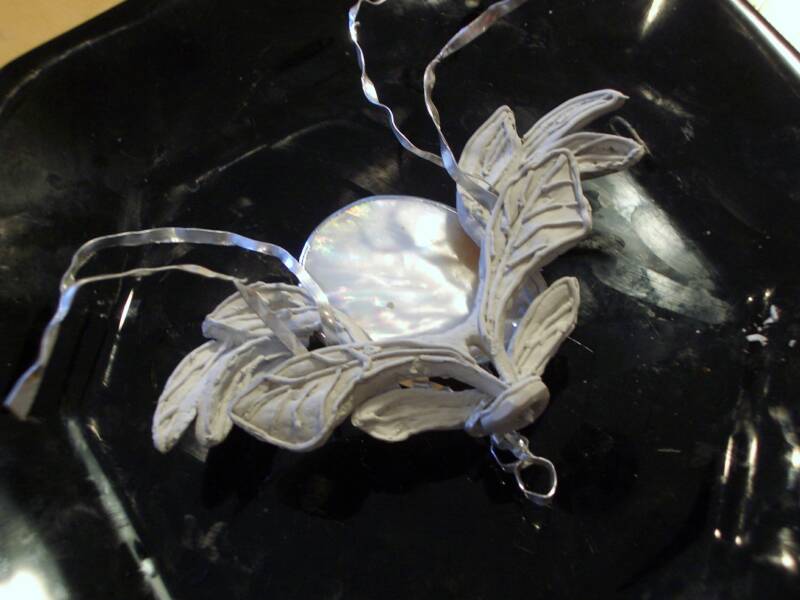
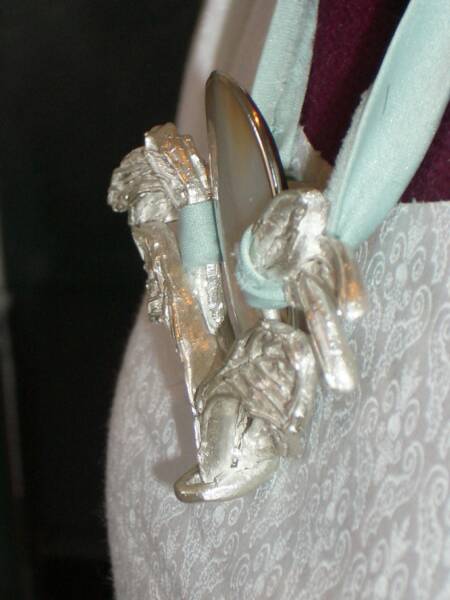
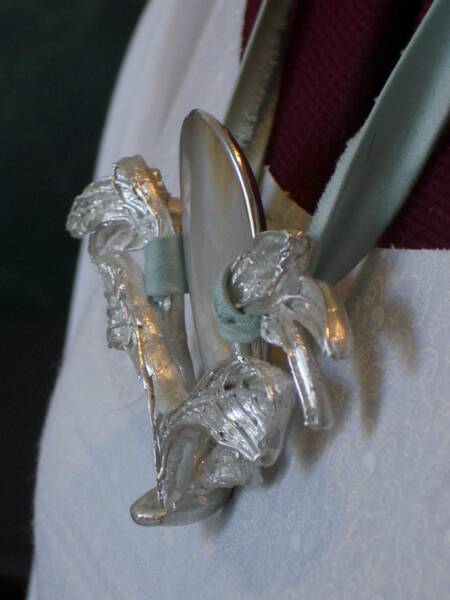
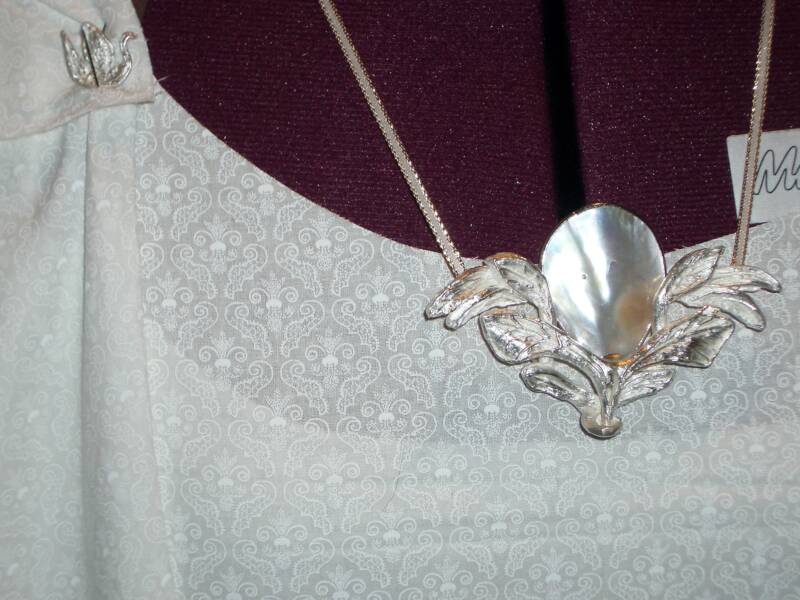
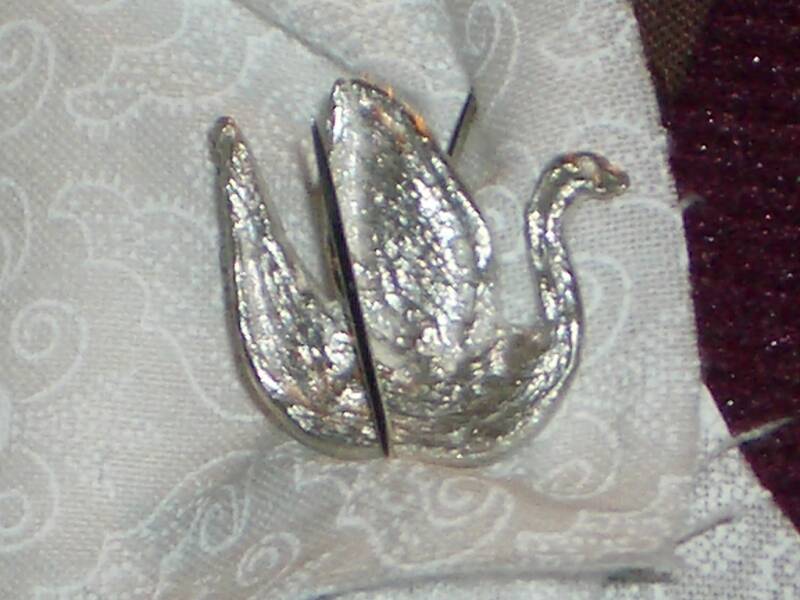
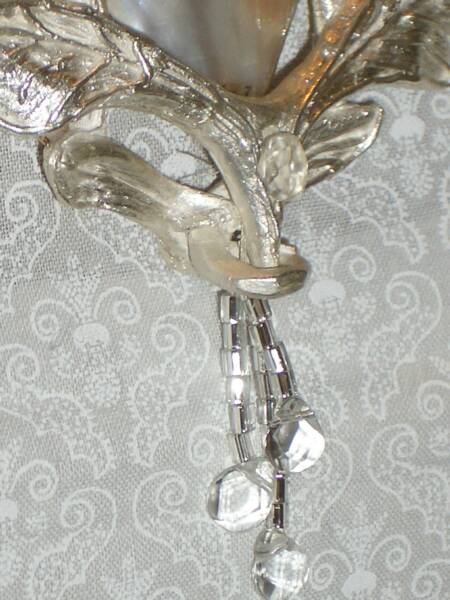
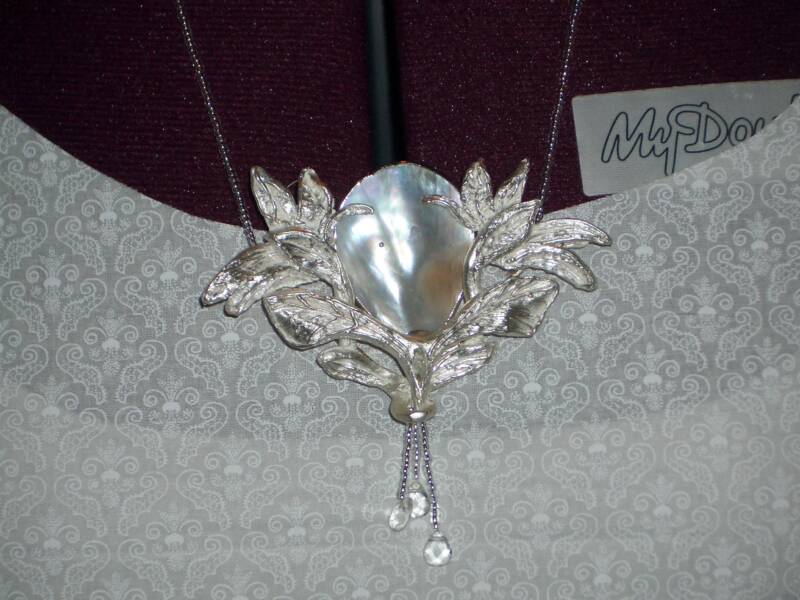
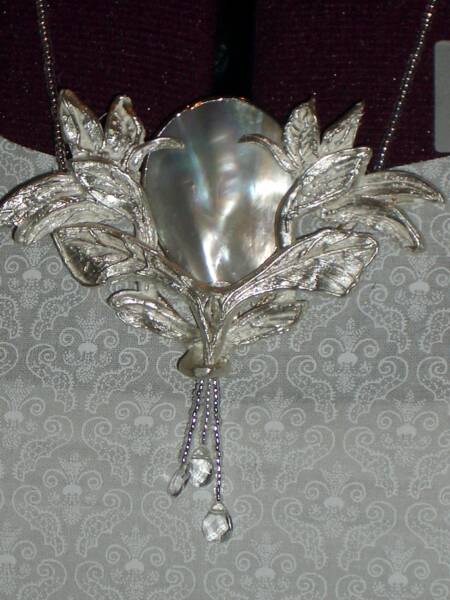
And here is a photo of the brooch with the ribbon I'll be using to turn it inot a necklace... I have soldered three silver slips in the back to hold the ribbon...
Next, I am building onto the brooch: I've decided to add a few more leaves ont the brooch piece, shaped similarly to the swans, but resembling the leaves in the brooch, and a few vine tendrils, to better hold the shell in the brooch... Coming soon!
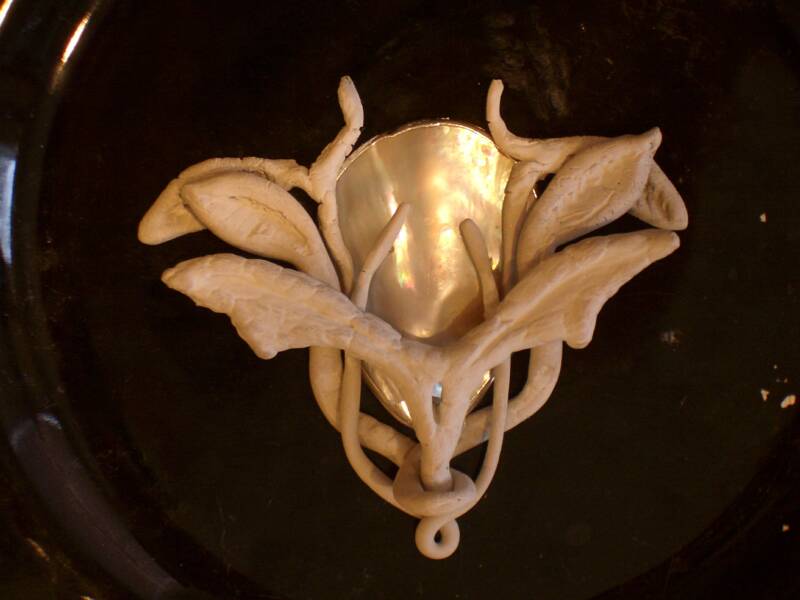
February 10, 2006...
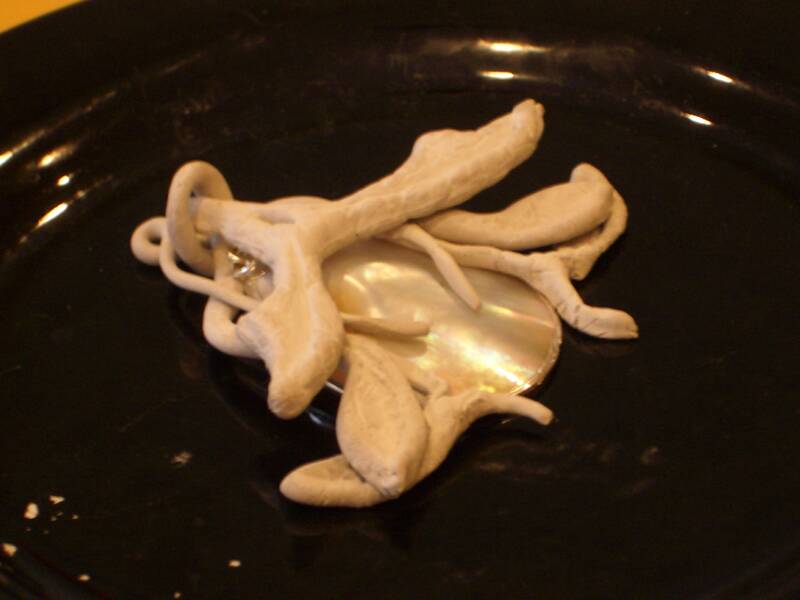
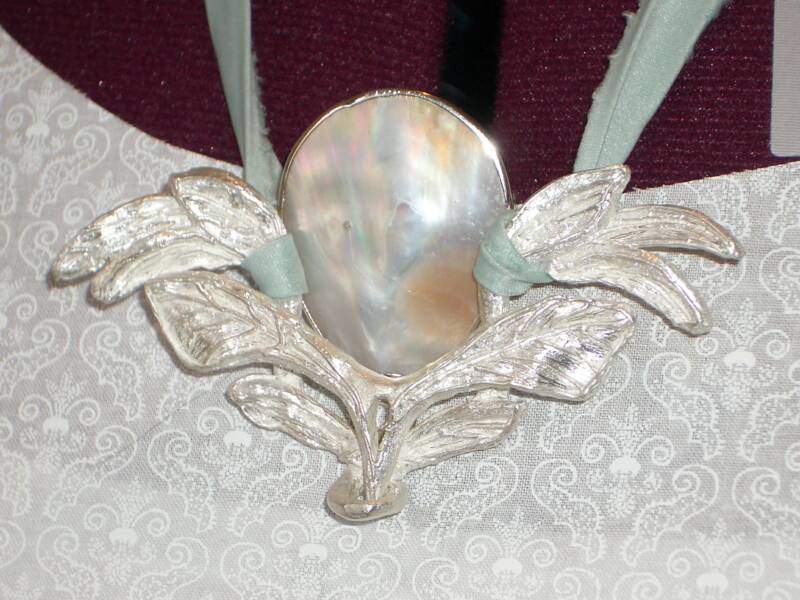
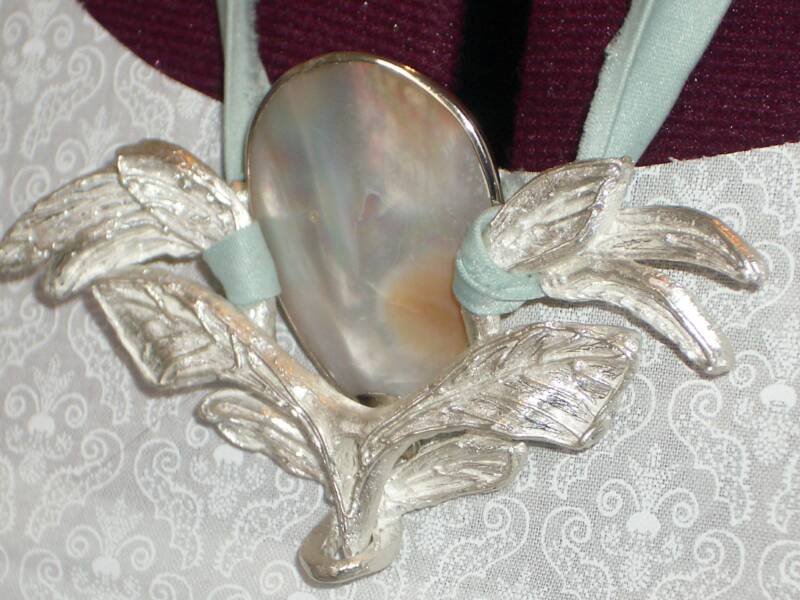
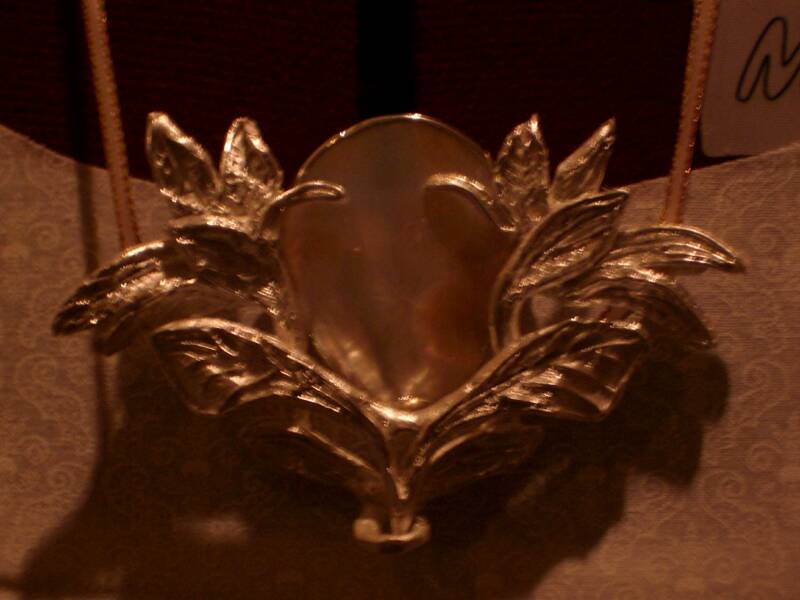
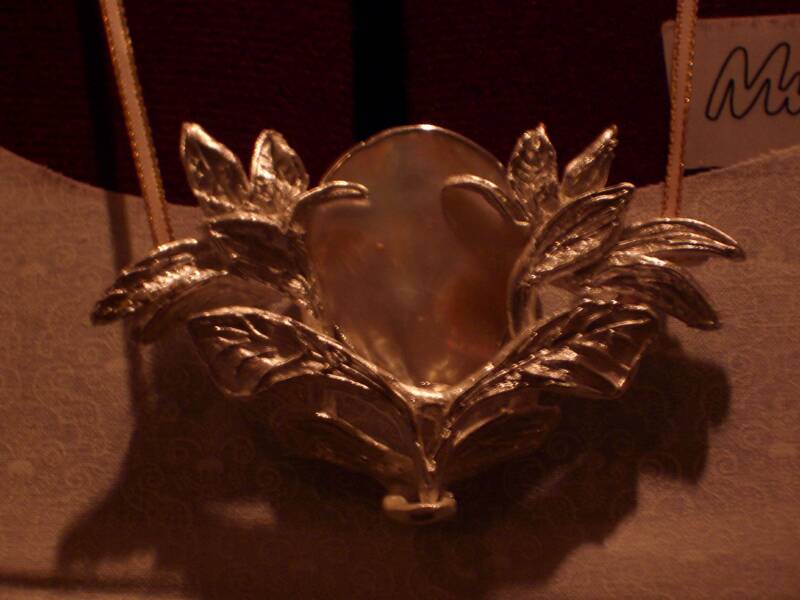
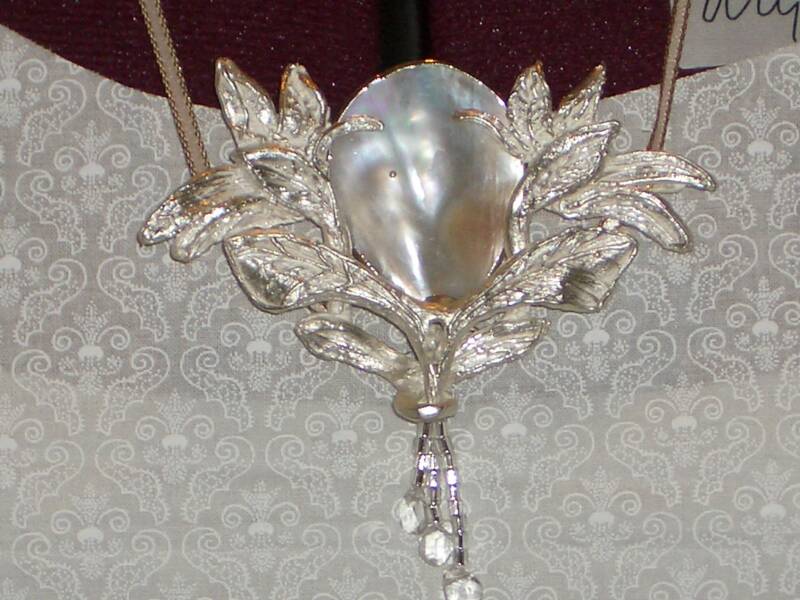
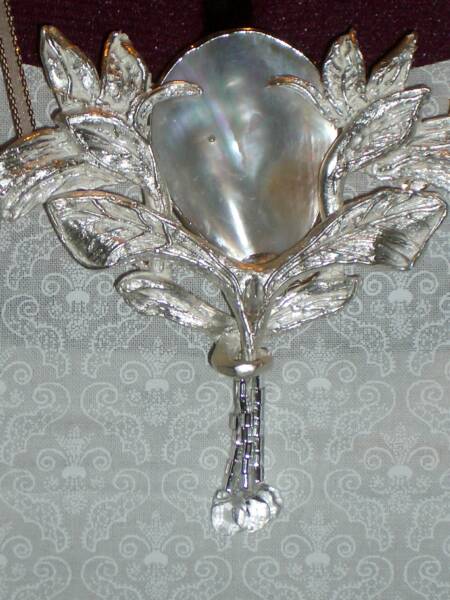
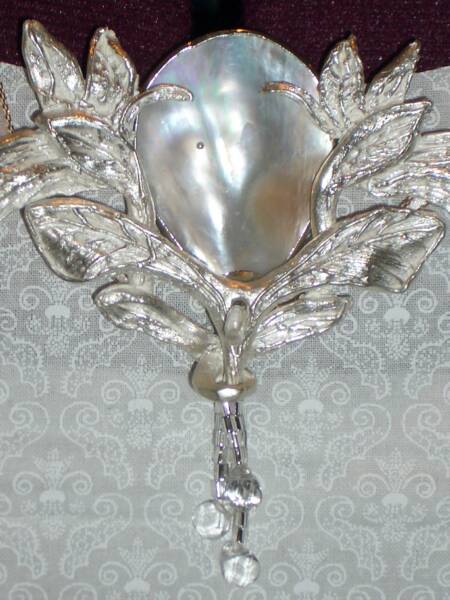
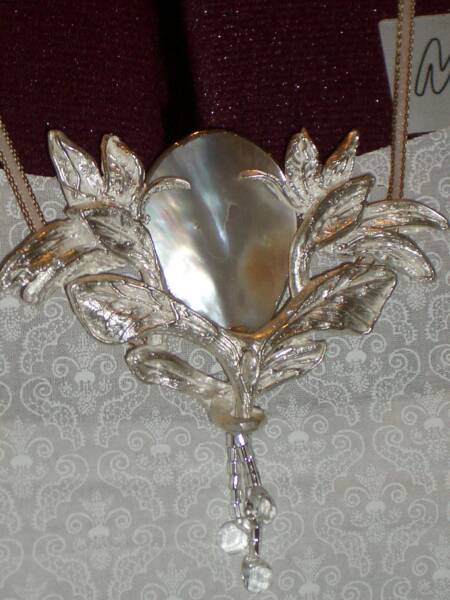
Today I added another leaf section to the brooch, to better capture the shell... Here is how it looks now...
The Boat Swans:
February 14, 2006:
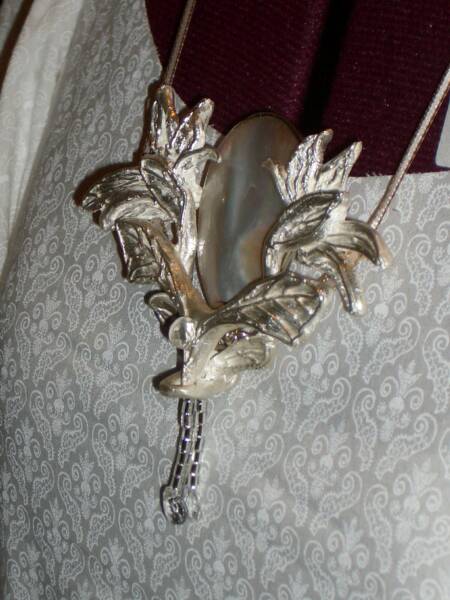
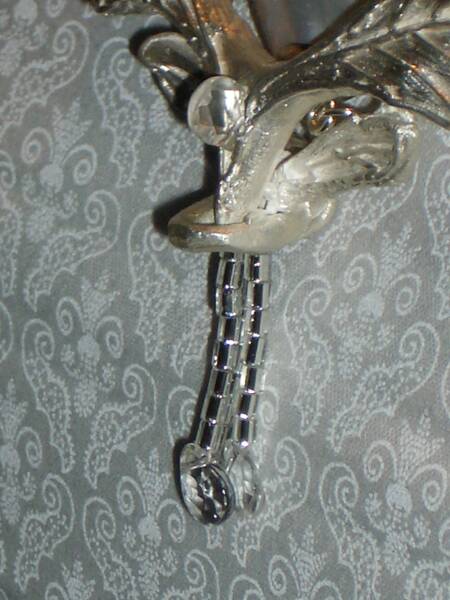
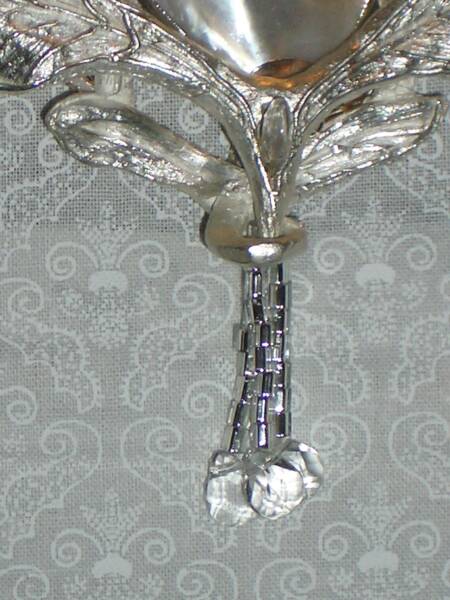
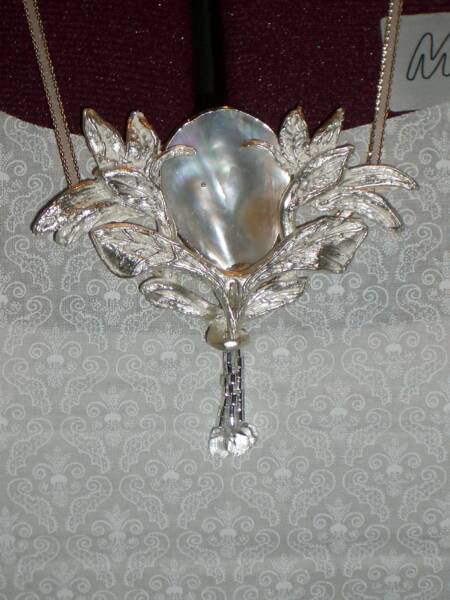
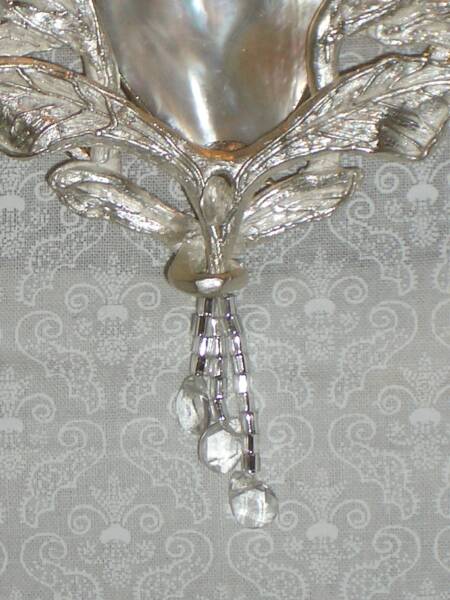
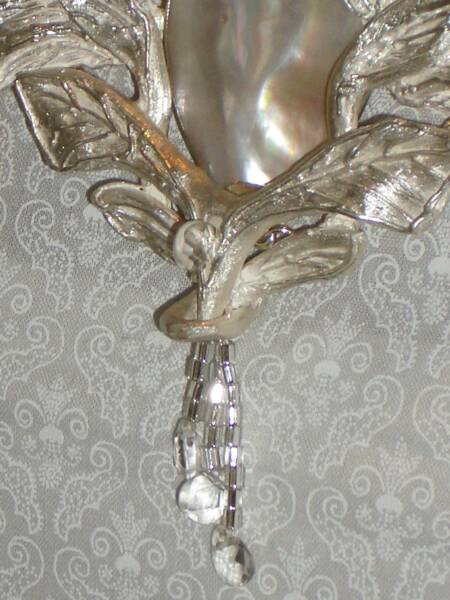
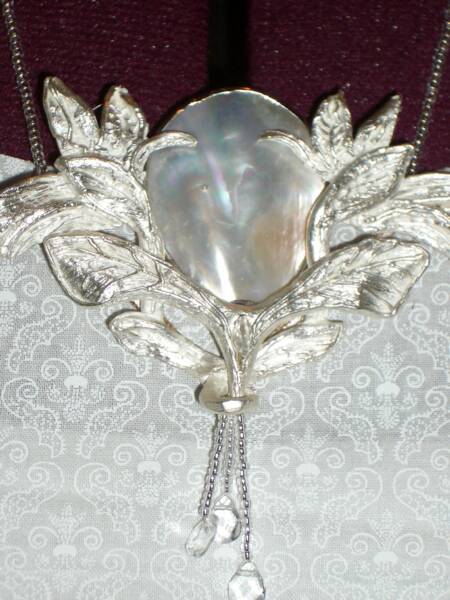
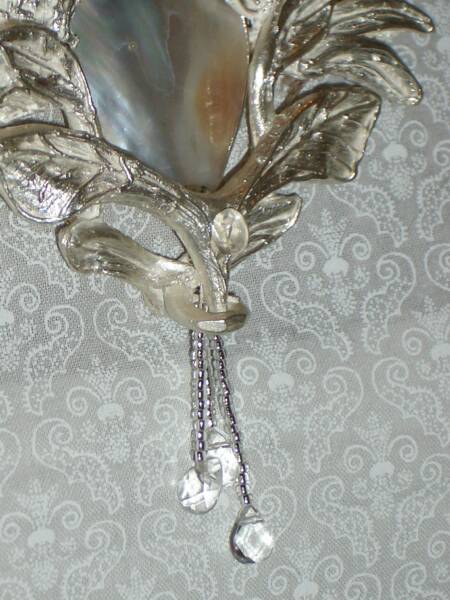
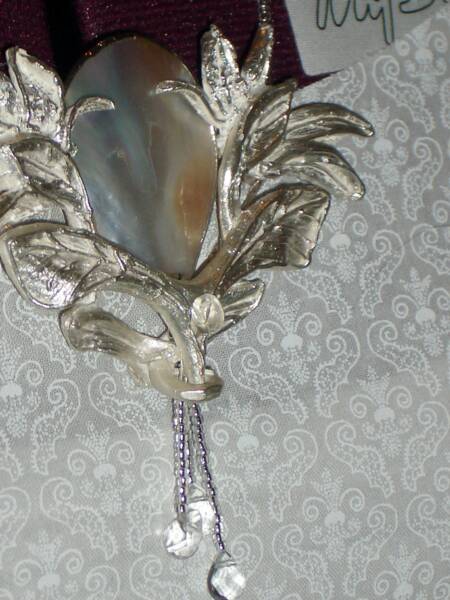
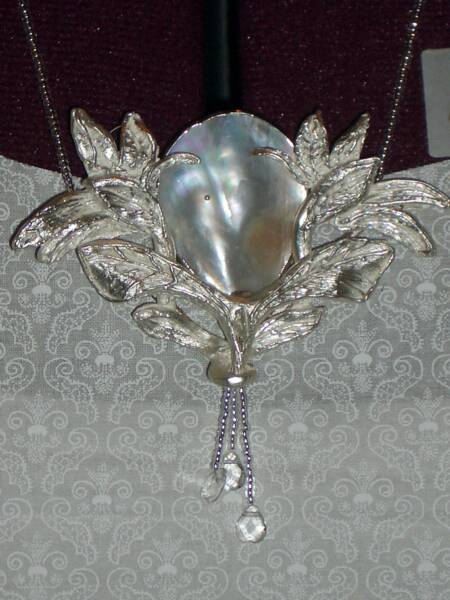
Today I did not do too much, but I explored an idea I have to add beads to the brooch. I have attached a crystal through the center hole of the first leaf V, and have three strands of beads with a crystal at each end dangling down. I may adjust how these hang, to make each strand a different length, but I want to sleep on that before I decide. I do like how they sparkle and move.
Here are a few photos:
So, tonight I'll sleep on it, and tomorrow decide whether to alter the bead strands to hang at different lengths, or leave it as it is...
Then, all that's left on this is to decide how to attach the clasp... I'll also check and see if it looks better with a silver chain. Not sure, as I haven't checked that out yet.
February 15, 2006.
After sleeping on it, and getting recommendations from friends on my live jorunal,
I have switched the way the bead strands lay, so that they fall at different lengths, giving more of a cascading effect.
I haven't found my chain yet to check that out... Seems missed placed at the moment.
Here are some photos.
Thank you for visiting!
February 16, 2006.
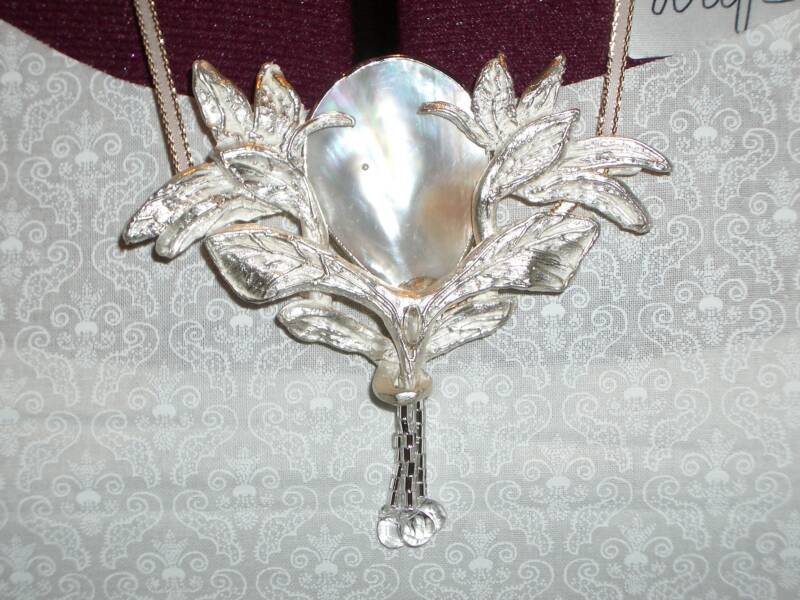
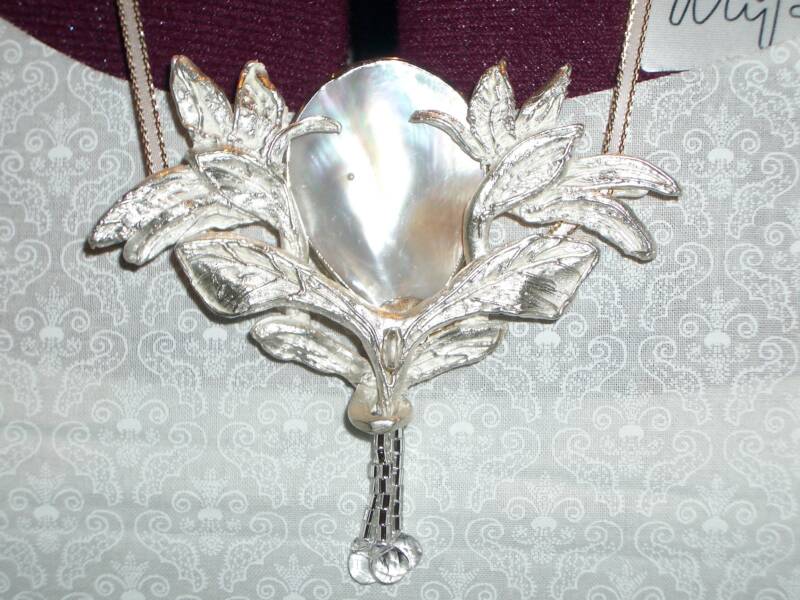
Last night, I exchanged the beads with the cascading crystals with some smaller silver lined seed beads, following the advice of someone from on the Metal Clay list. This has a very nice effect on the drape of the beads. I have used the same beads as the *chain* for the necklace. Here are some photos.
I wanted to take photos of the back, but then my camera broke last night... I will use one of my children's camera, and take those photos later.
Peter Jackson's visualization of The Lord of the Rings woke my latent passion for costuming and inspired me to learn to sew.
This page and its links reflect my best efforts in Lord of the Rings costuming.
Projects linking to their own pages are featured here. Click the links in the navigation bar to visit the individual pages, or scroll further below to the image links and see a quick overview of the costumes.
y
Galadriel's Brooch
Construction
Welcome to Yvette's
Nearly ten years ago I set out to teach myself to sew, so that I could create inspired costumes such as those featured on my site.
I created this site to share what I've done. It launched August 18, 2004, and has been growing ever-since.
In addition to costume construction pages, there are pages featuring portraits of the costumes being worn.
Costuming is a hobby I love documenting, but I do not do commissions, nor do I sell patterns.
Please visit where your interests lead you, and enjoy.
y
The navigation on my site is under construction. I'll be getting the links set up page by page. In the meantime, please bear with me.